

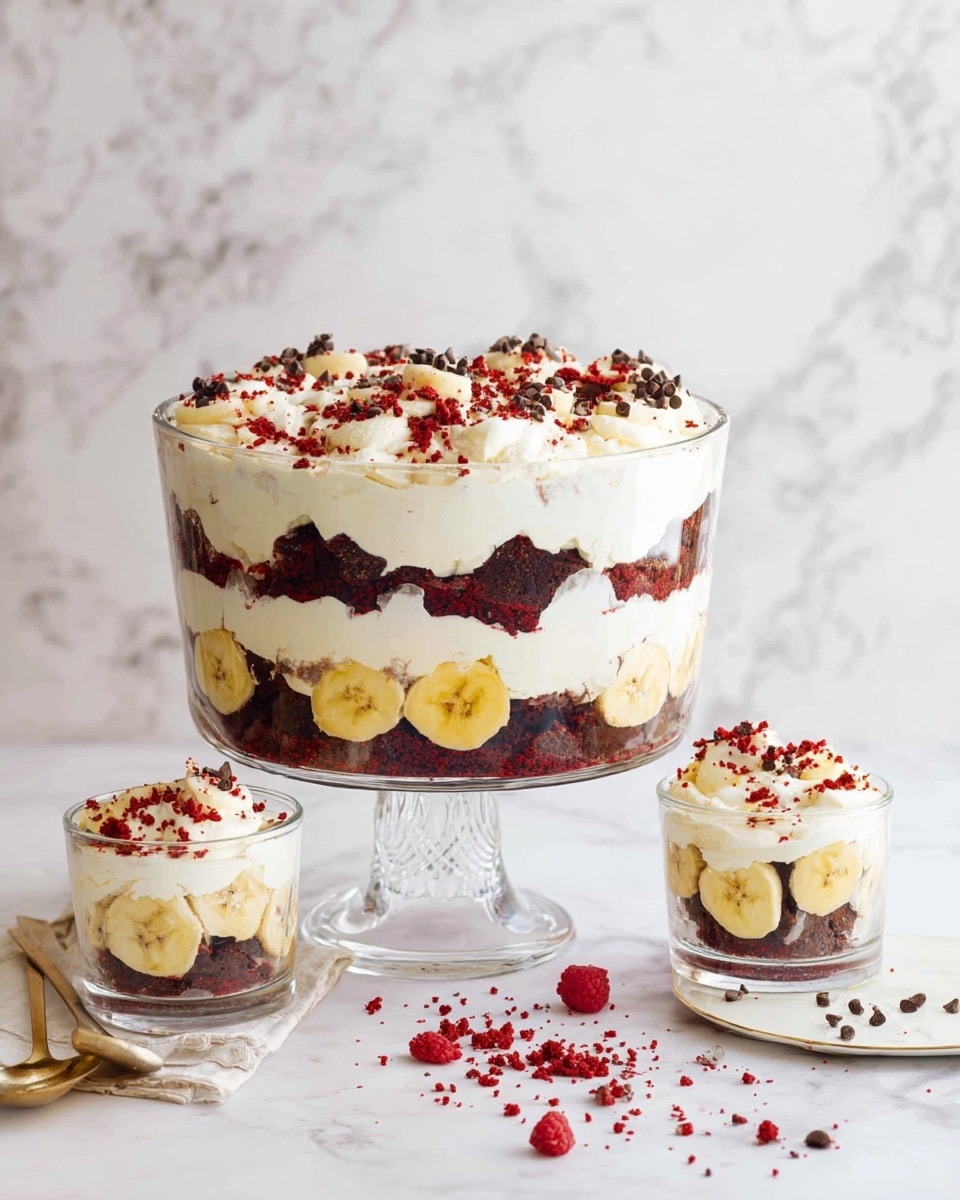
I absolutely love this Red Velvet Banana Pudding Recipe because it brings together two classic favorites — rich red velvet cake and creamy banana pudding — into one show-stopping dessert. The creamy pudding layered with slices of tender, moist red velvet and fresh banana slices creates a harmony of textures and flavors that always impresses guests or makes any day feel special.
When I first tried this recipe, I was amazed at how the tangy cream cheese pudding balances perfectly with the sweet bananas and that subtle chocolate hint in the cake. You’ll find this Red Velvet Banana Pudding Recipe is perfect for parties, potlucks, or simply indulging after dinner, and trust me — it’s so worth the little effort!
Why You’ll Love This Recipe
- Unique Flavor Fusion: Combining red velvet cake with banana pudding creates an unexpected yet irresistible taste experience.
- Creamy, Layered Texture: Each bite delivers smooth pudding, soft cake, fresh bananas, and chocolate chips giving satisfying variety.
- Make-Ahead Friendly: You can prepare it a day in advance, allowing flavors to meld and making it perfect for busy schedules.
- Impressively Simple: Despite its luxurious look and taste, the recipe is straightforward even for newer bakers.

Ingredients You’ll Need
All these ingredients come together beautifully to deliver that classic red velvet taste and creamy banana pudding texture. Most are pantry staples, while a few fresh ingredients like bananas and cream make it feel extra special—keep an eye out for good-quality cream cheese and pudding mix for the best results.
- Cake flour: Helps keep the red velvet cake light and tender versus using all-purpose flour.
- Salt: Balances sweetness and enhances flavor depth in the cake.
- Unsalted butter: Room temperature butter creams smoothly with the sugar for a perfect cake crumb.
- Granulated sugar: The main sweetener, giving the cake its characteristic sweetness.
- Eggs: Bind ingredients and add moisture, so make sure you use fresh eggs.
- Liquid red food coloring: Essential for that iconic red velvet color; don’t skimp here.
- Unsweetened cocoa powder: Adds a subtle chocolate flavor that makes red velvet cake extra special.
- Pure vanilla extract: Enhances all the flavors in the pudding and cake.
- Buttermilk: Gives the cake a slight tang and ensures moistness and tenderness.
- Cider vinegar: Reacts with baking soda for a light, fluffy texture in the cake.
- Baking soda: The leavening agent that creates air pockets in the cake.
- Sweetened condensed milk: Makes the pudding luxuriously creamy and sweet.
- Ice-cold water: Helps dissolve the pudding mix without lumps.
- Instant vanilla pudding mix: The quick base for a smooth, firm pudding layer.
- Cream cheese: Softened to blend seamlessly for that classic tangy pudding taste.
- Heavy cream: Whipped to add lightness and fluffiness to the pudding.
- Ripe bananas: Sliced fresh to complement the pudding with natural sweetness and texture.
- Mini chocolate chips or chocolate shavings: Add pops of chocolate flavor and visual appeal.
Variations
I love how flexible this Red Velvet Banana Pudding Recipe is—you can tweak it to suit your taste or dietary needs without losing its magic. Over the years, I’ve tried adding a few spins to make it even more fun or suitable for special occasions.
- Dairy-Free Version: I’ve swapped heavy cream and cream cheese with coconut cream and vegan cream cheese, which still tastes amazing and keeps it creamy.
- Extra Chocolate: Sometimes, I mix in chocolate syrup or sprinkle cocoa powder between layers to give it a rich chocolate boost.
- Fruit Twists: Adding berries like strawberries or raspberries alongside the banana adds a refreshing tartness and color contrast.
- Mini Puddings: For parties, I’ve made individual portions in small glass jars—fun and perfect for grab-and-go dessert.
How to Make Red Velvet Banana Pudding Recipe
Step 1: Prepare the Red Velvet Cake Batter and Bake
Start by preheating your oven to 325°F and buttering and flouring a 9×13-inch pan—that extra care prevents sticking and gives nice clean edges when cutting. Whisk the cake flour and salt in a bowl, then cream butter and sugar with your mixer until it’s light and fluffy—this took me a couple of tries to get the timing just right for maximum fluffiness!
Add eggs one at a time, scraping the bowl as you go to mix everything evenly. Then gently incorporate the red food coloring mixed with cocoa powder—this combo achieves that characteristic red velvet taste and color, so don’t rush this step. Alternating the dry ingredients and buttermilk keeps the batter airy, and the vinegar with baking soda ensures the perfect rise. Pour the batter into your pan and bake for about 40-45 minutes. You’ll know it’s done when the cake springs back to the touch and a tester comes out clean.
Step 2: Cool and Cut the Cake
Let your cake cool in the pan for at least 30 minutes before transferring it to a cooling rack to cool fully. Don’t skip this step—when the cake is warm, it can fall apart when you cut it for layering. Once cooled, cut into rectangles and then halves so you can layer nicely in your trifle or large bowl. This part feels so satisfying once you have those neat cake pieces ready for assembly!
Step 3: Make the Cream Cheese Pudding Layer
Using your mixer, beat together sweetened condensed milk and cold water, then add the instant pudding mix until smooth—no lumps here, or it’ll affect the texture! Refrigerate it until firm, at least one hour. After chilling, mix in the softened cream cheese to create the signature tangy, velvety pudding that pairs perfectly with the red velvet cake. Keep chilled until ready to fold into the whipped cream.
Step 4: Whip the Cream and Combine
Whip your heavy cream to stiff peaks, but be careful not to overwhip or it’ll turn grainy. Gradually fold in the chilled pudding mixture by adding it in spoonfuls while mixing on low speed; this keeps it fluffy and smooth, preventing streaks and ensuring luscious texture in every bite.
Step 5: Assemble Your Red Velvet Banana Pudding
Here’s the fun part! Spread a scoop of pudding on the bottom, layer cake pieces on top, then bananas and mini chocolate chips. Repeat those layers twice more, finishing with pudding on top sprinkled with crumbled cake and a final touch of chocolate chips. Cover and refrigerate at least 4 hours or overnight to let all the flavors marry beautifully. I’ve found that the pudding gets richer and the layers meld so well when you give it time to chill!
Pro Tips for Making Red Velvet Banana Pudding Recipe
- Room Temperature Ingredients: Make sure your butter and cream cheese are softened before mixing; this prevents lumps and creates a smoother batter and pudding.
- Don’t Overmix the Batter: Mix just until ingredients are combined to keep the cake tender instead of dense or chewy.
- Use Ripe Bananas: The natural sweetness of ripe bananas pairs best with the pudding and cake – underripe bananas can taste starchy and dull.
- Chill for Best Results: Refrigerate the assembled pudding long enough so the flavors blend; it tastes noticeably better the next day!
How to Serve Red Velvet Banana Pudding Recipe
Garnishes
When I serve this Red Velvet Banana Pudding Recipe, I like to keep it simple but elegant. A sprinkle of mini chocolate chips or chocolate shavings on top makes for a pretty presentation and adds that extra bit of chocolate goodness. Sometimes, I add a few thin banana slices on top or a dusting of cocoa powder to round things out visually and flavor-wise.
Side Dishes
This pudding is honestly a dessert all on its own, but if you want to offer more, light and fruity sides work wonderfully. I’ve paired it with fresh berry salads or a simple glass of sparkling water with lemon to balance out the sweetness. It shines bright after a hearty meal as a refreshing yet indulgent finale.
Creative Ways to Present
For special occasions, I’ve layered this pudding into clear individual trifle cups or mason jars — guests love seeing the beautiful layers, and it makes serving a breeze. Another idea I’ve tried is using white chocolate curls instead of chips for a delicate look, or topping with edible flowers for a stunning touch at parties.
Make Ahead and Storage
Storing Leftovers
I keep leftovers tightly covered in the fridge—this pudding actually tastes better the next day once everything has had time to meld. I recommend eating leftovers within 3 days for the best texture and flavor, as the bananas may start to brown over time.
Freezing
If you need to freeze it, I suggest freezing individual portions before adding the banana slices (which don’t freeze well). Thaw in the refrigerator overnight, then add fresh bananas before serving for best texture and flavor.
Reheating
This dessert is best served chilled, so reheating isn’t usually necessary. If you want a slightly warmer experience, let it sit at room temperature for 15-20 minutes rather than microwaving, which can affect the pudding’s texture.
FAQs
-
Can I use store-bought red velvet cake instead of making it from scratch?
Absolutely! You can save time by using store-bought red velvet cake or even cake mix baked ahead. Just make sure it’s fresh so it layers well with the pudding and bananas for a delightful texture.
-
What’s the best way to prevent bananas from browning in the pudding?
Using ripe bananas is best, and assembling the pudding right before serving helps prevent browning. You can also toss banana slices in a little lemon juice before layering to slow oxidation.
-
Can I make this Red Velvet Banana Pudding Recipe vegan or dairy-free?
Yes! Swap the dairy ingredients with plant-based alternatives like coconut cream, vegan cream cheese, and vegan pudding mixes. The texture will be slightly different but still delicious.
-
How long should I refrigerate the pudding before serving?
At least 4 hours, but I recommend overnight so the pudding sets well and layers meld beautifully, making the texture silky and the flavors more intense.
Final Thoughts
This Red Velvet Banana Pudding Recipe feels like a little celebration every time I make it, combining nostalgia with something fresh and exciting. Whether you’re making it for family, friends, or just treating yourself, I know you’ll enjoy how the rich layers and creamy pudding come together so perfectly. Give it a try—you might just find this becoming your go-to dessert for every special occasion or cozy night in!
Print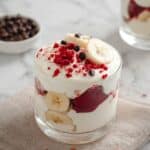
Red Velvet Banana Pudding Recipe
- Prep Time: 30 minutes
- Cook Time: 45 minutes
- Total Time: 5 hours 15 minutes
- Yield: 16 servings
- Category: Dessert
- Method: Baking
- Cuisine: American
- Diet: Vegetarian
Description
Indulge in a luscious twist on a classic dessert with this Red Velvet Banana Pudding recipe. Combining the moist, cocoa-infused red velvet cake with creamy vanilla pudding, fresh ripe bananas, and rich whipped cream, this layered dessert is perfect for special occasions or any time you crave a decadent treat. The pudding is chilled to set beautifully, allowing the flavors to meld into a wonderfully comforting and impressive dessert.
Ingredients
Red Velvet Cake
- 3 1/2 cups (383 g/13.5-oz) cake flour
- 1 1/2 tsp salt
- 3/4 cup (1 1/2 sticks/170 g/6-oz) unsalted butter, room temperature
- 2 1/4 cups (450 g/16-oz) granulated sugar
- 3 eggs
- 6 tbsp liquid red food coloring
- 3 tbsp (22.5 g/.75-oz) unsweetened cocoa powder (22-24%), sifted
- 1 1/2 tsp pure vanilla extract
- 1 1/2 cups (240 g/8.5-oz) buttermilk
- 1 1/2 tsp cider vinegar
- 1 1/2 tsp baking soda
Pudding
- 1 (14-oz) can sweetened condensed milk
- 1 1/2 cups (360 g/12.7-oz) ice-cold water
- 1 (3.4-oz) package instant vanilla pudding mix (preferably Jell-O brand)
- 1 (8-oz) package full-fat cream cheese (preferably Philadelphia brand), cut into 8 pieces, room temperature
- 3 cups (720 g/25.5-oz) heavy cream
Assembly
- 4 to 5 ripe bananas, sliced
- 1 cup plus 1 tablespoon (160 g/5.6-oz) mini chocolate chips or chocolate shavings
Instructions
- Preheat and prepare pan: Preheat your oven to 325°F. Butter and flour a 9 ×13-inch pan to ensure the cake won’t stick.
- Mix dry ingredients: In a medium bowl, whisk together the cake flour and salt. Set aside for later use.
- Cream butter and sugar: Using a stand mixer fitted with the paddle attachment, beat the unsalted butter on medium speed until smooth. Gradually add the granulated sugar and beat until the mixture is very light and fluffy, about 4 to 5 minutes.
- Add eggs: With the mixer still on medium speed, add the eggs one at a time, beating well after each addition. Scrape the sides and bottom of the bowl to ensure all ingredients are well incorporated.
- Add coloring and cocoa: In a small bowl, combine the liquid red food coloring and sifted cocoa powder. On low speed, slowly pour this mixture into the batter and mix until just combined. Scrape down the bowl again as needed.
- Combine wet and dry ingredients: In a liquid measuring cup, whisk together the vanilla extract and buttermilk. Add the flour mixture to the batter in three additions, alternating with the buttermilk, beginning and ending with the dry ingredients. Beat on low speed and stop mixing as soon as ingredients are just combined to avoid overmixing.
- Activate baking soda: In a small bowl, stir together cider vinegar and baking soda until it bubbles. Add this mixture to the batter on low speed and combine thoroughly, scraping the bowl as necessary.
- Bake the cake: Pour the red velvet batter into the prepared pan and bake for 40 to 45 minutes. The cake is done when the top springs back upon touch and a cake tester inserted in the center comes out clean.
- Cool the cake: Let the cake cool in the pan for at least 30 minutes, then transfer it to a wire rack to cool completely. The cake can be made a few days ahead and wrapped tightly to maintain freshness.
- Prepare pudding base: In a stand mixer with a whisk attachment, combine the sweetened condensed milk and ice-cold water and beat on medium speed for about 1 minute until well mixed. Add the instant vanilla pudding mix and beat about 2 minutes until smooth and lump-free. Cover and refrigerate the pudding mixture until firm, at least 1 hour or overnight.
- Add cream cheese: Transfer the chilled pudding mixture back to the stand mixer, add softened cream cheese, and beat until thoroughly smooth. Refrigerate while whipping the cream.
- Whip heavy cream: In a clean bowl, whip the heavy cream using a stand mixer with a whisk attachment on medium speed for about 1 minute until it begins to thicken. Increase the speed to medium-high and whip until stiff peaks form, being careful not to overwhip.
- Combine pudding and whipped cream: With the mixer running on low, gradually add the pudding mixture spoonful by spoonful to the whipped cream. Mix until homogeneous and no pudding streaks remain.
- Cut cake into pieces: Remove the cooled red velvet cake from the pan and cut into a 4 by 2-inch grid to yield 8 rectangular pieces. Cut each rectangle in half horizontally for 16 half-inch-thick pieces. Set aside for layering.
- Assemble pudding layers: In a large trifle bowl or wide glass bowl (4 to 5-quart capacity) or individual serving bowls, spread one-quarter of the pudding mixture on the bottom. Add a layer of red velvet cake pieces to cover the pudding, then top with one-third of the sliced bananas and 1/3 cup mini chocolate chips. Repeat this layering process two more times, ending with a final layer of pudding on top.
- Finish topping and chill: Sprinkle crumbled pieces of red velvet cake and 1 tablespoon mini chocolate chips on the top layer. Cover the assembled pudding with plastic wrap and refrigerate for at least 4 hours or overnight to set and allow flavors to meld.
Notes
- Learn to make Magnolia Bakery’s signature Red Velvet Banana Pudding at home with this detailed recipe.
- The dessert can be prepared a day ahead to save time and develop richer flavors.
- Use full-fat cream cheese and heavy cream for the best creamy texture and flavor.
- Careful folding and mixing will keep the pudding light and fluffy without deflating the whipped cream.
- Adjust the amount of chocolate chips to taste or substitute with chocolate shavings for a different texture.
Nutrition
- Serving Size: 1 serving
- Calories: 450
- Sugar: 35g
- Sodium: 320mg
- Fat: 28g
- Saturated Fat: 17g
- Unsaturated Fat: 9g
- Trans Fat: 0.5g
- Carbohydrates: 45g
- Fiber: 2g
- Protein: 6g
- Cholesterol: 105mg


