
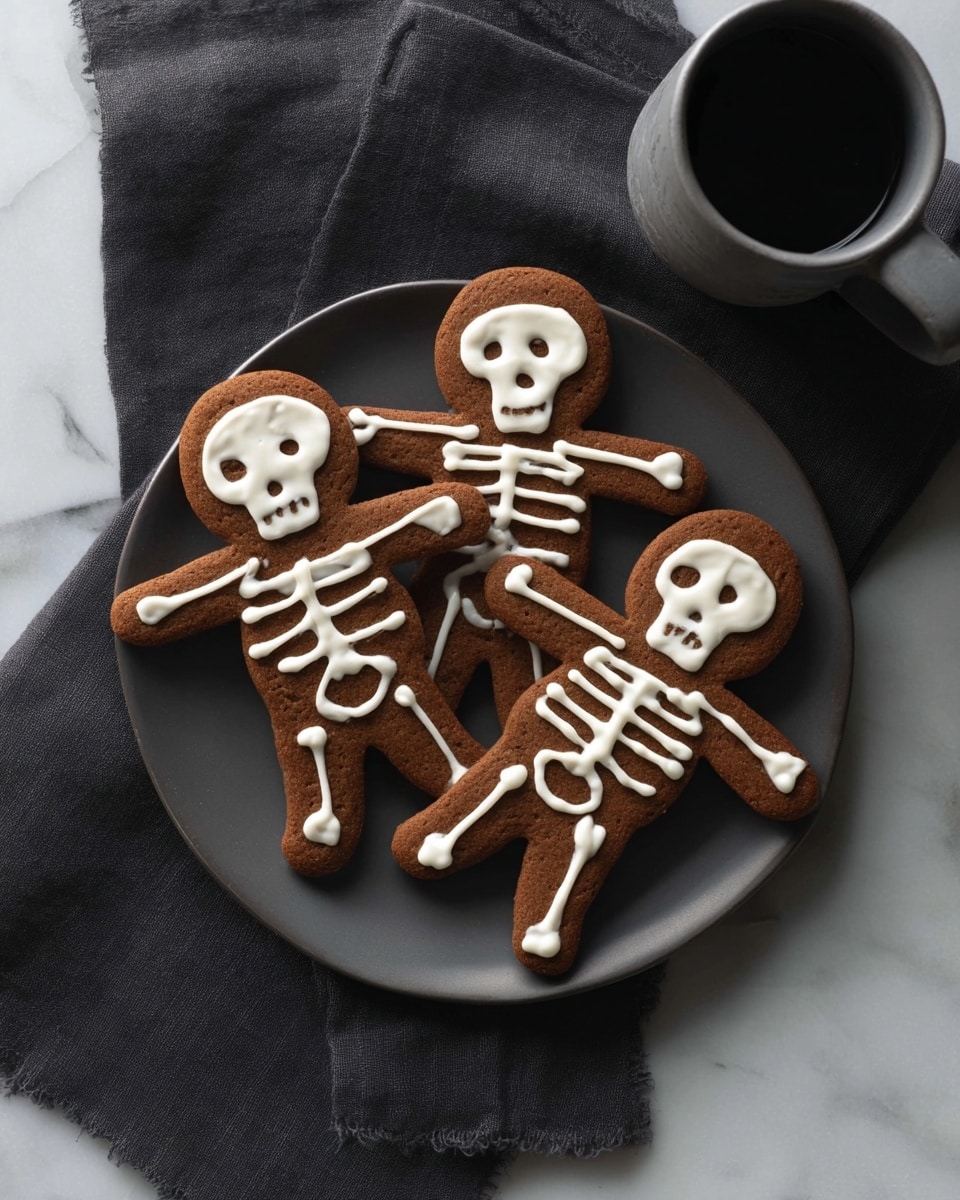
If you’re looking for a fun, festive, and utterly delicious treat to impress your friends (or just spoil yourself a bit), this Chocolate Skeleton Cookies Recipe is going to become your new favorite. I absolutely love how these cookies combine rich chocolate, a hint of warm cinnamon, and the cutest skeleton decorations to create spooky-yet-sweet delights. Whether you’re baking for Halloween or just feel like getting a little creative, you’ll find these cookies both impressive and surprisingly simple to nail.
Why You’ll Love This Recipe
- Perfect balance of flavors: The cocoa and cinnamon together give the cookies a cozy yet rich chocolatey taste that everyone asks for seconds.
- Fun and festive decoration: Piping the skeleton designs is easily the highlight, and it’s great for both experienced bakers and newbies.
- Reliable royal icing formula: The icing is smooth, won’t crack, and dries beautifully for that perfect skeleton effect.
- Make ahead friendly: You can prep the dough and icing beforehand, making your baking day more relaxed and enjoyable.

Ingredients You’ll Need
Each ingredient plays a crucial role to deliver the taste and texture that makes this Chocolate Skeleton Cookies Recipe so special. I always make sure to use high-quality cocoa and fresh cinnamon to get the best flavor.
- All-purpose flour: Gives the cookies their structure—measure carefully for consistent cookie thickness.
- Unsweetened cocoa: This adds deep chocolate flavor; I prefer Dutch-processed cocoa for its smoothness.
- Salt: A pinch to balance the sweetness and enhance the chocolate notes.
- Cinnamon: Adds a subtle warmth—if you love spice, experiment with a touch more.
- Unsalted butter: Use good quality butter for that rich, tender crumb.
- Confectioners’ sugar: Creates a delicate sweetness and helps with dough’s texture and the royal icing.
- Eggs: Provide moisture and help bind the dough perfectly.
- Vanilla extract: Rounds out the flavor with a slight, comforting sweetness.
- Royal Icing ingredients (confectioners’ sugar, meringue powder, water): Essential for the skeleton decorations—trust me, the meringue powder is a game-changer for stability.
- White sanding sugar: A little sparkle for some cookies, to make the bones pop visually.
Variations
One of the joys of this Chocolate Skeleton Cookies Recipe is how you can easily personalize it. I love to tweak the decorations or spices depending on the occasion or who I’m baking for.
- Spicy Kick: Adding a pinch of cayenne pepper gives a surprising warmth that pairs beautifully with the chocolate.
- Gluten-Free: I’ve swapped all-purpose flour for a gluten-free blend and it works nicely, just chill the dough a bit longer.
- Colorful Icing: Sometimes I mix food coloring into the royal icing for a rainbow skeleton effect—kids go crazy for that!
- Nutty Texture: Adding finely chopped nuts or a sprinkle of sea salt before baking adds great texture and flavor.
How to Make Chocolate Skeleton Cookies Recipe
Step 1: Combine Your Dry Ingredients
Start by whisking together the flour, unsweetened cocoa, salt, and cinnamon in a large bowl. I always take a moment here to smell that cinnamon-cocoa combo—it’s like the first whisper of Halloween magic. Set that aside while you move on to the wet ingredients.
Step 2: Cream Butter and Sugar
Using an electric mixer, beat the unsalted butter with the confectioners’ sugar until it’s light and fluffy—about 2 minutes. This step is key for tender, melt-in-your-mouth cookies. Then beat in the eggs and vanilla extract one at a time, making sure everything is blended smoothly.
Step 3: Combine Wet and Dry
Working in two batches, add the flour mixture to the butter mixture. Beat it just until combined—no overmixing here, or you risk tougher cookies. Divide your dough into two, flatten each into disks, wrap in plastic wrap, and pop them into the fridge for at least an hour or overnight. This chilling step is a game-changer for easier rolling and cleaner cookie shapes.
Step 4: Cut and Bake
Heat your oven to 350°F. On a lightly floured surface, roll the dough out to about ¼ inch thick. Use a 5-inch gingerbread man cookie cutter to cut out your skeleton shapes—this is where the spooky fun begins. Transfer cookies to unlined baking sheets and bake for about 12 minutes, or until they spring back when gently touched. Let them cool completely on wire racks before decorating.
Step 5: Prepare Royal Icing
While your cookies cool, prepare the royal icing by mixing confectioners’ sugar, meringue powder, and water on low speed with an electric mixer. Scrape the sides frequently. You’re aiming for soft whipped cream consistency, which usually takes around 10 minutes. This is the secret to piping smooth, detailed bones that hold their shape beautifully.
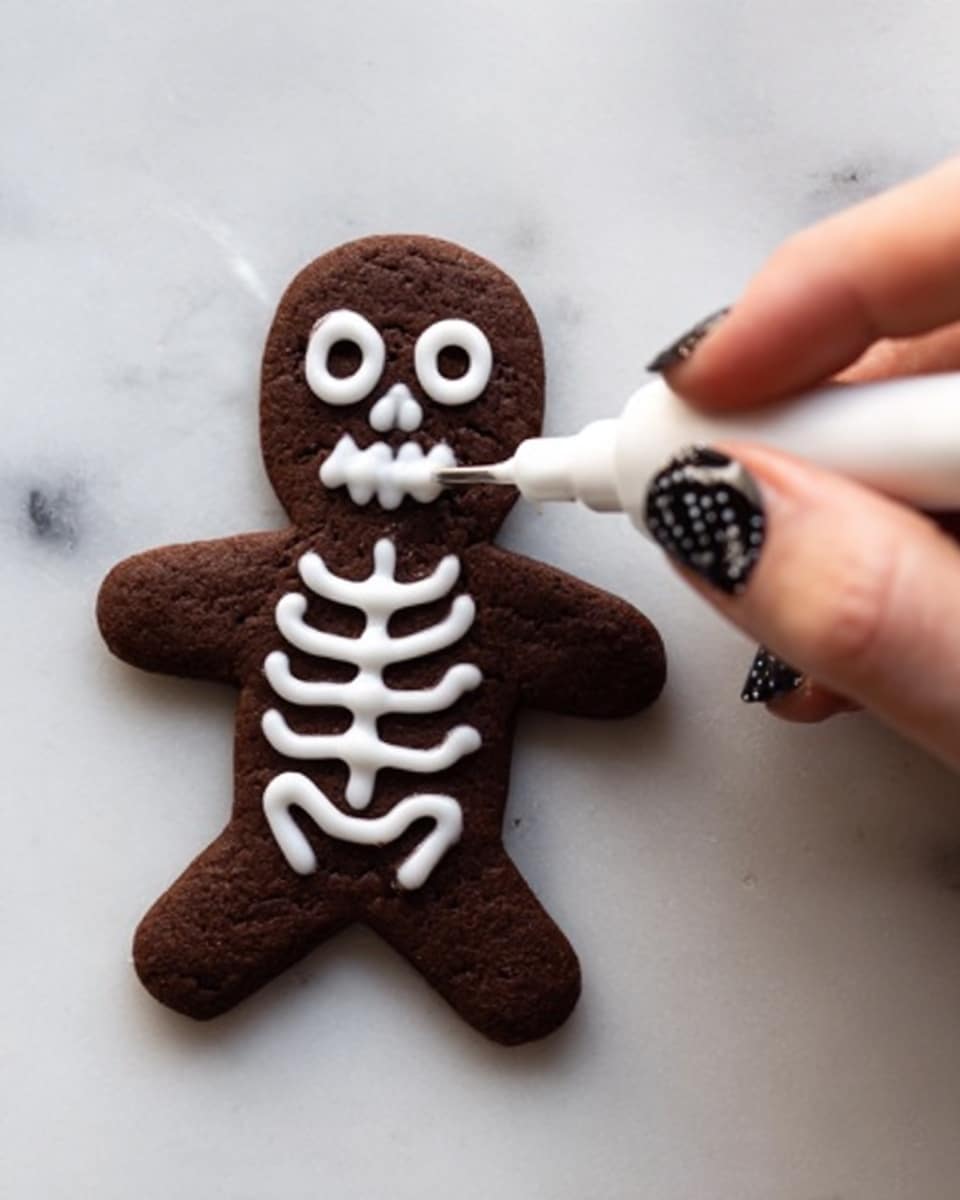
Step 6: Decorate Your Skeletons
Transfer your royal icing into a piping bag fitted with a #2 tip. Start by piping outlines of skulls, then circle for eyes and mouth. Flood the faces with icing. For a little extra spooky sparkle, sprinkle some white sanding sugar right after flooding. Let the cookies dry completely—this can take several hours, but it’s worth the wait for crisp, vibrant skeleton designs.
Pro Tips for Making Chocolate Skeleton Cookies Recipe
- Chilling is Crucial: Don’t skip chilling the dough—cold dough rolls easier and keeps your cookie shapes sharp after baking.
- Use a Light Hand with Flour: Lightly flour your surface and rolling pin to avoid dry or crumbly dough.
- Royal Icing Consistency: Be patient with icing mixing time for the perfect pipe-able texture that won’t drip or crack.
- Avoid Overbaking: Watch your cookies closely—removing them just before they’re fully firm helps keep them soft inside without being fragile.
How to Serve Chocolate Skeleton Cookies Recipe
Garnishes
I like to keep it simple with a sprinkle of white sanding sugar—adds sparkle without overpowering the look. Sometimes, I add tiny edible silver pearls or a light dusting of edible glitter for party wow-factor. Don’t forget a glass of cold milk or your favorite cozy hot drink alongside.
Side Dishes
These cookies shine best paired with a warm cinnamon-spiced latte or a rich hot chocolate. For a full dessert platter, add some fresh berries or whipped cream to offset the deep chocolate intensity. I’ve also served them at Halloween gatherings with punch and other festive finger foods.
Creative Ways to Present
For Halloween parties, I’ve laid these cookies on black platters lined with faux cobwebs and garnished with small plastic spiders for a fun spooky vibe kids love. You can also stack them in clear jars tied with orange ribbons for gift-worthy treats that look as good as they taste.
Make Ahead and Storage
Storing Leftovers
I usually store leftover decorated cookies in an airtight container at room temperature. They stay fresh for about a week, though I admit—they rarely last that long in my house! Just keep a parchment layer between them to protect the intricate icing designs.
Freezing
If you want to freeze for later, freeze the undecorated cookies in a single layer on a baking sheet first, then transfer them to a freezer-safe container or bag. I like freezing the decorated cookies only if the icing has fully dried, wrapped individually for protection. Defrost overnight at room temperature for best taste.
Reheating
These cookies are best enjoyed at room temperature, so no reheating needed. If you want softer cookies, pop them in the microwave for 5-7 seconds—but be careful not to melt the icing. I prefer to just enjoy them as they are—the texture and decoration really shine that way.
FAQs
-
Can I use regular egg whites instead of meringue powder for the royal icing?
Yes, you can use fresh egg whites or pasteurized liquid egg whites in place of meringue powder. Just make sure to beat them properly and be cautious with raw eggs if serving to children or pregnant individuals. Meringue powder is convenient and safer for most home bakers.
-
How do I prevent my royal icing from cracking once dry?
Ensuring your royal icing has the right consistency and drying it at room temperature without drafts helps prevent cracks. Avoid adding too much water and pipe steadily for even thickness. Also, keep the humidity low if possible.
-
Can I make these cookies without the cinnamon?
Absolutely! Cinnamon adds warmth and depth, but if you’re not a fan or don’t have it on hand, you can leave it out. The cookies will still have that rich chocolate flavor.
-
How long does it take for the royal icing to dry completely?
Depending on room temperature and humidity, royal icing typically takes 4 to 6 hours to dry fully. For best results, let cookies dry overnight before storing or stacking.
Final Thoughts
This Chocolate Skeleton Cookies Recipe holds a special place in my kitchen because it effortlessly combines creativity with classic flavors. I remember the first time I made these for a Halloween party—friends and family couldn’t stop smiling (and sneaking) these sweet skeletons. You’ll find that the baking process is calming, and decorating the cookies offers a fun artistic outlet. I truly hope you make this recipe your own and enjoy every spooky bite just as much as I do!
Print
Chocolate Skeleton Cookies Recipe
- Prep Time: 20 minutes
- Cook Time: 12 minutes
- Total Time: 1 hour 32 minutes
- Yield: 24 cookies
- Category: Dessert
- Method: Baking
- Cuisine: American
Description
Chocolate Skeleton Cookies are a spooky and delicious treat perfect for Halloween. These cinnamon-infused chocolate cookies are tender yet sturdy enough to hold intricate skeleton designs piped with classic royal icing. Finished with a sprinkle of white sanding sugar, these cookies combine rich cocoa flavor with sweet, delicate decoration, ideal for festive celebrations.
Ingredients
Cookie Dough
- 3 cups all-purpose flour
- 1¼ cups unsweetened cocoa powder
- ¼ teaspoon salt
- ½ teaspoon cinnamon
- 1½ cups unsalted butter, softened
- 2½ cups confectioners’ sugar
- 2 large eggs
- 1 teaspoon vanilla extract
Royal Icing
- 2 cups confectioners’ sugar
- 2½ tablespoons meringue powder (or powdered egg whites)
- ¼ cup water
- White sanding sugar, for decoration
Instructions
- Mix Dry Ingredients: In a large bowl, whisk together the flour, unsweetened cocoa powder, salt, and cinnamon until well combined. Set aside.
- Cream Butter and Sugar: Using an electric mixer, beat the unsalted butter and confectioners’ sugar together on medium speed until the mixture is light and fluffy, approximately 2 minutes.
- Add Wet Ingredients: Beat in the eggs one at a time, followed by the vanilla extract, ensuring everything is fully incorporated.
- Combine Dough: Add the dry flour mixture to the butter mixture in two batches, mixing each batch just until combined to avoid overworking the dough.
- Chill Dough: Divide the dough in half and wrap each half tightly with plastic wrap. Flatten into disks and refrigerate for at least 1 hour, or optionally overnight, to firm up.
- Preheat Oven and Roll Dough: Preheat your oven to 350ºF (175ºC). On a lightly floured surface, roll out one disk of dough to about ¼ inch thickness.
- Cut and Arrange Cookies: Use a 5-inch gingerbread man cookie cutter to cut shapes from the rolled dough. Transfer the cutouts to unlined baking sheets, rerolling scraps once to maximize dough use.
- Bake: Bake the cookies in the preheated oven until they spring back when lightly touched, approximately 12 minutes. Remove from oven and allow to cool on wire racks completely.
- Prepare Royal Icing: In a mixing bowl, combine confectioners’ sugar, meringue powder, and water. Using an electric mixer on low speed, mix and scrape the sides of the bowl intermittently for about 10 minutes until the icing reaches the consistency of soft whipped cream.
- Decorate Cookies: Transfer the royal icing to a piping bag fitted with a #2 plain tip. Pipe skeleton designs by outlining skulls, adding circles for eyes and mouths, and flooding the face area. Sprinkle some cookies with white sanding sugar for added texture and visual interest.
- Dry and Serve: Allow the decorated cookies to dry completely before serving or storing. This ensures the royal icing sets firmly.
Notes
- Chilling the dough is crucial to prevent spreading and to ensure crisp edges while maintaining a tender center.
- Using meringue powder in royal icing ensures a stable, smooth finish ideal for intricate piping work.
- Be sure to allow the royal icing to dry fully to avoid smudging decorations.
- These cookies can be stored in an airtight container for up to 5 days or frozen for longer storage.
- The cinnamon adds a warm spice that balances the rich cocoa flavor in the cookie dough, enhancing the overall taste experience.
Nutrition
- Serving Size: 1 cookie
- Calories: 264 kcal
- Sugar: 22 g
- Sodium: 38 mg
- Fat: 13 g
- Saturated Fat: 8 g
- Unsaturated Fat: 4 g
- Trans Fat: 0.5 g
- Carbohydrates: 37 g
- Fiber: 2 g
- Protein: 3 g
- Cholesterol: 44 mg


