
If you’re on the hunt for a super fun, easy, and downright adorable Halloween treat, you’re going to flip when you try this Rice Krispies Halloween Peeps Pops Recipe. I absolutely love how these pops turn out — crispy, sweet, and just the right amount of spooky thanks to those cute Halloween Peeps and sprinkles. Whether you’re making them for a party, school treat, or just a festive snack for family, this recipe will totally impress without demanding hours in the kitchen. Let me show you how simple and satisfying it is!
Why You’ll Love This Recipe
- Kid-Friendly Fun: These pops are a hit with kids and adults alike, making Halloween extra festive and playful.
- Minimal Ingredients: You only need a handful of ingredients you can find at the store right now — no crazy shopping trips required.
- Quick & Easy Prep: From start to finish, you’ll have these treats ready to impress in about 30 minutes.
- Customizable Decorations: Use your favorite Halloween sprinkles and Peeps to switch up looks and keep it fun every time.

Ingredients You’ll Need
This recipe is all about simple, crowd-pleasing ingredients that come together perfectly. The Kellogg’s Rice Krispie Treats provide that familiar sweet crunch, while the white candy melts are perfect for coating and decorating. Choose festive Peeps and sprinkles to amp up the Halloween vibe!
- Kellogg’s Rice Krispie Treats: I prefer the original packed treats for their perfect size and texture; they hold up well when dipped.
- Popsicle sticks or lollipop sticks: These make the treats fun and easy to eat — paper straws work too and add a cute touch.
- Wilton Bright White candy melts: I love these for their smooth melting texture and bright, clean color that makes decorations pop.
- Halloween Peeps: These add a whimsical and colorful element that kids adore; plus, they’re super festive.
- Halloween sprinkles: Pick your favorites — I like to mix shapes like bats, pumpkins, and ghosts to really hit the holiday spirit.
Variations
I like to mix things up a bit depending on the mood or occasion. You’ll find that these Rice Krispies Halloween Peeps Pops Recipe variations keep the fun going and make sure everyone finds a favorite.
- Chocolate Lovers’ Version: Swap the white candy melts for dark or milk chocolate melts — my family goes crazy for the rich twist!
- Vegan Adaptation: Use vegan-friendly rice treats and dairy-free candy melts to keep it inclusive for all guests.
- Different Shapes: After dipping, try pressing Halloween cookie cutters into the soft treats for themed shapes before chilling.
- Extra Crunch: Sprinkle crushed pretzels or candy corn over the melted coating for an added texture surprise.
How to Make Rice Krispies Halloween Peeps Pops Recipe
Step 1: Get Your Treats Ready with Sticks
Start by lining a baking sheet with wax or parchment paper — this is where your pops will chill later. Open each Rice Krispie Treat from its wrapper. Now, this part is fun: insert your popsicle stick, lollipop stick, or even a festive paper straw right into the base of each treat. Here’s a little trick I learned — if your stick feels too thick or you want a sturdier hole, use a popsicle stick first to gently pre-make the hole, then slide in your paper straw cut in half. It makes the process way easier without breaking the treat! Place the treats on the baking sheet once they’ve got their sticks in place.
Step 2: Chill for Stability Before Coating
Pop that baking sheet into your fridge for 20 minutes. This might seem like a little waiting, but trust me, it makes a huge difference. The chill firms up the Rice Krispie Treats so when you dip them in your melted candy, they hold their shape perfectly rather than getting all soft and crumbly.
Step 3: Melt Your Candy Coating
While the treats are chilling, melt your Wilton Bright White candy melts. I like to do this gently in a microwave-safe bowl, heating in 30-second intervals and stirring in between to avoid burning. You want the candy smooth and silky, perfect for dipping. Alternatively, if you have a candy warmer, that works beautifully too.
Step 4: Dip and Decorate Your Pops
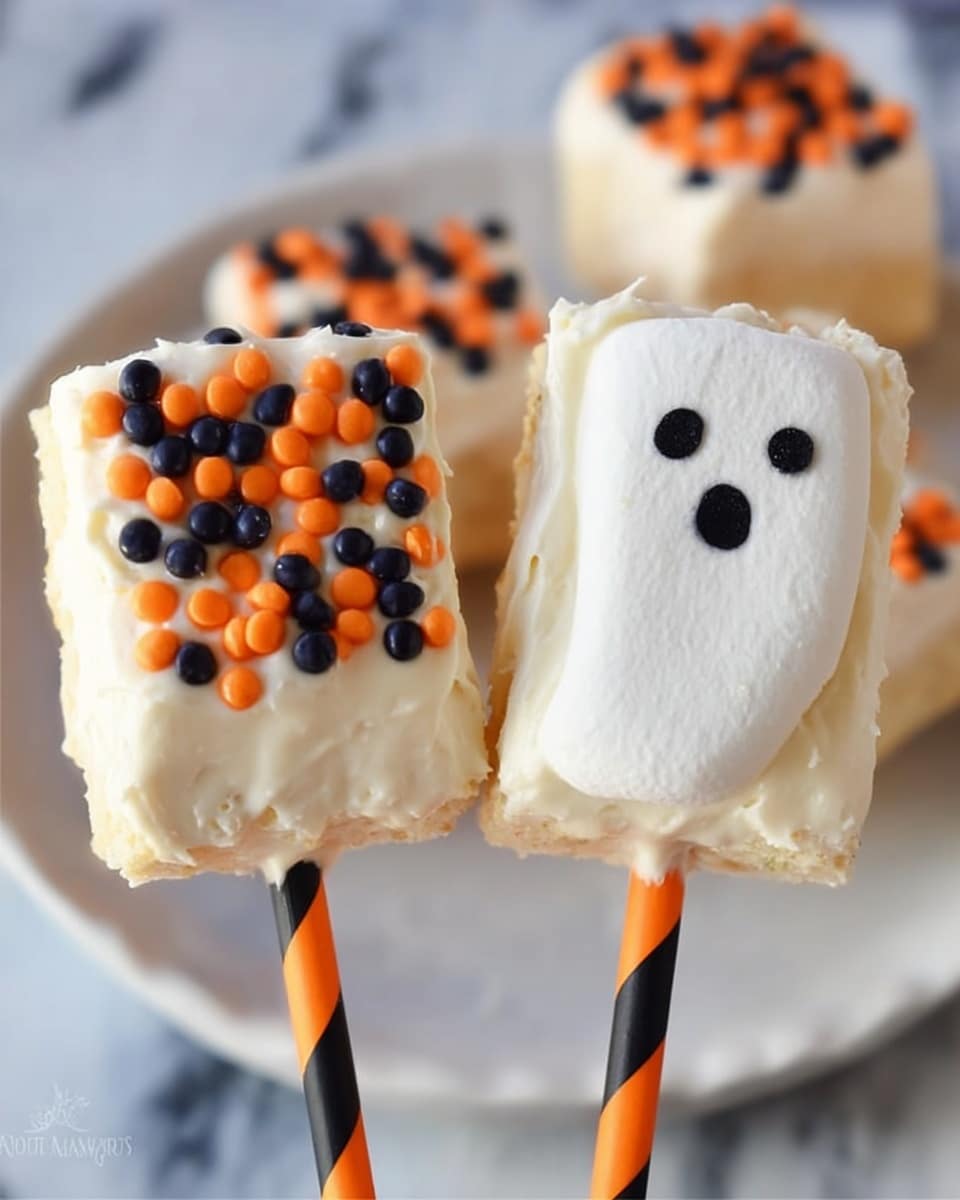
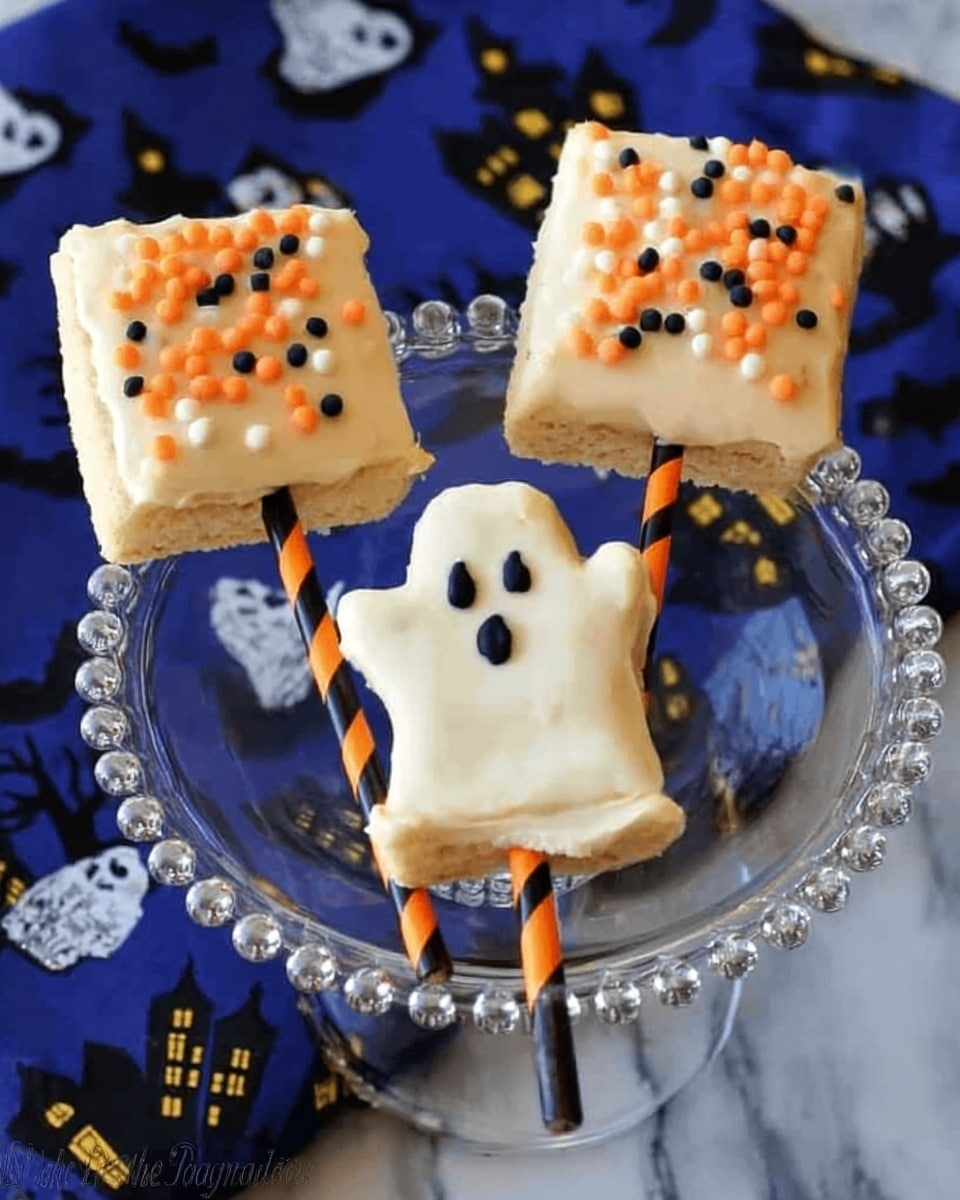
This is the really fun part. Take each chilled Rice Krispies Treat pop and dip it carefully into the melted candy coating. If you want to be precise, use a spoon to help coat evenly. Let any excess candy melt drip back into your bowl — nobody wants a dripping mess! Then, set each pop onto the lined baking sheet. Before the candy sets, sprinkle on your Halloween-themed sprinkles and press a Halloween Peep gently into the warm coating. The Peeps add that perfect pop of color and cuteness that’s totally Instagram-worthy!
Step 5: Chill and Serve
Once decorated, pop the whole tray back in the fridge so the candy coating can harden quickly. After about 15-20 minutes, your Rice Krispies Halloween Peeps Pops are ready to serve! Or, if you’re prepping for later, store them in an airtight container in a cool place — they stay fresh up to 3 days.
Pro Tips for Making Rice Krispies Halloween Peeps Pops Recipe
- Stick Insertion Trick: Use a popsicle stick first to gently create a hole, then slide in a paper straw for a sturdier, easier handle — this helped me avoid breakage every time.
- Melting Candy Slowly: I learned that heating candy melts too fast makes them grainy — patience is key for that silky smooth dip.
- Decorate While Warm: Add sprinkles and Peeps immediately after dipping so they stick perfectly before the candy hardens.
- Avoid Humidity: I always store these in a cool, dry place and refrigerate if needed; they won’t soften or get sticky that way.
How to Serve Rice Krispies Halloween Peeps Pops Recipe
Garnishes
Personally, I love adding a handful of colorful Halloween sprinkles — it makes the treats look festive and fun. Sometimes, I toss on edible glitter or tiny candy eyeballs for an extra spooky vibe. I always make sure to press the Peeps gently into the coated pop while the candy is still warm; it adds a lovely burst of color and texture that’s hard to resist.
Side Dishes
If you’re serving these at a Halloween party or snack table, they go great with a glass of cold milk or a warm cup of hot chocolate. For bigger gatherings, I like to pair them with some simple fruit skewers or mini sandwiches to balance the sweetness without overwhelming guests.
Creative Ways to Present
For parties, I arrange the pops vertically in a festive container filled with crinkled paper or candy corn to keep them standing tall — it instantly becomes the centerpiece! Another idea I’ve tried is wrapping each pop in clear cellophane tied with an orange or black ribbon, perfect for handing out at school or work. And if you want to get really creative, placing the pops on a spooky-themed platter with faux spider webs and plastic spiders adds a fun touch that everyone notices.
Make Ahead and Storage
Storing Leftovers
I always keep leftover Rice Krispies Halloween Peeps Pops in an airtight container at room temperature if it’s not too warm. This helps keep them crisp and fresh for up to 3 days without the candy coating sweating or getting sticky. Avoid storing them in plastic bags, as that can cause moisture buildup.
Freezing
Freezing isn’t my go-to for these pops because the texture can get a little off once thawed, especially the Peeps. But if you must, wrap each pop tightly in plastic wrap and place in a freezer-safe container. Thaw them completely at room temperature before unwrapping for best results.
Reheating
There’s no need to reheat these since they’re sweet treats meant to be enjoyed as-is. If your coating gets a bit soft, chilling them again in the fridge for 10-15 minutes usually restores firmness without affecting flavor.
FAQs
-
Can I use homemade Rice Krispie Treats for this recipe?
Absolutely! Homemade Rice Krispie Treats work wonderfully. Just make sure they’re set firm and chilled well before inserting sticks and dipping into the candy melts to prevent crumbling or breaking.
-
What if I don’t have candy melts? Can I use melted chocolate?
You can use melted chocolate, but keep in mind it can be a bit trickier to melt smoothly and may not harden as neatly as candy melts. Candy melts are designed for dipping and will give you that perfect firm coating.
-
How do I prevent the candy coating from melting or getting sticky?
Store the pops in a cool, dry place away from direct sunlight and heat sources. Refrigerating them for a short time before serving helps keep the coating firm and looking fresh.
-
Can I make this recipe gluten-free?
Yes! Just make sure the Rice Krispie Treats you buy or make are certified gluten-free, as some brands may contain malt flavoring with gluten. The rest of the ingredients, like candy melts and Peeps, are typically gluten-free but always double-check packages to be sure.
Final Thoughts
I have to say, the Rice Krispies Halloween Peeps Pops Recipe is one of those joyful, simple treats that never fails to delight. I first tried making them a few Halloweens ago, and my kids begged me to make them every year since. They’re perfect for making memories, involving little hands in the kitchen, and adding that festive flair to any party or snack time. Give this recipe a try — I’m certain you’ll adore how easy and fun it is to create spooky sweet pops that everyone will rave about!
Print
Rice Krispies Halloween Peeps Pops Recipe
- Prep Time: 30 minutes
- Cook Time: 10 minutes
- Total Time: 40 minutes
- Yield: 16 pops
- Category: Dessert
- Method: No-Cook
- Cuisine: American
Description
These Rice Krispies Halloween Peeps Pops are a fun and festive treat perfect for Halloween celebrations. Featuring classic Rice Krispie Treats on sticks, dipped in bright white candy melts and decorated with Halloween Peeps and sprinkles, they’re easy to make, visually impressive, and perfect for parties or gifting.
Ingredients
Main Ingredients
- 2 (8 ct) boxes Kellogg’s Rice Krispie Treats
- 16 Popsicle sticks OR lollipop sticks OR festive paper straws
- 12 oz Wilton Bright White candy melts
- Halloween Peeps
- Halloween sprinkles
Instructions
- Prepare the workspace: Line a large baking sheet with wax or parchment paper to prevent sticking and make cleanup easier.
- Insert sticks: Open each Rice Krispie Treat box and remove the treats from their wrappers. Insert one popsicle stick or lollipop stick (or a paper straw cut in half) into the base of each treat carefully. Place the treats upright on the prepared baking sheet.
- Chill treats: Place the prepared treats with sticks into the refrigerator for 20 minutes. This firms them up, making it easier to dip in melted candy without falling apart.
- Melt candy coating: While the treats chill, begin melting the 12 oz of Wilton Bright White candy melts according to package instructions, typically using a microwave or candy warmer.
- Dip treats: Remove the treats from the fridge one at a time and dip each treat into the melted candy melts. Use a spoon to help coat evenly if needed, allowing excess to drip back into the bowl.
- Decorate: After coating, place each dipped treat back onto the baking sheet. Decorate promptly by adding Halloween sprinkles or pressing a Halloween Peep gently into the warm candy coating before it sets.
- Set the coating: Optionally, place the decorated treats back in the refrigerator to help the candy harden faster.
- Store and serve: Serve the pops immediately once set, or store in an airtight container in a cool place for up to 3 days to maintain freshness.
Notes
- These pops are a super easy and budget-friendly Halloween treat that also look fantastic for parties or gifting.
- Using the fridge to firm the treats before and after dipping helps prevent breakage and ensures a smooth candy coating.
- Feel free to experiment with different candy melt colors and sprinkles to customize the pops.
- For easier stick insertion, using popsicle sticks to pre-make holes then swapping with paper straws works well.
Nutrition
- Serving Size: 1 pop
- Calories: 180
- Sugar: 15g
- Sodium: 110mg
- Fat: 7g
- Saturated Fat: 4g
- Unsaturated Fat: 2g
- Trans Fat: 0g
- Carbohydrates: 28g
- Fiber: 0.5g
- Protein: 1g
- Cholesterol: 0mg


