
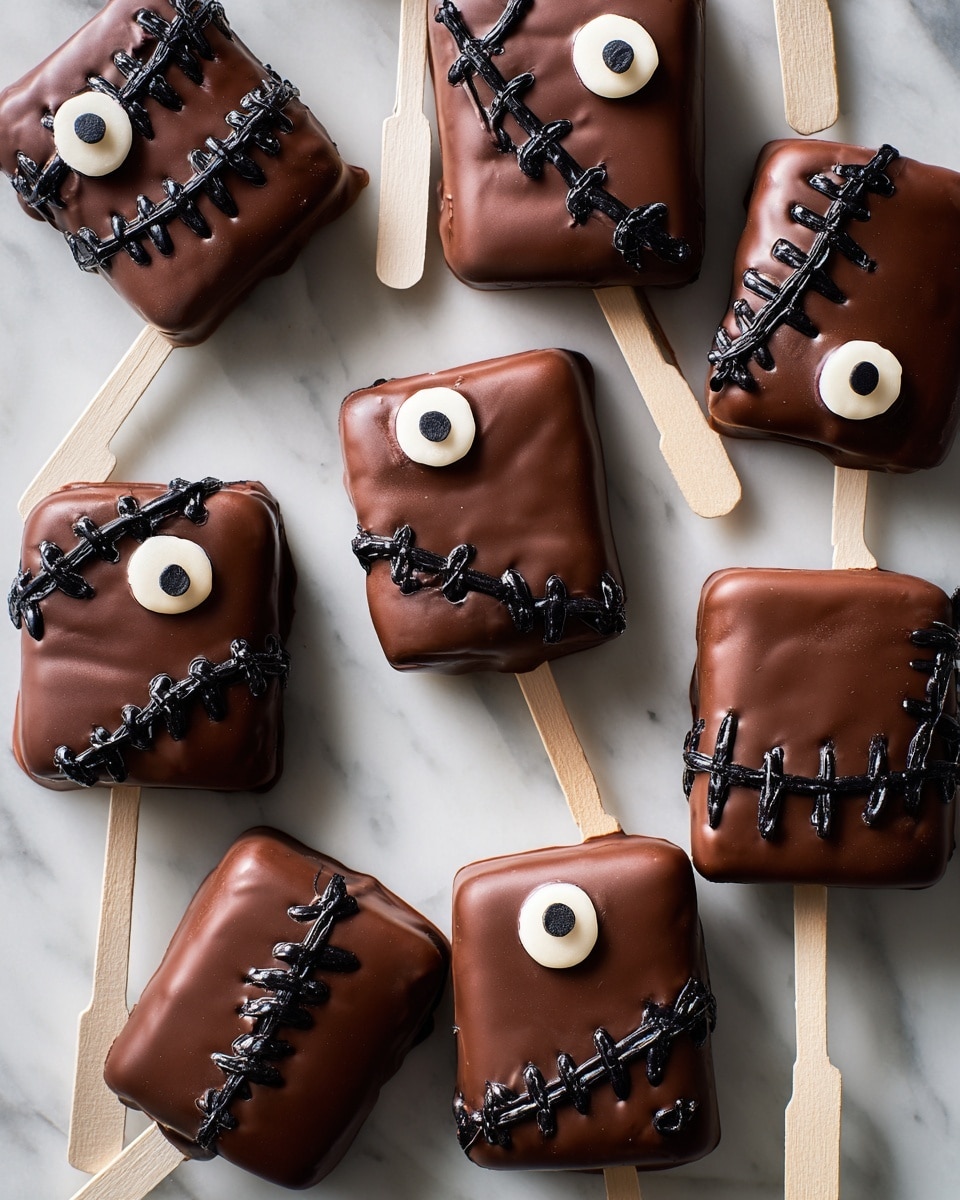
If you’re on the hunt for a spooky, fun, and downright delicious treat, you’re gonna love this Hocus Pocus S’mores Pops Recipe. It’s perfect for Halloween parties or just a cozy night in when you want to indulge in something sweet with a little festive flair. I absolutely love how these s’mores pops come together with just a handful of simple ingredients but end up looking like a magical Halloween surprise. Stick around, because I’m sharing all my tips to make sure your pops turn out perfectly every time!
Why You’ll Love This Recipe
- Super Easy to Make: You’ll find everything comes together quickly with no oven needed.
- Fun and Festive Design: The candy eyes and frosting details really bring the spooky vibe to life.
- Perfectly Sweet and Chocolaty: Melty chocolate and marshmallow crème make these pops irresistible.
- Kid-Friendly and Mess-Free: Pops on sticks mean less sticky fingers and more fun to share.

Ingredients You’ll Need
These ingredients come together to create that classic s’mores taste with a Halloween twist. I always recommend using good quality chocolate chips for the richest flavor, and trust me, marshmallow crème spreads like a dream and keeps everything nice and gooey.
- Graham crackers: Halve them so they fit your popsicle sticks just right; think of these as your “book covers.”
- Marshmallow crème: It’s perfect here because it stays soft and spreadable without roasting.
- Semisweet chocolate chips: I find semisweet strikes the best balance—not too bitter, not too sweet.
- Coconut oil: Helps melt the chocolate smoothly and gives it that shiny finish.
- Candy eyes: These are the secret to the spooky “face” — they’re adorable and easy to find online or at craft stores.
- Black cookie frosting: Use this for drawing details—it’s forgiving and gives that magic finishing touch.
Variations
I love making the Hocus Pocus S’mores Pops Recipe my own by mixing up the toppings. Feel free to get creative here! Changing up the type of chocolate or decorating with different candies can make these fun all season long.
- White chocolate version: I once swapped out the semisweet for white chocolate chips and added orange sprinkles—to make it super Halloween-themed and the kids went nuts for it!
- Gluten-free option: Using gluten-free graham crackers works beautifully if you or your guests have dietary restrictions with no loss of that classic flavor.
- Peanut butter twist: Spread a thin layer of peanut butter under the marshmallow crème for a richer, more decadent treat.
- Spooky sprinkles: Try decorating with ghost or pumpkin-shaped sprinkles instead of candy eyes for a different spooky vibe.
How to Make Hocus Pocus S’mores Pops Recipe
Step 1: Assemble Your S’mores “Books”
Start by spreading about one tablespoon of marshmallow crème on half of the graham cracker halves. This sticky layer holds your popsicle stick perfectly in place. Place the stick halfway onto the crème so it peeks out like a handle, then sandwich it with the other cracker. Pop these assembled “books” in the freezer while you prepare the chocolate coating—it helps them set up nicely and makes dipping easier.
Step 2: Melt and Mix Your Chocolate Coating
In a medium microwave-safe bowl, combine the chocolate chips and coconut oil. Heat in 20-second bursts, stirring in between, until smooth and glossy—this usually takes about a minute total. The coconut oil thins the chocolate just enough to coat the pops evenly. Patience here pays off; a well-melted chocolate mix means easier dipping and a prettier finish.
Step 3: Dip and Decorate
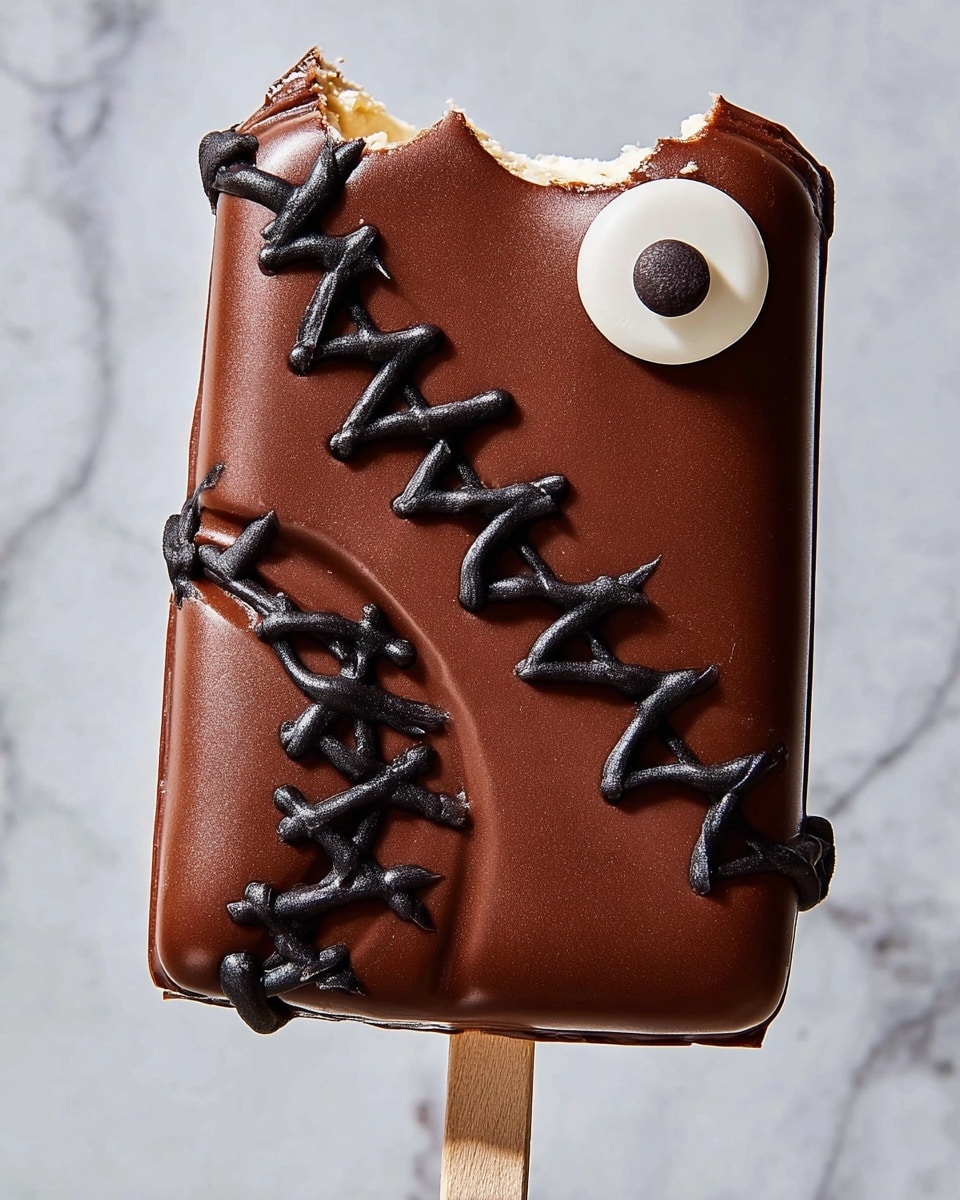
Carefully dip each s’mores pop into the chocolate, making sure to cover all sides completely. If you find the chocolate is thick, use a butter knife or silicone spatula to spread it evenly—this little trick kept my pops smooth and flawless when I first made them. Next, place one candy eye on each “book” about halfway down on the right side—that’s the signature “eye” look for these pops. Chill in the fridge for about 15 minutes to let the chocolate harden.
Step 4: Add The Final Touches
Use the black cookie frosting to draw a circle around the eye, semicircles on the “corners” of the graham cracker covers, and those classic “stitches” across the chocolate. I love this step because it’s where the magic really happens—watch your pops come to life right before your eyes! Pop them back in the fridge for another 15 minutes to let everything set perfectly.
Pro Tips for Making Hocus Pocus S’mores Pops Recipe
- Freeze Before Dipping: Freezing the sandwiches first makes the chocolate coating much easier and prevents sogginess.
- Use Room Temperature Chocolate: Avoid overheating your chocolate—it can seize. Warm up gently and stir often for smooth dips.
- Decorate Quickly: Add candy eyes before chocolate hardens, so they stick perfectly without falling off.
- Chill in Batches: Refrigerate pops in batches to keep the chocolate hard and shiny — no melting mishaps!
How to Serve Hocus Pocus S’mores Pops Recipe
Garnishes
I usually keep the garnishing simple with just candy eyes and a generous swirl of black frosting because the look is already so fun and striking. But if I’m feeling extra festive, I’ll add a sprinkle of edible glitter or a dash of crushed orange and black candy sprinkles around the plate to make the presentation pop.
Side Dishes
These pops are a dessert star all on their own, but if you want to complete your Halloween spread, I recommend fresh apple slices or a cup of warm spiced cider alongside. Both balance the sweetness and add a cozy touch—perfect combo for chilly October nights.
Creative Ways to Present
One year, I placed the pops in a mini pumpkin bucket filled with shredded orange tissue paper—it made an adorable “bouquet” centerpiece for our Halloween party table. You can also wrap each pop in clear cellophane tied with black and orange ribbon, turning them into festive party favors that guests take home with a smile.
Make Ahead and Storage
Storing Leftovers
I keep any leftover pops in an airtight container in the fridge. They stay delicious and the chocolate coating holds up well for about 3 days. Just be sure to let them come to room temperature a bit before eating for the best gooey texture inside.
Freezing
Freezing these pops is totally doable if you want to prep ahead. Wrap each pop tightly in plastic wrap and place in a freezer-safe container. When you’re ready to serve, thaw in the fridge overnight. I’ve found freezing can slightly affect the crispness of the graham crackers, but the flavor stays fantastic.
Reheating
Since these are best enjoyed chilled or at room temp, I usually skip reheating. That said, if you want a melty marshmallow moment, you can briefly zap a pop in the microwave for 5-10 seconds—just watch closely so the chocolate doesn’t melt off.
FAQs
-
Can I use regular marshmallows instead of marshmallow crème?
You could, but marshmallow crème spreads easier and stays soft inside the pops. If you want to use regular marshmallows, try melting them slightly to create a spreadable texture before assembling.
-
How do I keep the pops from melting or getting soggy?
Freezing the assembled s’mores before dipping in chocolate is key — it helps keep the graham crackers firm. Also, the coconut oil in the chocolate helps the coating harden with a nice, protective finish.
-
Can I make these ahead for a party?
Absolutely! Prep them a day or two before, keep them refrigerated, and add the frosting details shortly before serving to maintain the freshest look.
-
What other decorations can I use if I can’t find candy eyes?
You can get creative with mini chocolate chips, edible googly eyes, or even make tiny eyes using white frosting and mini chocolate chips.
Final Thoughts
This Hocus Pocus S’mores Pops Recipe quickly became one of my go-to Halloween treats because it’s as fun to make as it is to eat. I love sharing them with friends and family—there’s just something magical about biting into a sweet, chocolatey pop that looks like it jumped straight out of a spooky story. Give it a try for your next party or just because, and I promise you’ll be hooked. Happy Halloween and happy dipping!
Print
Hocus Pocus S’mores Pops Recipe
- Prep Time: 15 minutes
- Cook Time: 0 minutes
- Total Time: 45 minutes
- Yield: 6 servings
- Category: Dessert
- Method: No-Cook
- Cuisine: American
- Diet: Vegetarian
Description
Hocus Pocus S’mores Pops are a fun and festive Halloween dessert featuring graham cracker sandwiches filled with marshmallow crème, dipped in rich melted chocolate, and decorated with spooky candy eyes and black cookie frosting. Perfect for parties or a themed treat, these pops combine classic s’mores flavors with playful Halloween-inspired designs.
Ingredients
Graham Cracker Sandwiches
- 12 graham crackers, halved
- 1/2 cup marshmallow crème
Chocolate Coating
- 2 cups semisweet chocolate chips
- 3 tablespoons coconut oil
Decorations
- 1 bag candy eyes
- 1 container black cookie frosting
Instructions
- Prepare Graham Cracker Sandwiches: Spread about 1 tablespoon of marshmallow crème on half of the graham cracker halves. Place a popsicle stick halfway onto the marshmallow crème so it sticks out like a handle. Top with the remaining graham cracker halves to form sandwiches. Arrange them on a parchment-lined baking sheet and place in the freezer to chill while you prepare the chocolate coating.
- Melt Chocolate Coating: In a medium heatproof bowl, microwave the semisweet chocolate chips and coconut oil in 20-second increments, stirring well between each session, until completely melted and smooth, about 1 minute total.
- Dip Sandwiches in Chocolate: Remove the chilled graham cracker sandwiches from the freezer. Dip each sandwich into the melted chocolate, covering it completely. Use a butter knife or silicone spatula as needed to coat all sides evenly. Immediately stick one candy eye on each chocolate-covered sandwich on the far right side about halfway down.
- Chill to Harden Chocolate: Place the dipped and decorated sandwiches back onto the parchment-lined baking sheet and refrigerate for about 15 minutes or until the chocolate has hardened.
- Decorate with Frosting: Use the black cookie frosting to draw a circle around each candy eye, add two semicircles on the outer corners of the graham cracker sandwiches, and create stitch-like lines across the chocolate coating to give a fun Halloween look.
- Final Chill: Refrigerate the decorated s’mores pops for at least another 15 minutes until the frosting sets and everything is firm and ready to serve.
Notes
- This recipe is a simple and festive Halloween treat that will be a hit at any party or gathering.
- Ensure the sandwiches are well chilled before dipping to help the chocolate coat smoothly.
- Use parchment paper to prevent sticking during freezing and chilling steps.
- You can customize decorations with different colored frostings or candy eyes for variety.
Nutrition
- Serving Size: 1 s’mores pop
- Calories: 1065
- Sugar: 120 g
- Sodium: 302 mg
- Fat: 57 g
- Saturated Fat: 29 g
- Unsaturated Fat: 28 g
- Trans Fat: 0 g
- Carbohydrates: 143 g
- Fiber: 8 g
- Protein: 7 g
- Cholesterol: 0 mg

