
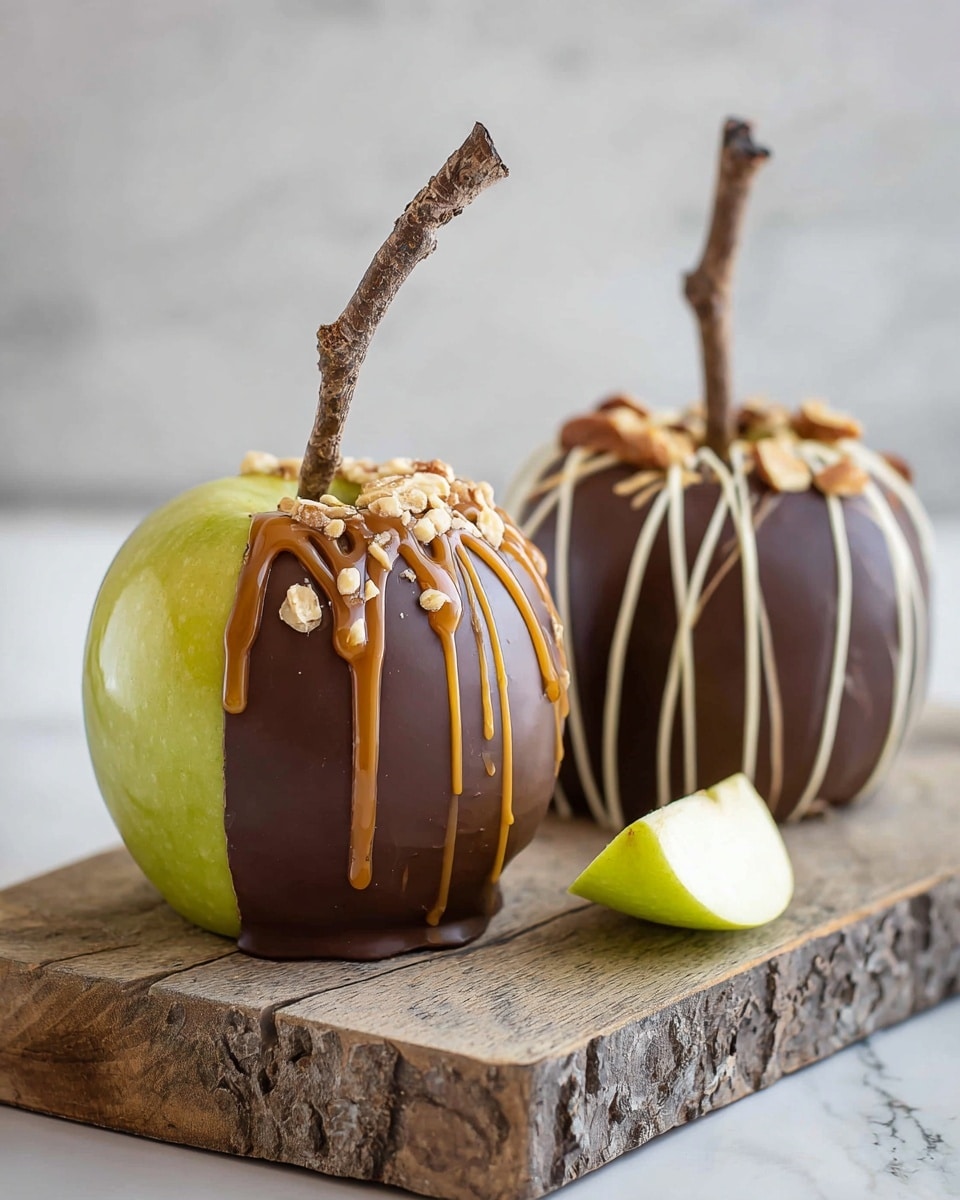
There’s something so irresistible about crunchy apples dipped in rich, melty chocolate, right? That’s why this Homemade Chocolate Apples Recipe is an absolute game changer. It’s easy, fun, and the perfect treat for any occasion—whether it’s a cozy night in or a festive party. Trust me, once you try this, you’ll be hooked on the combo of crisp apple and creamy chocolate that melts in your mouth.
Why You’ll Love This Recipe
- Simple Ingredients: You don’t need a fancy pantry to make these delicious chocolate apples.
- Customizable Toppings: Add nuts, dried fruit, or more chocolate to suit your taste perfectly.
- Perfect for Any Occasion: These homemade treats shine as gifts, party snacks, or festive desserts.
- Fun to Make with Kids: Kids love dunking apples and decorating them—it’s a great interactive kitchen activity.

Ingredients You’ll Need
Each ingredient in this Homemade Chocolate Apples Recipe plays a key role—whether it’s the crispness of the Granny Smith apples or the sweet creaminess of the chocolate chips. Shopping quality chocolate and fresh apples really pays off here!
- Green apples: I recommend Granny Smith for their tart crunch that balances the sweet chocolate perfectly.
- Lollipop sticks or sturdy sticks: Make sure these are clean and strong enough to hold the coated apples.
- Peanut butter chips: Adds a wonderfully nutty layer that’s different from plain chocolate.
- Semi-sweet chocolate chips: Classic choice that melts well and isn’t too sweet.
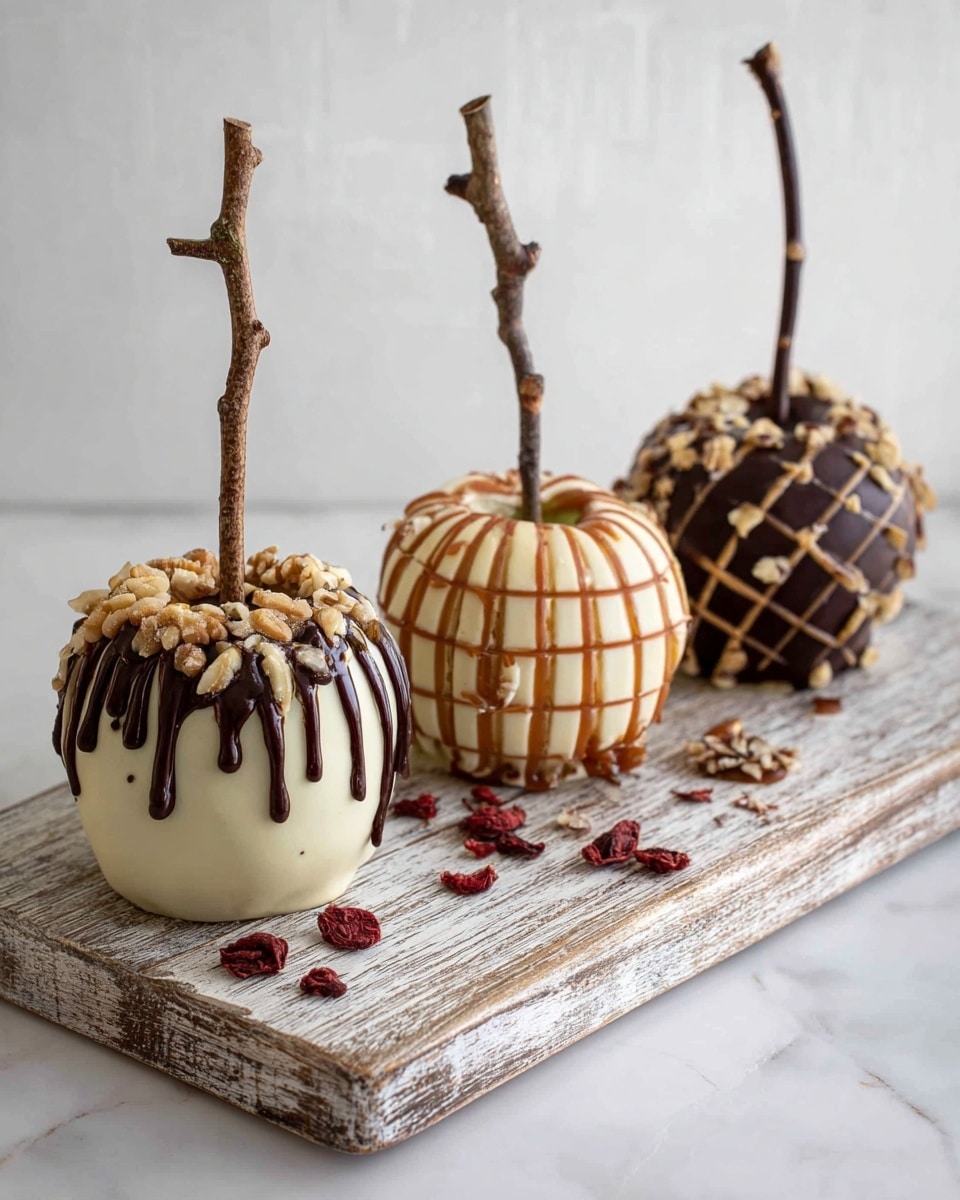
- White chocolate chips: Great for contrast and drizzling decoration.
- Dried cranberries: Their chewy tartness complements the chocolate and apple.
- Chopped pecans: Adds crunch and a rich flavor that I find enhances every bite.
Variations
I love mixing things up depending on the season or what’s in my pantry. The Homemade Chocolate Apples Recipe is super flexible, so you can easily make it your own with different toppings or chocolate combos.
- Salted caramel drizzle: I once tried drizzling homemade caramel over the chocolate for a sweet-salty surprise, and my family went crazy for it.
- Nut-free option: Swap out peanut butter chips for extra semi-sweet chocolate if you’re avoiding nuts.
- Spiced chocolate: Adding a pinch of cinnamon or chili powder to the chocolate mix adds unexpected warmth and zing.
- Fancy sprinkles or shredded coconut: Great for dressing up your apples for birthdays or holiday parties.
How to Make Homemade Chocolate Apples Recipe
Step 1: Prep Your Apples and Sticks
First off, if your apples have that shiny wax coating, don’t skip this step. I dip mine briefly in boiling water and wipe them clean, or sometimes use a baking soda paste followed by rinsing. This helps the chocolate stick better and not slide off. Then, trim the stems and push your lollipop sticks firmly into the tops—make sure they’re secure because once the chocolate’s on, you don’t want any slipping!
Step 2: Melt Your Chocolate and Peanut Butter Chips
Microwaving is my go-to—it’s quick and gives you control. Heat each type of chip separately in 10-second bursts, stirring well between each until smooth. This prevents burning and keeps the chocolate glossy. You’ll notice the peanut butter chips give a lovely rich twist that pairs beautifully with the apples.
Step 3: Dip, Decorate, and Chill
Now for the fun part! Dip each apple into the chocolate or drizzle it on for a more rustic look—whatever you’re feeling. Let the excess drip off before putting it on a lined baking sheet. If you want to add toppings like cranberries or chopped pecans, sprinkle them on while the chocolate is still wet. Then pop everything into the fridge to set. Once they’re firm, feel free to add white chocolate drizzles or any extra decorations.
Pro Tips for Making Homemade Chocolate Apples Recipe
- Choose Crisp Apples: Granny Smiths really hold up best without getting soggy under the chocolate.
- Microwave in Short Bursts: Heating chips in 10-second increments keeps the chocolate from scorching and becoming grainy.
- Work Quickly: Chocolate sets fast in the fridge, so be ready to add toppings while it’s still soft.
- Keep Apples Cold Until Use: Cold apples help the chocolate to set quicker and provide a satisfying crunch every time.
How to Serve Homemade Chocolate Apples Recipe
Garnishes
I adore adding little festive touches—like a dusting of crushed peppermint in winter or toasted coconut shreds in summer. Sprinkle colorful sprinkles or edible glitter if you want to wow the kids or guests. Dried cranberries add a nice tart pop, and pecans bring a wonderful crunch and nuttiness I look forward to every time.
Side Dishes
These chocolate apples are so rich and satisfying that I usually keep sides simple—like a crisp green salad or even a scoop of vanilla ice cream. For parties, I love pairing them with a selection of cheeses and nuts for an unexpected mix of sweet and savory.
Creative Ways to Present
For birthdays or holidays, stand the chocolate apples upright in a pretty wooden box filled with crinkled paper or straw for a rustic look. I’ve also arranged them on a tiered dessert platter with themed decorations and little handwritten tags for guests. It turns a simple treat into an eye-catching centerpiece.
Make Ahead and Storage
Storing Leftovers
Once your Homemade Chocolate Apples are set, store them in an airtight container in the fridge. They stay fresh and delicious for about 3-4 days. I like to keep them separate using parchment paper between apples so the chocolate doesn’t stick together.
Freezing
I’ve tried freezing them—wrap each apple tightly in plastic wrap, then foil. While freezing works, the apple texture softens a bit once thawed. So, I usually avoid freezing if I want that fresh crunch, but it’s a good fallback if you have extra.
Reheating
Reheating isn’t necessary and can ruin the chocolate coating. If anything, I just let frozen apples thaw in the fridge overnight and serve cold. If your chocolate has lost shine, a gentle warm towel wipe can help freshen the look before serving.
FAQs
-
Can I use other types of apples for this recipe?
Absolutely! While Granny Smith apples are my favorite because of their tartness and firmness, you can use Fuji, Honeycrisp, or Gala. Just make sure the apples are fresh and crisp so they hold up well under the chocolate coating.
-
How do I prevent the chocolate from sliding off the apples?
Removing any wax coating on the apples is key. Also, chilling the apples before dipping and working with melted chocolate at the right temperature helps it adhere better. Holding the apple to let excess chocolate drip off before placing it down is crucial.
-
Can I make these chocolate apples ahead of time?
Yes, you can make them a day or two ahead—store them in the fridge in an airtight container. I don’t recommend making them too far in advance because the apple’s crunchiness diminishes over time.
-
What’s the best way to melt chocolate chips for dipping?
Microwaving in short 10-second bursts and stirring in between is the most foolproof method. You could also melt chocolate over a double boiler, which gives you a bit more control and prevents burning.
Final Thoughts
I absolutely love how this Homemade Chocolate Apples Recipe brings simple ingredients to life with that perfect balance of crisp, sweet, and nutty flavors. It’s one of those nostalgic treats with a grown-up twist that I always reach for during the holidays and even random weekends. Give it a go—you’ll enjoy the process almost as much as the delicious results, and I promise your family and friends will thank you for it!
Print
Homemade Chocolate Apples Recipe
- Prep Time: 20 minutes
- Cook Time: 0 minutes
- Total Time: 20 minutes
- Yield: 4 apples
- Category: Dessert
- Method: No-Cook
- Cuisine: American
Description
Homemade Chocolate Apples are a delightful treat featuring crisp green apples coated in melted peanut butter, semi-sweet, and white chocolates, then decorated with dried cranberries and pecans. This easy no-bake recipe combines fruity freshness with rich, creamy chocolate flavors for a fun and festive dessert or snack.
Ingredients
Apples and Sticks
- 4 green apples, cold (preferably Granny Smith)
- 4 lollipop sticks or strong garden sticks, cleaned
Chocolate Coatings
- 1 ¾ cups (200 grams) peanut butter chips
- 1 ¾ cups (200 grams) semi-sweet chocolate chips
- 1 ¾ cups (200 grams) white chocolate chips
Decorations
- ¼ cup (32 grams) dried cranberries
- ½ cup (75 grams) pecans, chopped
Instructions
- Prepare the apples: Remove any wax from the surface by briefly dipping apples in boiling water and wiping them or rubbing with a baking soda and water mixture, then rinse thoroughly. Dry the apples completely to ensure the chocolate adheres well.
- Insert sticks: Cut off the stems from the apples and firmly insert lollipop sticks or clean sticks into the top center of each apple to serve as handles.
- Prepare workspace: Line a small baking sheet with wax or parchment paper and clear space in your refrigerator to place the coated apples for setting.
- Melt chocolates: Place peanut butter chips, semi-sweet chocolate chips, and white chocolate chips each in separate microwave-safe containers. Microwave individually in 10-second increments, stirring after each increment until smooth and fully melted.
- Coat the apples: Dip each apple into the melted chocolate or drizzle chocolate over them to coat evenly. Allow excess chocolate to drip off, then place the apples onto the lined baking sheet.
- Add decorations: While the chocolate is still melted, sprinkle dried cranberries and chopped pecans over the apples for added texture and flavor.
- Set the chocolate: Transfer the baking sheet with coated apples to the refrigerator and chill until the chocolate is fully set and firm.
- Optional finishing touches: Once the chocolate is hardened, add additional decoration by drizzling contrasting melted chocolates or other fun toppings as desired. Enjoy your homemade chocolate apples!
Notes
- Granny Smith apples work best due to their tart flavor and firm texture, which complement the sweetness of the chocolate.
- If apples have wax, removing it improves chocolate adherence.
- Use fresh and cold apples to ensure the chocolate sets well.
- Decorations like dried cranberries and pecans add crunch and a burst of flavor.
Nutrition
- Serving Size: 1 apple
- Calories: 380
- Sugar: 43 grams
- Sodium: 85 milligrams
- Fat: 19 grams
- Saturated Fat: 10 grams
- Unsaturated Fat: 8 grams
- Trans Fat: 0 grams
- Carbohydrates: 59 grams
- Fiber: 7 grams
- Protein: 6 grams
- Cholesterol: 13 milligrams


