
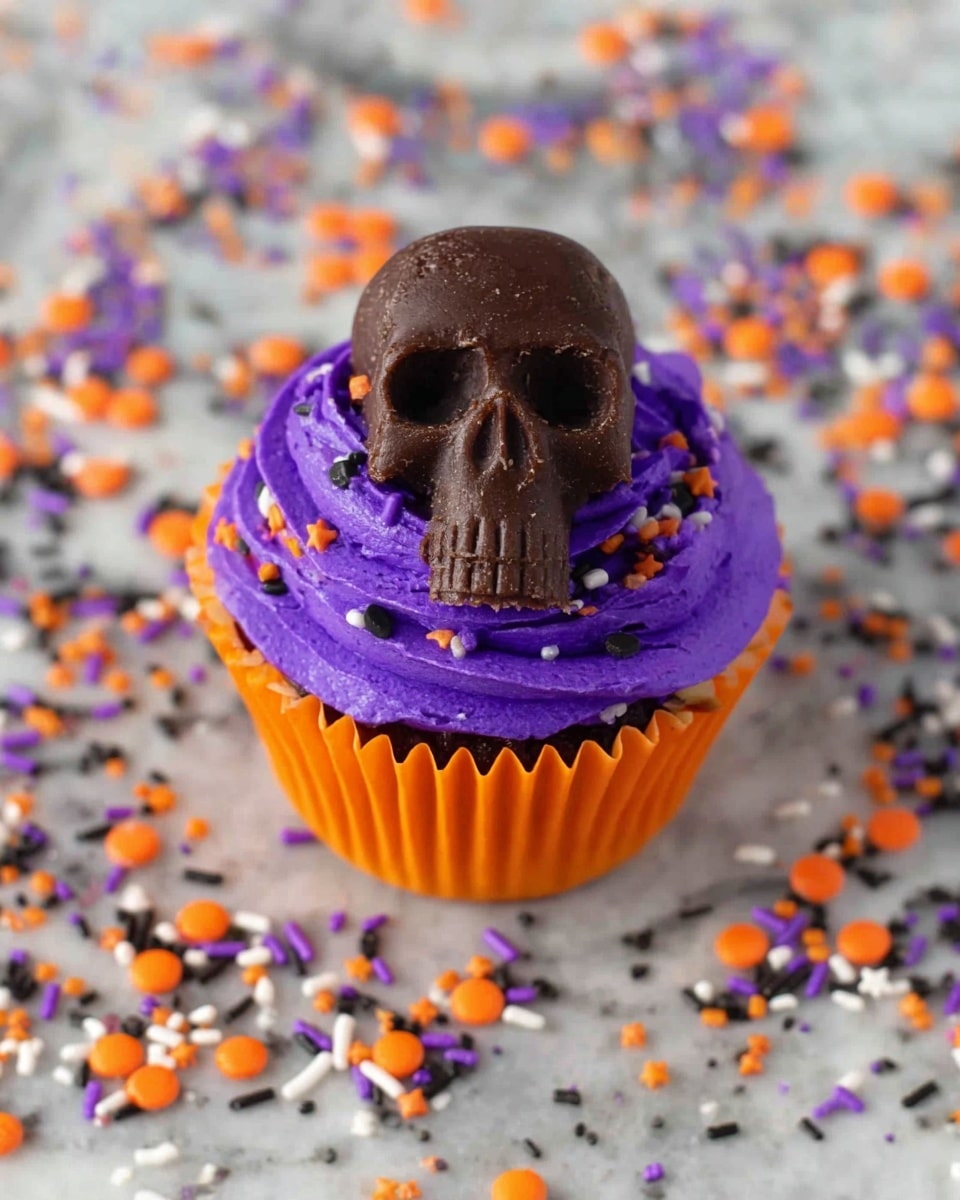
If you’re looking to wow your guests this spooky season, this Halloween Skull Cupcakes Recipe is an absolute must-try. I love this recipe because it combines the simple joy of cupcakes with an eerily fun twist—thanks to those irresistible Butterfinger Peanut Butter Cup Skulls! Whether you’re hosting a party or just want a festive treat, these cupcakes are as delicious as they are spooky, and I can’t wait to share all my little tips to help you nail them perfectly.
Why You’ll Love This Recipe
- Easy to Make: Even if you’re not a baking pro, this recipe keeps it simple with store-bought cake mix and frosting, so you can focus on the fun stuff.
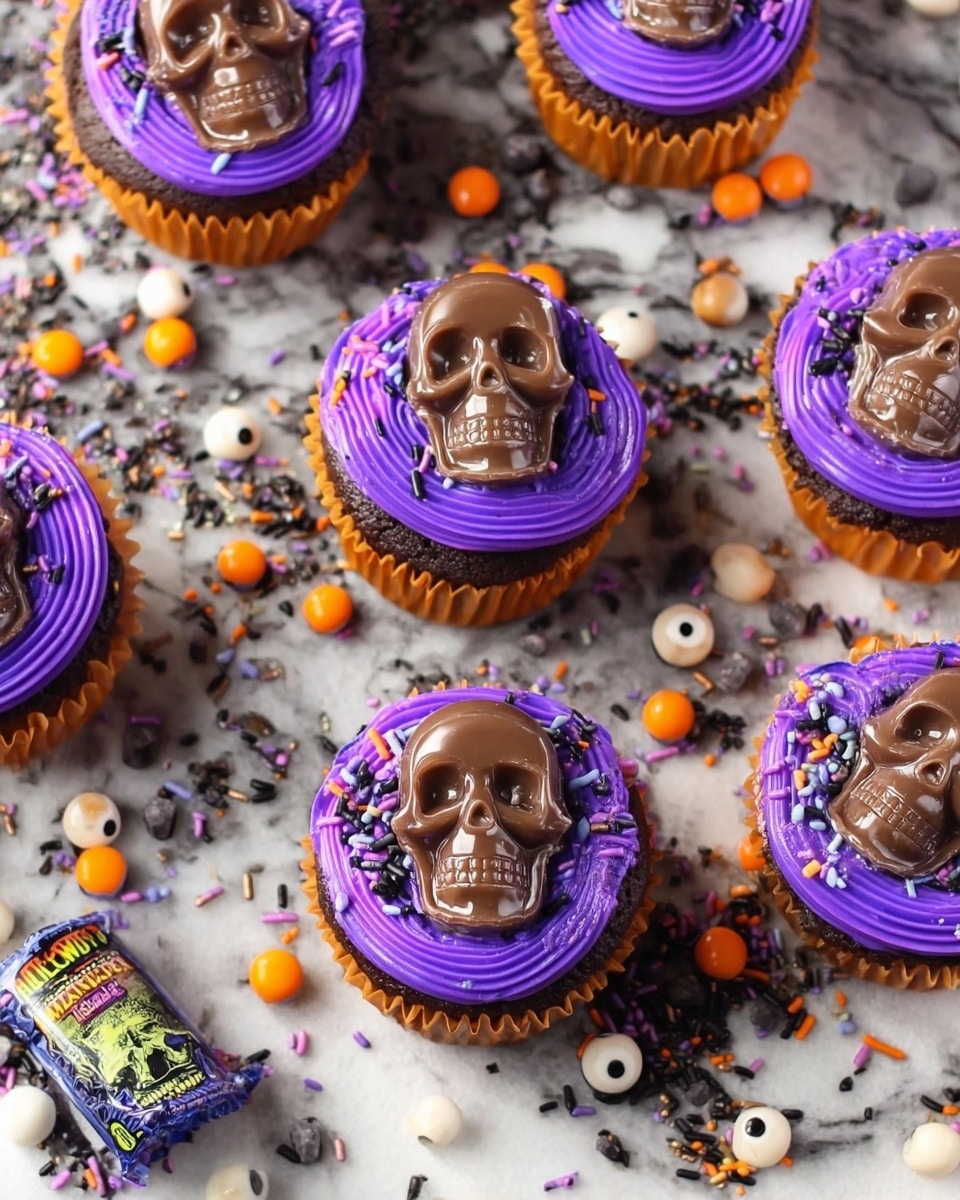
- Eye-Catching Presentation: Those Butterfinger Peanut Butter Cup Skulls instantly turn ordinary cupcakes into a Halloween centerpiece your friends will be talking about.
- Delicious Flavor Combo: The rich chocolate and peanut butter in the skull candies add a decadent punch to sweet vanilla cupcakes.
- Perfect for All Ages: Kids and adults alike will go crazy for these festive treats, making any Halloween gathering extra special.

Ingredients You’ll Need
For this Halloween Skull Cupcakes Recipe, I stick to a few trusty ingredients that come together effortlessly. The key here is the texture and fun toppings, so choosing the right cake mix and frosting can really make a difference.
- Cake Mix: I recommend using your all-time favorite boxed cake mix—vanilla or white works best because it lets the pumpkin spice seasonings and toppings shine.
- Vanilla Buttercream Frosting: Smooth and creamy frosting is essential; the tubs make it easy to work with either piping or simple spreading.
- Color Gel – Purple: Just a dab to tint your frosting a spooky purple hue for some extra Halloween vibe.
- Sprinkles: Use colorful or Halloween-themed sprinkles to add texture and a playful touch to each cupcake.
- Butterfinger Peanut Butter Cup Skulls: This is the star of the show—the perfect spooky candy accent that also packs a peanut buttery crunch.
Variations
I love how this Halloween Skull Cupcakes Recipe gives you the freedom to tweak it based on your pantry or party theme. Over the years, I’ve tried a few twists that made the experience even more special.
- Chocolate Cake Base: Once, I swapped the vanilla cake mix for chocolate and added a hint of cinnamon—gave these skull cupcakes a richer, spookier vibe that my family adored.
- Colored Frosting Fun: If purple isn’t your thing, try black or blood-red gel coloring. It’s ridiculously easy and totally transforms the mood.
- Nut-Free Version: For allergen-sensitive friends, I skip the Butterfinger skulls and use vegan chocolate skull-shaped candies instead, no one can even tell the difference!
- Add a Filling: For a surprise element, I hollow out the cupcake centers and add peanut butter or jelly before frosting—trust me, it’s a game-changer.
How to Make Halloween Skull Cupcakes Recipe
Step 1: Bake Your Cupcakes to Perfection
Start by prepping your cake mix exactly as the box directs, usually with eggs, oil, and water. Once mixed, pour the batter evenly into cupcake liners placed in a muffin tin. Bake them according to the package instructions—don’t open the oven early, or they might sink. I usually check with a toothpick inserted in the center; if it comes out clean, they’re ready. Let them cool completely on a wire rack. This step is key so your frosting stays smooth and won’t melt.
Step 2: Tint and Frost Your Cupcakes
While your cupcakes cool, grab your tubs of vanilla buttercream frosting and stir in a small amount of purple gel coloring until you get that fun Halloween shade you love. You’ll find that gel colors give a richer color than liquid, so start small! Once your cupcakes are totally cool, frost them either by piping swirls with a piping bag or spreading the frosting neatly with a knife or spatula. Either way works—I personally enjoy piping because it looks a bit more polished, but spreading is quick and just as tasty.
Step 3: Add Sprinkles and the Star Skull
After frosting, sprinkle your chosen colorful or Halloween-themed sprinkles generously over each cupcake. Then, gently place one Butterfinger Peanut Butter Cup Skull right in the center of each cupcake. These skull-shaped candies aren’t just a great decoration; they add a crunchy peanut butter surprise that’s incredibly addictive. This finishing touch always gets “oohs” and “aahs” from everyone!
Step 4: Serve and Enjoy!
Now for the best part—digging in! These cupcakes are perfect for your Halloween party table, and if you’re like me, you might find yourself sneaking one (or two) before guests even arrive. They’re that good.
Pro Tips for Making Halloween Skull Cupcakes Recipe
- Cool Completely Before Frosting: Hot cupcakes can melt your frosting and make it slide right off—let them sit at room temp at least 30 minutes.
- Use Gel Food Coloring: I learned that gel colors won’t thin your frosting like liquid dyes do, helping keep that perfect spreadable texture.
- Secure Skulls Before Serving: Gently press the Butterfinger skull just enough so it stays put but doesn’t sink into the frosting too far—it’s less likely to tip over this way.
- Sprinkle Early: I add sprinkles right after frosting so they stick better instead of falling off later during transport or handling.
How to Serve Halloween Skull Cupcakes Recipe
Garnishes
I love to keep garnishes simple—those colorful sprinkles and Butterfinger skulls do all the heavy lifting here! Sometimes I add a light dusting of edible glitter or tiny candy eyes if I want to crank up the spooky factor. It’s fun to experiment with edible decorations but remember, less is often more with these cupcakes.
Side Dishes
Pair these cupcakes with a classic Halloween punch or hot apple cider. On my dessert table, I usually serve them alongside caramel apples, a bowl of mixed candies, or a simple cheese platter for adults. The sweet and salty combo is always a hit!
Creative Ways to Present
I once set up a Halloween dessert “graveyard” with these skull cupcakes as the centerpiece—planted spooky twig “fences” around each cupcake and added small tombstone picks with fun messages. It was a blast and made for easy serving. You could also arrange cupcakes on a black slate platter or a tiered stand decorated with cobwebs and mini pumpkins to wow your guests visually.
Make Ahead and Storage
Storing Leftovers
I store leftover cupcakes in an airtight container at room temperature for up to two days, though they rarely last that long in my house! If your kitchen is warm, refrigerate them, but bring to room temp before serving so the frosting softens up nicely.
Freezing
Freezing works well if you want to prep early! Just bake and cool cupcakes fully, then freeze un-frosted in a single layer on a baking sheet. Once frozen, transfer to a zip freezer bag. When you’re ready, thaw completely, then frost and decorate as usual—this keeps the texture fresh and the frosting perfect.
Reheating
Warm cupcakes briefly in the microwave for about 10 seconds (if unfrosted or frosting can tolerate it) to revive softness. For frosted cupcakes, I prefer to serve them chilled or at room temperature so the decorations stay intact.
FAQs
-
Can I make the Halloween Skull Cupcakes Recipe from scratch instead of using a cake mix?
Absolutely! You can swap out the boxed cake mix for your favorite homemade vanilla or chocolate cupcake recipe. Just make sure the cupcakes are fully cooled before frosting and decorating to get the best results.
-
Where can I find Butterfinger Peanut Butter Cup Skulls?
These seasonal candies usually show up at major grocery stores and big-box retailers during fall, especially near the Halloween aisle. You can also find them online through candy specialty shops or directly from the brand during the season.
-
Can I use a different candy instead of Butterfinger Peanut Butter Cup Skulls?
Yes! Feel free to get creative with other skull-shaped chocolates, gummy candies, or even classic Halloween treats like candy eyeballs. Just choose something that complements the cupcake and frosting flavors well.
-
How long do the cupcakes stay fresh?
Stored in an airtight container at room temperature, these cupcakes stay fresh for about 2 days. Refrigeration can extend that to 3-4 days, though chilling may firm up the frosting.
Final Thoughts
This Halloween Skull Cupcakes Recipe holds a special place in my heart because it brings together easy prep and festive fun in a way that always delights my family and friends. I used to struggle with looking for that perfect Halloween treat that was both simple and impressive, and this recipe totally delivers. If you want a spooky, tasty, and downright fun dessert this year, grab some Butterfinger Skulls and get baking—you’ll love how these cupcakes bring smiles (and maybe a little fright!) to the table.
Print
Halloween Skull Cupcakes Recipe
- Prep Time: 15 minutes
- Cook Time: 20 minutes
- Total Time: 35 minutes
- Yield: 24 cupcakes
- Category: Dessert
- Method: Baking
- Cuisine: American
Description
Celebrate Halloween with these spooky and delicious Skull Cupcakes featuring your favorite cake mix, topped with creamy vanilla buttercream frosting, colorful sprinkles, and Nestlé Butterfinger Peanut Butter Cup Skulls for a festive and fun treat perfect for any Halloween party.
Ingredients
Cake
- 1 box of your favorite Cake Mix (any flavor)
Frosting
- 3 tubs of Vanilla Buttercream Frosting
- Color Gel – Purple, for tinting frosting
Toppings
- Sprinkles, as desired
- 1 – 10.8-ounce bag of Butterfinger Peanut Butter Cups Skulls (24 pieces)
Instructions
- Prepare the Cupcakes: Follow the instructions on the cake mix box using the required ingredients to make the batter. Pour the batter into cupcake liners placed in a cupcake pan and bake according to the package directions. Once baked, remove from the oven and allow cupcakes to cool completely before decorating.
- Frost the Cupcakes: Tint the vanilla buttercream frosting with purple color gel if desired. Using either a piping bag or a knife/frosting spatula, generously frost each cooled cupcake to your preference.
- Add Sprinkles: Decorate the frosted cupcakes with sprinkles to add a festive touch and texture.
- Place Skull Toppers: Gently place one Butterfinger Peanut Butter Cup Skull on the center of each cupcake, pressing slightly to secure it in the frosting.
- Serve and Enjoy: Your Halloween Skull Cupcakes are ready to be devoured! Perfect for a spooky party or festive treat.
Notes
- These cupcakes make a great Halloween party treat with unique skull-shaped Butterfinger Peanut Butter Cup decorations.
- You can customize the cake mix flavor and sprinkle colors to match your Halloween theme.
- If you prefer, you can also tint the frosting with other colors or use piping techniques to create spooky designs.
- Store cupcakes in an airtight container at room temperature for up to 2 days or refrigerate for longer freshness.
Nutrition
- Serving Size: 1 cupcake
- Calories: 310
- Sugar: 25g
- Sodium: 220mg
- Fat: 18g
- Saturated Fat: 7g
- Unsaturated Fat: 9g
- Trans Fat: 0.5g
- Carbohydrates: 36g
- Fiber: 1g
- Protein: 3g
- Cholesterol: 35mg

