
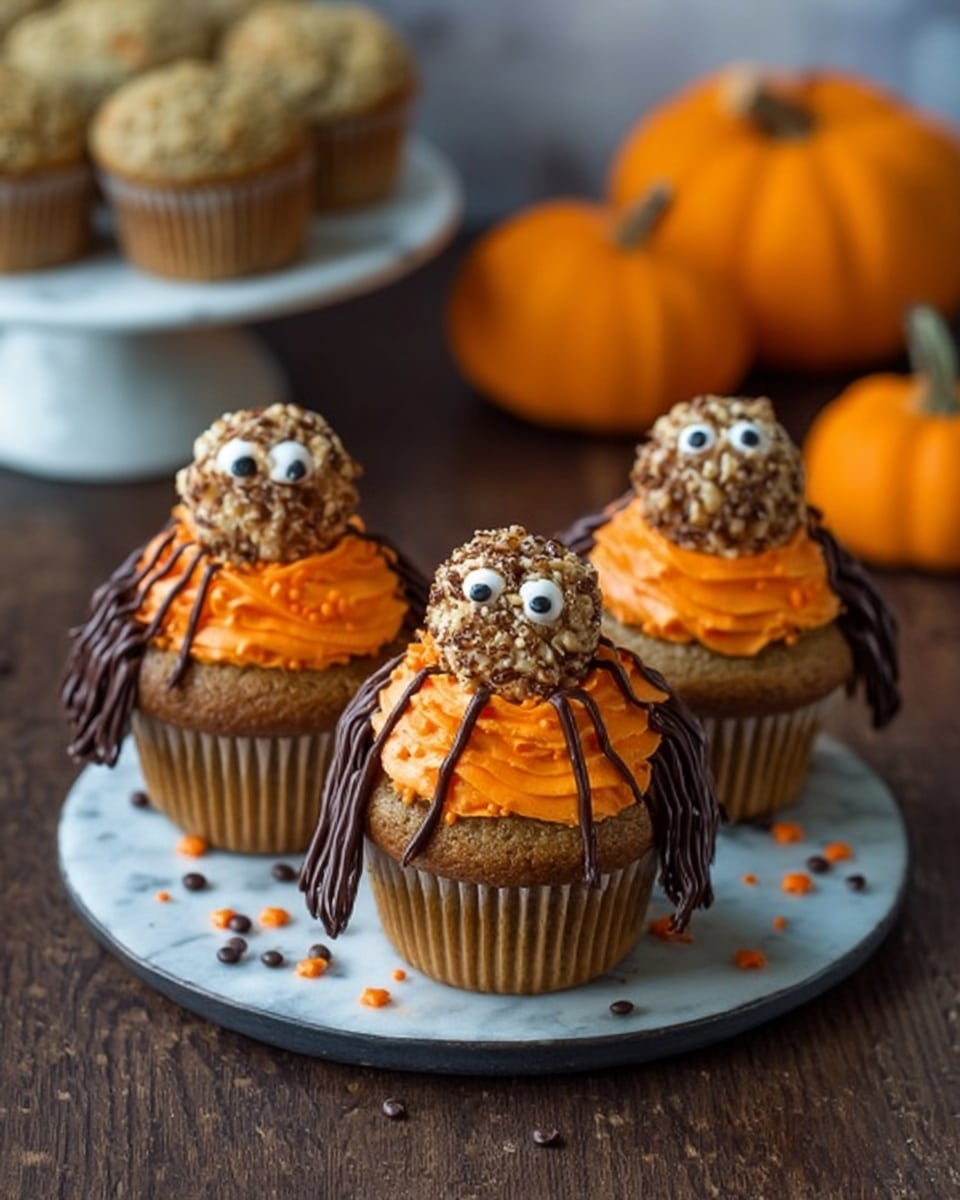
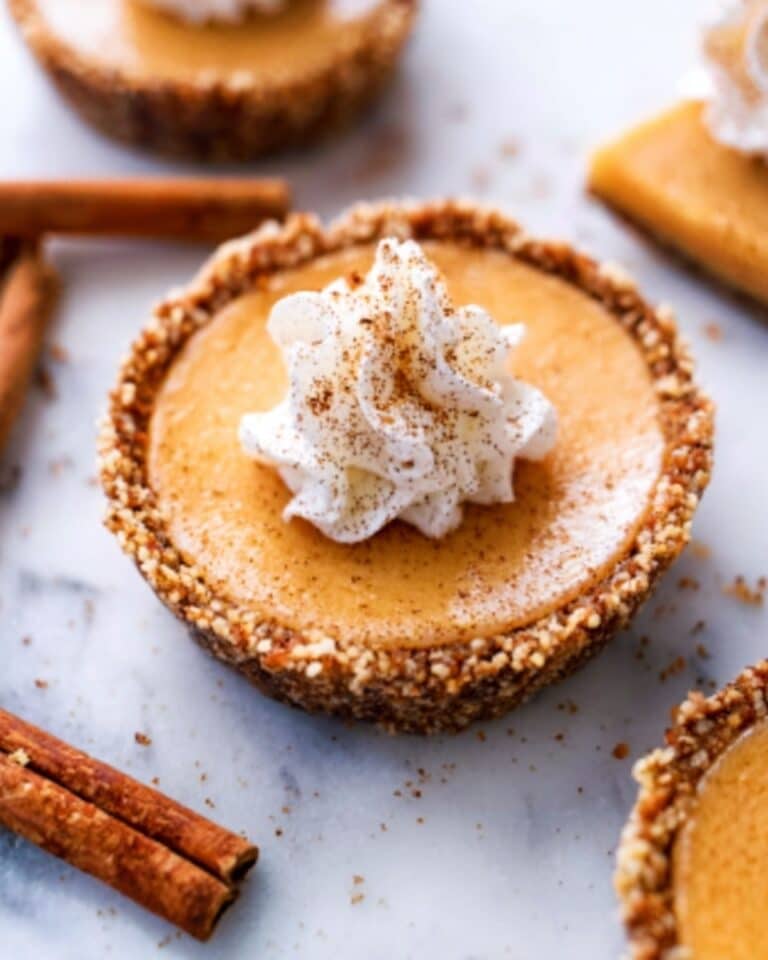
If you’re looking for a fun and festive treat to wow your guests this Halloween, you’ll absolutely adore this Pumpkin Walnut Spider Cupcakes Recipe. These little critters are a total showstopper with their pumpkin-y flavor, crunchy walnut legs, and cute candy eyes. Trust me, once you try these, you’ll be baking them every fall — they’re just that good and surprisingly easy to pull off!
Why You’ll Love This Recipe
- Perfect Fall Flavors: The mix of pumpkin spice and walnuts brings the cozy vibes of autumn in every bite.
- Fun and Festive Presentation: These “spiders” aren’t just tasty—they’re a playful centerpiece for any Halloween get-together.
- Kid-Friendly Baking: The simple steps and candy decorations make this a great recipe to bake with your little ones.
- Make-Ahead Friendly: You can bake and decorate in stages, making party prep a breeze.

Ingredients You’ll Need
The blend of warm spices paired with pumpkin and crunchy walnuts makes these cupcakes burst with flavor. Plus, using candiquik and marshmallows for the spider details keeps the look cute and simple. Here’s a little tip — try to get fresh pumpkin puree for the best texture and flavor in your cupcakes.
- Flour: I prefer all-purpose for that classic cupcake crumb.
- Baking powder & baking soda: These help the cupcakes rise beautifully and stay fluffy.
- Salt: Just a pinch brings out all the flavors.
- Cinnamon & pumpkin pie spice: The heart of pumpkin treats—warm and aromatic.
- Brown sugar: Adds moisture and a rich caramel note.
- Butter: Room temp is key here so it creams nicely with sugar.
- Eggs: Large eggs help bind everything together.
- Pumpkin puree: Choose canned or homemade—it adds moisture and that perfect pumpkin flavor.
- Diamond of California Shelled Walnuts (chopped): For delicious crunch in the batter.
- Large marshmallows: Each cupcake gets one to help form the spider body.
- Diamond of California Shelled Walnuts (finely chopped): These are for the spider legs, so chop them fine for easy placement.
- Chocolate candiquik or almond bark: Melted for holding walnut legs in place.
- Vegetable shortening: Helps melt the candiquik smoothly and gives the frosting its creamy texture.
- Candy eyeballs: These make the spiders cute and kid-approved!
- Vanilla extract: Adds a lovely depth to the frosting.
- Powdered sugar: For sweetening the frosting to just the right consistency.
- Orange and brown gel food coloring: To tint your frosting with those classic fall colors.
Variations
I love that this Pumpkin Walnut Spider Cupcakes Recipe is versatile enough to tweak based on what you have or your taste preferences. Here’s how I’ve personalized it over time to suit different occasions and dietary needs.
- Nut Free Version: I’ve swapped the walnuts for roasted pepitas or omit them altogether, which still makes a tasty, crunchy cupcake.
- Spice Swap: Sometimes I add a pinch of nutmeg or ground ginger for a slightly different fall spice profile that my family adores.
- Vegan Adaptation: Using flax eggs and vegan butter can work if you want a plant-based treat, just watch the baking time closely as it might vary.
- Frosting Flavors: To mix it up, try swapping a bit of the vanilla for maple extract—so good and seasonal.
How to Make Pumpkin Walnut Spider Cupcakes Recipe
Step 1: Prepare Your Batter
Start by preheating your oven to 350°F (175°C). In a bowl, whisk together flour, baking powder, baking soda, salt, cinnamon, and pumpkin pie spice—this way your spices distribute evenly in the cupcake. Then, cream the room temperature butter and brown sugar until light and fluffy. I always use an electric mixer here because it really gets that texture perfect. Next, beat in the eggs one at a time, followed by the vanilla extract and pumpkin puree. Fold in the dry ingredients gently to keep your batter light, and don’t forget those chopped walnuts—they add such a lovely texture!
Step 2: Bake the Cupcakes
Line a muffin tin with cupcake liners and evenly divide the batter into 12 cups. Bake for about 15 minutes, but keep an eye out—the cupcakes are done when a toothpick inserted in the center comes out clean. One trick I learned is to rotate the pan halfway through baking to get an even bake, especially if your oven runs a bit hot on one side. Once baked, let them cool completely on a wire rack before decorating.
Step 3: Make the Frosting and Color It
For the frosting, cream together butter and vegetable shortening until fluffy. Slowly add in powdered sugar, a cup at a time, until the frosting is your preferred sweetness and texture. Stir in vanilla extract and separate your frosting into two bowls. Color one orange and the other brown with gel food coloring. This dual-color frosting will help you bring the spiders and their webs to life brilliantly.
Step 4: Decorate Your Spooky Spiders
Frost each cupcake generously with the orange frosting for a pumpkin base. Next, place a large marshmallow in the center of each cupcake (this will be the spider’s body). Melt your chocolate candiquik with vegetable shortening until smooth and use a small spoon to dab the melted chocolate onto the cupcake around the marshmallow. Quickly stick in finely chopped walnuts on both sides of the marshmallow to form spider legs before the chocolate hardens. Don’t forget to add candy eyeballs to the marshmallow to bring your spider to life! I found that working in small batches helps ensure the chocolate doesn’t set too quickly before placing the legs.
Pro Tips for Making Pumpkin Walnut Spider Cupcakes Recipe
- Freshly Chopped Walnuts: Toasting your walnuts lightly before chopping amps up their flavor and crunch—don’t skip this step if you can.
- Avoid Overmixing: When combining wet and dry ingredients, fold gently to keep cupcakes light and airy.
- Cool Completely Before Decorating: If your cupcakes are even a little warm, the frosting will melt and the decorations won’t stay put.
- Use Gel Food Coloring: It’s the best way to get vivid, bright orange and brown without watering down the frosting.
How to Serve Pumpkin Walnut Spider Cupcakes Recipe
Garnishes
I usually finish these cupcakes with the candy eyeballs to bring the spiders to life — they’re the cutest touch and incredibly kid-friendly. Sometimes I sprinkle a dash of cinnamon on top or add an extra drizzle of melted dark chocolate for a rich contrast. If I’m feeling fancy, a tiny leaf-shaped fondant piece adds a seasonal vibe that guests always ask about.
Side Dishes
These cupcakes pair beautifully with a warm cup of spiced apple cider or pumpkin latte. If it’s a party, I like to serve them alongside a charcuterie board or autumnal fruit platter—think crisp apples, pears, and dried cranberries. The sweetness of the cupcakes balances the savory and tart flavors perfectly.
Creative Ways to Present
One year I arranged these cupcakes on a big tray lined with edible cookie “dirt” made from crushed chocolate cookies, setting a creepy spider web around them using piped frosting. For parties with kids, placing each cupcake inside a mini “cobweb” cupcake liner made from black lace paper made serving super festive and fun. You could even create a Halloween dessert table themed around your pumpkin walnut spiders—think mini pumpkins, candy corn, and cobweb décor!
Make Ahead and Storage
Storing Leftovers
I store leftovers in an airtight container in the fridge, which keeps the cupcakes moist and the frosting firm. They taste great for up to 3 days this way, though the pumpkin flavor is so good, mine never last that long! To avoid soggy walnuts or marshmallows, try to keep the decorated cupcakes separate from any moist ingredients.
Freezing
These cupcakes freeze well if you want to prepare them in advance. I find it easiest to freeze without the marshmallow spiders and walnut legs, then decorate after thawing. When freezing, wrap each cupcake individually in plastic wrap and place in an airtight container or freezer bag. They keep for up to a month without losing flavor.
Reheating
I gently thaw frozen cupcakes at room temperature, then add the marshmallow spiders and walnuts right before serving to keep everything looking fresh and crunchy. If you want a slightly warmed cupcake, pop it in the microwave for 10-15 seconds, but keep frosting and decorations cool to avoid melting.
FAQs
-
Can I use canned pumpkin puree for this Pumpkin Walnut Spider Cupcakes Recipe?
Yes! Canned pumpkin puree is convenient and works perfectly for these cupcakes. Just make sure it’s pure pumpkin, not pumpkin pie filling, to get the right texture and flavor.
-
What’s the best way to melt chocolate candiquik without it seizing?
The key is low, gentle heat either in a microwave using short bursts or over a double boiler. Adding a tablespoon of vegetable shortening helps keep it smooth and glossy, which is critical when attaching the walnut legs.
-
Can I make this recipe nut-free?
Definitely! You can either leave out the walnuts or substitute them with a crunchy seed like pumpkin seeds to keep the texture without nuts.
-
How do I keep the marshmallow spiders from melting on the cupcakes?
Make sure your cupcakes are completely cooled before adding marshmallows. Also, assemble the decorations shortly before serving to keep their shape and prevent melting.
Final Thoughts
This Pumpkin Walnut Spider Cupcakes Recipe has become one of my family’s favorite seasonal treats for all the right reasons. It’s charming, delicious, and a total conversation starter at parties. The combination of pumpkin spice, buttery walnut crunch, and playful spider design brings so much joy to baking and sharing. I highly recommend you give these a try this fall—it’s like Halloween captured in a cupcake, and I promise you won’t regret it!
Print
Pumpkin Walnut Spider Cupcakes Recipe
- Prep Time: 20 minutes
- Cook Time: 15 minutes
- Total Time: 35 minutes
- Yield: 12 cupcakes
- Category: Dessert
- Method: Baking
- Cuisine: American
Description
Delightfully festive Pumpkin Walnut Spider Cupcakes perfect for Halloween parties, featuring moist pumpkin-spiced cake, crunchy walnut spider legs, marshmallow bodies, and candy eyeballs atop creamy orange and brown buttercream frosting.
Ingredients
Cupcakes
- 1 1/4 cups flour
- 1 tsp baking powder
- 1/2 tsp baking soda
- 1/4 tsp salt
- 1/2 tsp cinnamon
- 1 tsp pumpkin pie spice
- 3/4 cup brown sugar
- 1 stick butter (1/2 cup, room temperature)
- 2 large eggs
- 1 cup pumpkin puree
- 1/3 cup Diamond of California Shelled Walnuts (chopped)
Spider Decorations
- Large marshmallows (one for each cupcake)
- Diamond of California Shelled Walnuts (finely chopped for legs)
- 2-3 squares chocolate candiquik or almond bark
- 1 tbsp vegetable shortening (to melt chocolate candiquik)
- Candy eyeballs
Buttercream Frosting
- 2 sticks butter (1 cup, room temperature)
- 3/4 cup vegetable shortening
- 1 tsp vanilla extract
- 6-8 cups powdered sugar
- Orange gel food coloring
- Brown gel food coloring
Instructions
- Prepare the Cupcake Batter: In a medium bowl, whisk together flour, baking powder, baking soda, salt, cinnamon, and pumpkin pie spice until evenly combined. In a separate large bowl, cream together the brown sugar and 1 stick of butter until fluffy. Add eggs one at a time, mixing well after each addition. Stir in the pumpkin puree. Gradually add the dry ingredients to the wet mixture, mixing until just combined. Fold in 1/3 cup chopped walnuts.
- Bake the Cupcakes: Preheat oven to 350°F (175°C). Line a 12-cup muffin tin with cupcake liners. Divide batter evenly among liners, filling about 2/3 full. Bake for 15 minutes or until a toothpick inserted in center comes out clean. Remove and cool completely on a wire rack.
- Make the Buttercream Frosting: In a large bowl, beat together 2 sticks butter and vegetable shortening until smooth. Add vanilla extract. Gradually add powdered sugar, one cup at a time, beating well after each addition until frosting is light and fluffy. Divide frosting into two portions, coloring one portion orange and the other brown using gel food coloring.
- Decorate the Cupcakes: Spread or pipe the orange buttercream over cooled cupcakes. Melt chocolate candiquik with vegetable shortening in a microwave-safe bowl in short increments, stirring until smooth. Using a fork or a small brush, dip or drizzle the melted chocolate onto a baking sheet and immediately press in finely chopped walnuts to create spider legs. Allow to set until firm.
- Assemble the Walnut Spiders: Place a large marshmallow in the center of each frosted cupcake to be the spider’s body. Attach candy eyeballs onto the marshmallow with a bit of frosting or melted chocolate. Arrange the walnut spider legs on either side of the marshmallow to finish the spider decoration.
Notes
- These cupcakes are a fun and creative Halloween treat – perfect for kids’ parties.
- Walnuts add a delightful crunch and complement the pumpkin flavor beautifully.
- Use gel food coloring for vibrant frosting without altering the texture.
- Make sure cupcakes are completely cool before frosting to prevent melting.
- Chocolate candiquik helps set the walnut legs firmly for sturdiness.
- Store cupcakes in an airtight container at room temperature for up to two days.
- Feel free to customize spider decorations with other nuts or candies if desired.
Nutrition
- Serving Size: 1 cupcake
- Calories: 745
- Sugar: 79 g
- Sodium: 352 mg
- Fat: 42 g
- Saturated Fat: 21 g
- Unsaturated Fat: 19 g
- Trans Fat: 3 g
- Carbohydrates: 91 g
- Fiber: 1 g
- Protein: 3 g
- Cholesterol: 92 mg

