
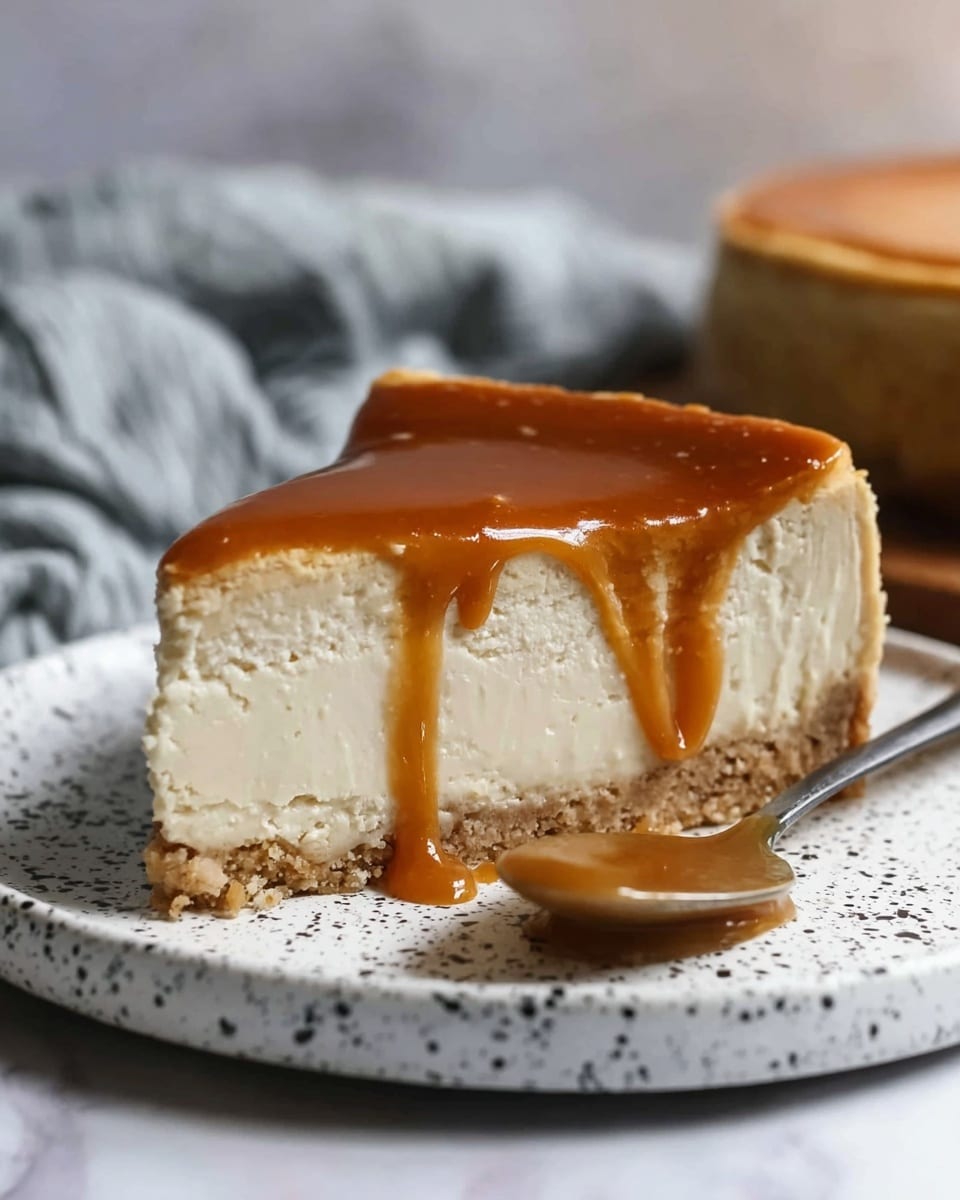
If you’re looking for a cheesecake with a twist that really captures the essence of autumn, this Apple Cider Cheesecake Recipe is an absolute must-try. I absolutely love how the rich cream cheese filling is perfectly balanced by the spiced reduced apple cider, giving it that warm and cozy flavor that’s just irresistible. Whether it’s a holiday gathering or a chilly weekend treat, this cheesecake instantly feels special and comforting.
When I first tried this Apple Cider Cheesecake Recipe, I was amazed by how the mulling spices and tart apple cider create layers of flavor that you don’t get in your typical cheesecake. You’ll find that it tastes fancy enough for company yet straightforward enough to whip up on a casual afternoon. Trust me, once you get the hang of reducing the cider, it becomes one of those recipes you’ll want to keep coming back to year after year.
Why You’ll Love This Recipe
- Unique Flavor: Apple cider reduction adds a beautiful tart and spicy dimension not found in everyday cheesecakes.
- Seasonal Twist: Perfect for fall parties, holidays, or any time you want a dessert with cozy autumn vibes.
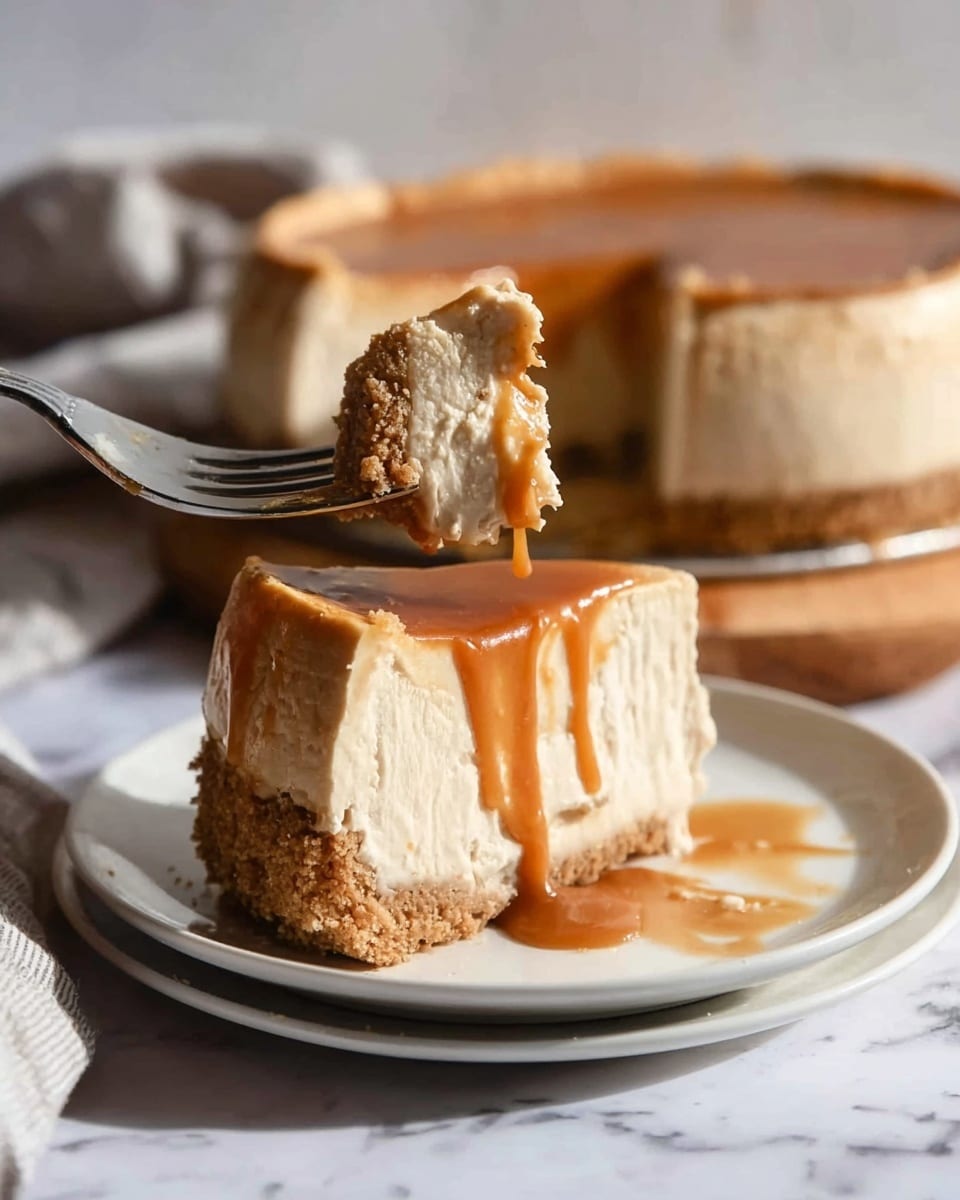
- Creamy, Silky Texture: The cream cheese filling stays smooth and luscious thanks to careful mixing and baking technique.
- Impressive Yet Doable: You’ll wow your guests without needing fancy ingredients or complicated steps.

Ingredients You’ll Need
These ingredients come together to create a balance of buttery crust, creamy luscious filling, and that unforgettable apple cider flavor. Picking fresh cider and a good quality cream cheese makes all the difference here.
- Digestive cookies or graham crackers: These give a sweet, crisp base for your crust; I like digestive cookies for a slightly nutty flavor.
- Butter: Melted butter binds the crust crumbs into a firm foundation.
- Salt: Just a pinch enhances all the flavors without making it salty.
- Powdered sugar: Adds a touch of extra sweetness and smoothness to the crust.
- Fresh apple cider: I recommend Honeycrisp cider for its tartness that cuts through the richness.
- Mulling spices: This blend of cinnamon, cloves, and allspice brings warmth and depth.
- Cream cheese: Three blocks, softened to room temp for a smooth, creamy filling.
- Brown sugar: Adds molasses notes and moisture to the filling.
- Vanilla extract: Pure vanilla elevates the cheesecake’s aroma and flavor.
- Sour cream: Keeps the texture tender and adds a slight tang.
- Cinnamon: Just the right amount to amplify the autumnal spices.
- Large eggs: Bind the filling together without overdoing it.
- All-purpose flour: Helps set the cheesecake without making it dense.
Variations
I love tweaking this Apple Cider Cheesecake Recipe depending on the season or my mood. Feel free to personalize it to your taste or dietary needs—it’s pretty forgiving.
- Ginger twist: Adding a teaspoon of ground ginger to the spices really amps up the warmth—my family couldn’t get enough last winter.
- Nut crust: Swap out some of the cookies for finely chopped toasted pecans or walnuts to bring extra texture and nuttiness.
- Maple syrup: Replace some brown sugar with maple syrup for a sweet, earthy flavor that pairs beautifully with cider.
- Dairy-free option: Use a vegan cream cheese and coconut cream to make it dairy-free, though the texture will be a bit lighter.
How to Make Apple Cider Cheesecake Recipe
Step 1: Reduce the Apple Cider with Mulling Spices
This step sets the flavor tone for your cheesecake. Pour your fresh cider into a large pot, add in the mulling spices, and bring to a boil over high heat. Let it bubble away for about an hour until it thickens to a syrupy consistency—about 1/3 cup remains. Be patient here; this reduction concentrates the flavors and sweetness, creating that magical autumn essence you’ll adore. Once done, remove from heat and let it cool completely before using it in the filling.
Step 2: Prepare and Bake the Crust
Next, grab your food processor and pulse the digestive cookies until they’re fine crumbs. Add melted butter, a pinch of salt, and powdered sugar, then pulse again until the mixture forms moist crumbs that hold together when pressed. Press this mixture firmly into the bottom (and slightly up the sides) of an 8-inch springform pan lined with parchment or wrapped with foil to catch drips. Bake the crust at 350°F for 10 minutes, then let it cool completely. Chilling after baking helps it set firmly, making slicing easier later on.
Step 3: Mix the Cheesecake Filling
With your stand mixer fitted with a paddle attachment, beat the softened cream cheese and brown sugar together until completely smooth and lump-free—don’t rush this part, scraping the bowl down a few times will really help. Add sour cream, vanilla, salt, cinnamon, and that luscious reduced cider, blending well after each addition. Finally, add the eggs one at a time, then gently fold in the flour until just combined—overmixing can cause cracking so a gentle touch is key here.
Step 4: Bake the Cheesecake in a Water Bath
Pour your filling into the cooled crust. Place the springform pan inside a larger 13×9-inch baking dish and fill the outer dish with hot water about halfway up the cheesecake pan’s side—this water bath helps the cheesecake bake evenly and prevents cracking. Bake at 325°F for around 90 minutes, or until the edges are set but the center still jiggles gently when you shake it. This wobble is exactly what you want—it ensures a creamy middle instead of dry and crumbly.
Step 5: Cooling and Chilling
Turn off the oven but leave the cheesecake inside, cracking the oven door open slightly with a wooden spoon for about 30 minutes—this gradual cool-down helps prevent sinking or cracking. Then, close the door for 15 more minutes. Finally, remove the cheesecake and let it cool completely on the counter before refrigerating it for at least 8 hours or overnight. This chilling time is crucial for the flavors to marry and the texture to firm up perfectly.
Pro Tips for Making Apple Cider Cheesecake Recipe
- Softened Cream Cheese: Always bring cream cheese to room temperature for creamy, lump-free batter—it makes a huge difference.
- Slow Cooling: Cooling in a slightly open oven avoids sudden temperature changes that cause cracks in your cheesecake.
- Water Bath Setup: Wrapping your springform pan with foil and placing it in a water bath is a trick I learned to keep the cheesecake moist and crack-free.
- Don’t Overbake: The center should jiggle slightly when you finish baking—it will set during chilling, so resist the urge to bake longer.
How to Serve Apple Cider Cheesecake Recipe
Garnishes
I like to keep the garnishes simple to let the cheesecake shine. A dusting of cinnamon or nutmeg on top adds warmth visually and flavor-wise. Fresh apple slices or a drizzle of caramel sauce also make a lovely garnish—my guests always appreciate the extra touch of sweetness and texture.
Side Dishes
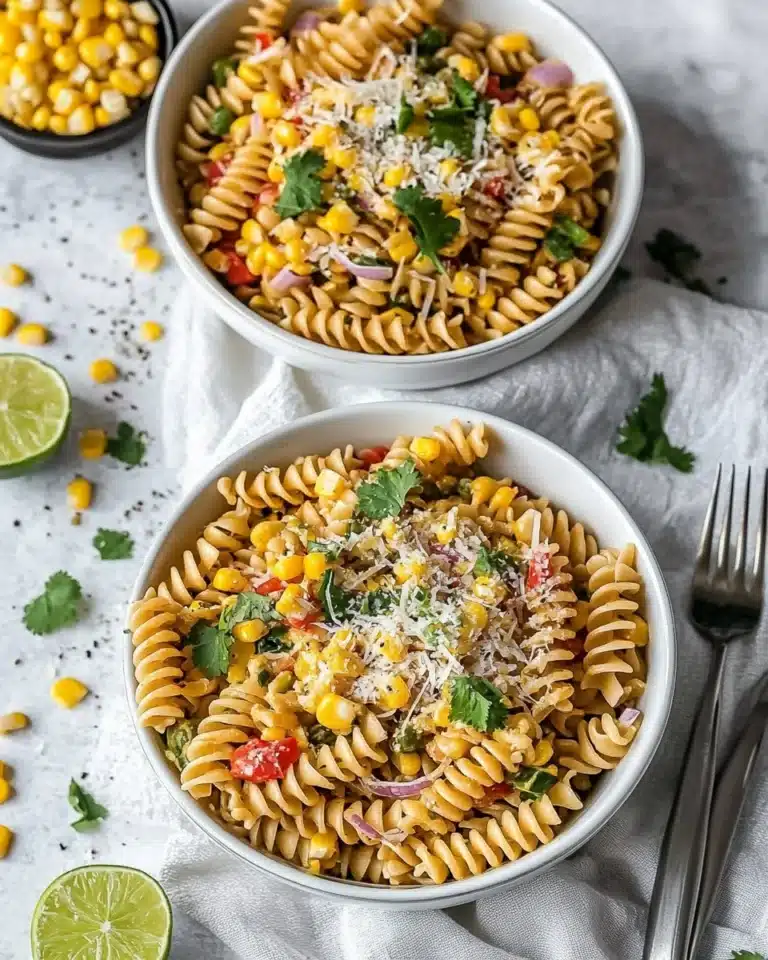
This cheesecake pairs wonderfully with a cup of hot spiced tea or coffee. If you’re serving it after a big meal, something light and fresh like a crisp green salad or spiced roasted nuts on the side works beautifully to balance the richness.
Creative Ways to Present
For special occasions, I’ve served this cheesecake with a swirl of whipped cream piped elegantly on top, finished with a sprinkle of crushed cinnamon graham crackers and a few dried apple chips. It completely elevates the look and brings fun texture contrasts that wow everyone at the table.
Make Ahead and Storage
Storing Leftovers
I keep leftover cheesecake wrapped tightly with plastic wrap and stored in the fridge—it stays wonderfully fresh for up to 4 days. I also place it on a small plate, then cover with a cake dome to avoid absorbing other fridge odors and keep the texture moist.
Freezing
I’ve frozen slices of this Apple Cider Cheesecake before with excellent results. Wrap each slice tightly in plastic wrap and then foil, and freeze for up to 2 months. When ready to eat, thaw overnight in the fridge for best texture.
Reheating
Cheesecake is best enjoyed chilled, but if you like a slightly softer texture, letting the slice sit at room temperature for 20 minutes before serving does the trick. I don’t recommend microwaving because it can affect the texture and cause weeping.
FAQs
-
Can I use store-bought apple cider for this cheesecake?
Absolutely! Just be sure to choose a fresh, unsweetened apple cider with good flavor. Honeycrisp or tart varieties work best because they have more acidity that balances the richness of the cheese.
-
Do I have to boil the cider for an hour?
Reducing the cider for about an hour concentrates the flavors and sweetness, which is key for an intense cider taste in the cheesecake. You can reduce the time slightly if you’re in a pinch, but the flavor won’t be as deep.
-
Can I make this cheesecake ahead of time?
Yes! In fact, letting it chill overnight improves the flavor and texture even more. You can also freeze slices for later, making it a convenient dessert to prepare in advance.
-
What’s the best way to avoid cracks on the cheesecake surface?
Using a water bath during baking and slowly cooling the cheesecake in a slightly open oven prevents sudden temperature changes that cause cracks. Also, don’t overmix the batter or overbake—it should still have a gentle wobble when you take it out.
Final Thoughts
This Apple Cider Cheesecake Recipe holds a special place in my heart because it brings together the best of fall flavors in a creamy, rich dessert that’s surprisingly easy to make. Whether you’re a seasoned baker or trying your hand at cheesecake for the first time, I promise this recipe will make you smile and your guests ask for seconds. So go ahead, give it a try—you’ll enjoy the process and the delicious payoff just as much as I do!
Print
Apple Cider Cheesecake Recipe
- Prep Time: 30 minutes
- Cook Time: 1 hour 45 minutes
- Total Time: 2 hours 15 minutes plus 8 hours chilling
- Yield: 1 tall 9-inch cheesecake (8–10 servings)
- Category: Dessert
- Method: Baking
- Cuisine: American
Description
This Apple Cider Cheesecake combines the tart sweetness of reduced apple cider with a creamy, rich cheesecake filling set atop a buttery digestive cookie crust. Infused with warm mulling spices and cinnamon, it offers a perfect autumn-inspired dessert that balances comforting flavors with a smooth texture, baked to perfection with a classic water bath for a silky finish.
Ingredients
Crust
- 2 cups digestive cookies or graham crackers (270g)
- ½ cup butter, melted (113g)
- ¼ teaspoon salt
- 2 tablespoons powdered sugar
Filling
- 3 cups fresh apple cider (preferably Honeycrisp for tartness)
- Mulling spices (to taste)
- 3 cream cheese bricks, softened and at room temperature (227g each)
- 1 cup brown sugar (220g)
- ½ teaspoon salt
- 2 teaspoons pure vanilla extract
- 1 cup sour cream (240g)
- ⅓ cup reduced apple cider syrup (from above)
- 1 teaspoon cinnamon
- 3 large eggs
- 2 tablespoons all-purpose flour
Instructions
- Reduce the Apple Cider: In a large pot, bring 3 cups of fresh apple cider and mulling spices to a boil over high heat. Boil for about 1 hour until the liquid thickens to a syrup-like consistency and reduces to approximately ⅓ cup. Remove from heat and let it cool completely.
- Preheat Oven and Prepare Crust: Preheat your oven to 350°F (175°C). In a food processor, pulse the digestive cookies or graham crackers until finely ground. Add the melted butter, salt, and powdered sugar, pulsing until the mixture forms wet crumbs.
- Form the Crust: Press the crumb mixture firmly into an 8-inch round springform pan wrapped with foil or an 8-inch wide, 3-inch high cake pan lined with parchment paper and greased. Bake the crust for 10 minutes, then remove it from the oven and allow it to cool before chilling it in the refrigerator.
- Lower Oven Temperature: Reduce the oven temperature to 325°F (163°C) for baking the cheesecake.
- Prepare Cheesecake Filling: Using a stand mixer with a paddle attachment, beat the softened cream cheese and brown sugar until smooth and lump-free, scraping down the sides as needed. Add sour cream, vanilla extract, salt, cinnamon, and the cooled reduced apple cider syrup. Beat again until the mixture is creamy and well combined.
- Add Eggs and Flour: Add the eggs one at a time along with the all-purpose flour. Beat on low just until combined, avoiding overmixing to keep the batter smooth but not aerated.
- Set Up Water Bath: Place your cheesecake pan into a larger 13×9-inch baking pan. Pour hot water into the larger pan until it comes about halfway up the sides of the cheesecake pan, creating a water bath to ensure gentle, even baking.
- Bake the Cheesecake: Pour the filling over the crust and bake for 90 minutes or more. The edges should be set while the center remains slightly wobbly when gently shaken.
- Cool in Oven: Turn off the oven and crack the door open using a wooden spoon. Let the cheesecake cool inside the oven for about 30 minutes to prevent cracking.
- Additional Cooling: Close the oven door and let it cool for another 15 minutes.
- Final Cooling and Chill: Remove the cheesecake from the oven and let it cool to room temperature on the counter. Once cooled, refrigerate the cheesecake for at least 8 hours before serving to allow it to fully set and develop flavor.
Notes
- Using Honeycrisp apple cider adds a nice tartness complementing the sweetness of the cheesecake.
- Wrapping the springform pan with foil prevents water from the bath from seeping into the crust.
- The water bath helps prevent cracks by providing gentle, moist heat during baking.
- Do not overbeat the eggs once added to keep the cheesecake dense and creamy.
- Letting the cheesecake cool gradually in the oven minimizes surface cracking.
- You can customize mulling spices according to taste, commonly including cinnamon sticks, cloves, and star anise.
- Allowing the cheesecake to chill for at least 8 hours or overnight helps the flavors to meld and the texture to firm up for easier slicing.
Nutrition
- Serving Size: 1 slice (1/10 of cheesecake)
- Calories: 370
- Sugar: 25g
- Sodium: 210mg
- Fat: 25g
- Saturated Fat: 15g
- Unsaturated Fat: 9g
- Trans Fat: 0g
- Carbohydrates: 28g
- Fiber: 1g
- Protein: 6g
- Cholesterol: 100mg


