
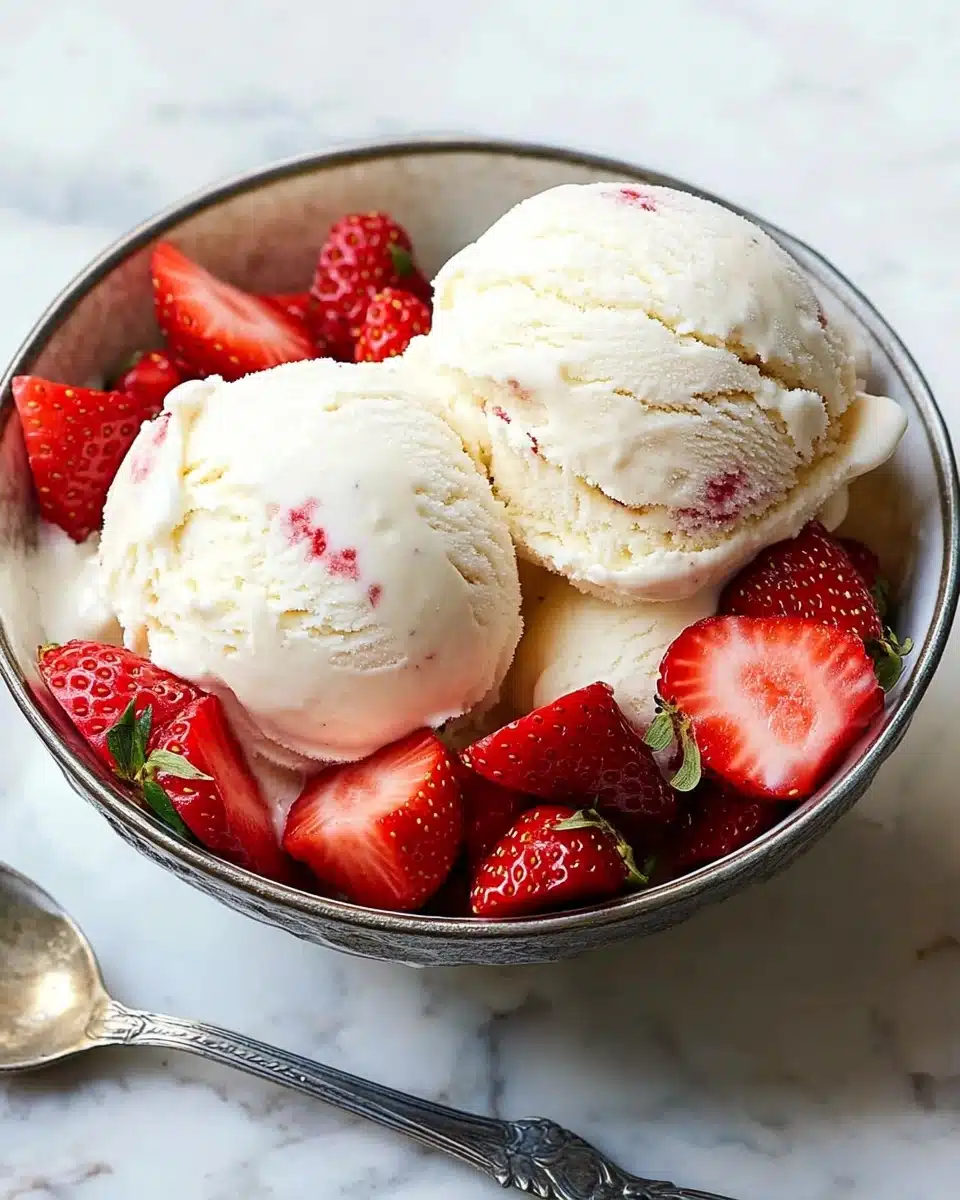
Have you ever dreamed of making the creamiest, silkiest Homemade Vanilla Ice Cream right in your own kitchen—no fuss, just pure, dreamy vanilla bliss? This recipe delivers an old-fashioned favorite that’s surprisingly simple, unbelievably delicious, and perfect for sharing (or not—we won’t judge!).
Why You’ll Love This Recipe
- True Classic Flavor: Real vanilla extract and top-notch ingredients capture that nostalgic, old-school ice cream shop magic in every scoop.
- Ultra Creamy Every Time: The combination of heavy cream and whole milk ensures this Homemade Vanilla Ice Cream is always rich, luscious, and scoopable.
- Ridiculously Easy: Just a few kitchen basics, one saucepan, and an ice cream maker—no eggs, no custard, no stress!
- Perfect Blank Canvas: Enjoy it on its own or customize with all your favorite mix-ins and toppings—the possibilities are endless!

Ingredients You’ll Need
The real beauty of Homemade Vanilla Ice Cream lies in its simplicity—every ingredient matters and comes together to create that unforgettable, classic flavor. Let’s get into what makes each one shine.
- Heavy Cream: The secret to that dreamy, scoopable texture and decadent richness you crave in every bite.
- Whole Milk: Balances out the cream, giving the ice cream body while keeping it light and silky.
- Cane Sugar: Sweetens without overpowering; cane sugar blends in smoothly for a clean, pure taste.
- Vanilla Extract: The star of the show—use pure vanilla for the most aromatic, authentic Homemade Vanilla Ice Cream experience.
- Sea Salt: Just a pinch enhances and deepens all the flavors, making that vanilla sing!
Variations
The charm of Homemade Vanilla Ice Cream is how customizable it is. Whether you’re a purist or an adventurous ice cream lover, there’s plenty of room to experiment with ingredients, textures, and flavors to create your own signature scoop.
- Classic Bean Specks: Swap some—or all—of the vanilla extract for real vanilla bean seeds for a gorgeous, aromatic upgrade.
- Dairy-Free Delight: Use canned coconut milk in place of cream and whole milk for a luscious vegan version with a hint of tropical flair.
- Mix-In Magic: Right at the end of churning, add chunks of brownies, fruit swirls, or toasted nuts for a personalized twist.
- Reduced Sugar: For a lighter batch, try swapping in half the sugar with your favorite natural sweetener—the texture stays creamy and soft.
How to Make Homemade Vanilla Ice Cream
Step 1: Warm the Ice Cream Base
In a medium saucepan, combine the heavy cream, whole milk, cane sugar, vanilla extract, and sea salt. Gently warm the mixture over medium-low heat, whisking frequently for about five minutes—just until the sugar has completely dissolved and everything is nicely blended. No need to let it boil; a gentle heat is key to keeping that flavor fresh and light.
Step 2: Chill Thoroughly
Pour your warm vanilla base into a heatproof bowl, cover it tightly, and let it chill in the refrigerator for at least two hours (or overnight if you’re planning ahead). This step is essential—it cools everything down to perfect churning temperature and helps the flavors meld into pure vanilla paradise.
Step 3: Churn to Perfection
When your base is nice and cold, whisk it one more time and pour into your ice cream maker. Churn according to your machine’s instructions—usually about 20 to 30 minutes. The Homemade Vanilla Ice Cream will thicken into a soft-serve consistency, ready for immediate enjoyment or further freezing.
Step 4: Freeze for a Firmer Scoop
For a classic, scoopable texture, transfer the churned ice cream into an airtight container and freeze for 2 to 4 hours. This last step turns your Homemade Vanilla Ice Cream from silky soft-serve to the ultimate, old-fashioned treat, perfect for cones and sundaes.
Pro Tips for Making Homemade Vanilla Ice Cream
- Chill for Success: Letting your ice cream base get fully cold (don’t rush this!) is the secret to smooth, creamy ice cream with zero ice crystals.
- Vanilla Matters: Invest in high-quality pure vanilla extract for the richest aroma and the most memorable flavor—skip imitation if you can.
- Avoid Overchurning: Keep an eye on your ice cream for that just-right, soft-serve consistency so it doesn’t turn grainy or buttery.
- Scoopability Hack: If your Homemade Vanilla Ice Cream is too hard straight from the freezer, let it sit out for a few minutes and use a warm ice cream scoop for picture-perfect servings every time.
How to Serve Homemade Vanilla Ice Cream
Garnishes
This ice cream absolutely loves a good topping—dress it up with a drizzle of homemade chocolate sauce, a sprinkle of toasted nuts, fresh berries, or even a flurry of your favorite rainbow sprinkles. You can keep it unfussy, or pile it high with as many garnishes as your heart desires!
Side Dishes
Homemade Vanilla Ice Cream is a natural companion for warm desserts—think apple pie, skillet brownies, or peach cobbler. It also makes an irresistible float with cold brew coffee or classic root beer for a retro twist.
Creative Ways to Present
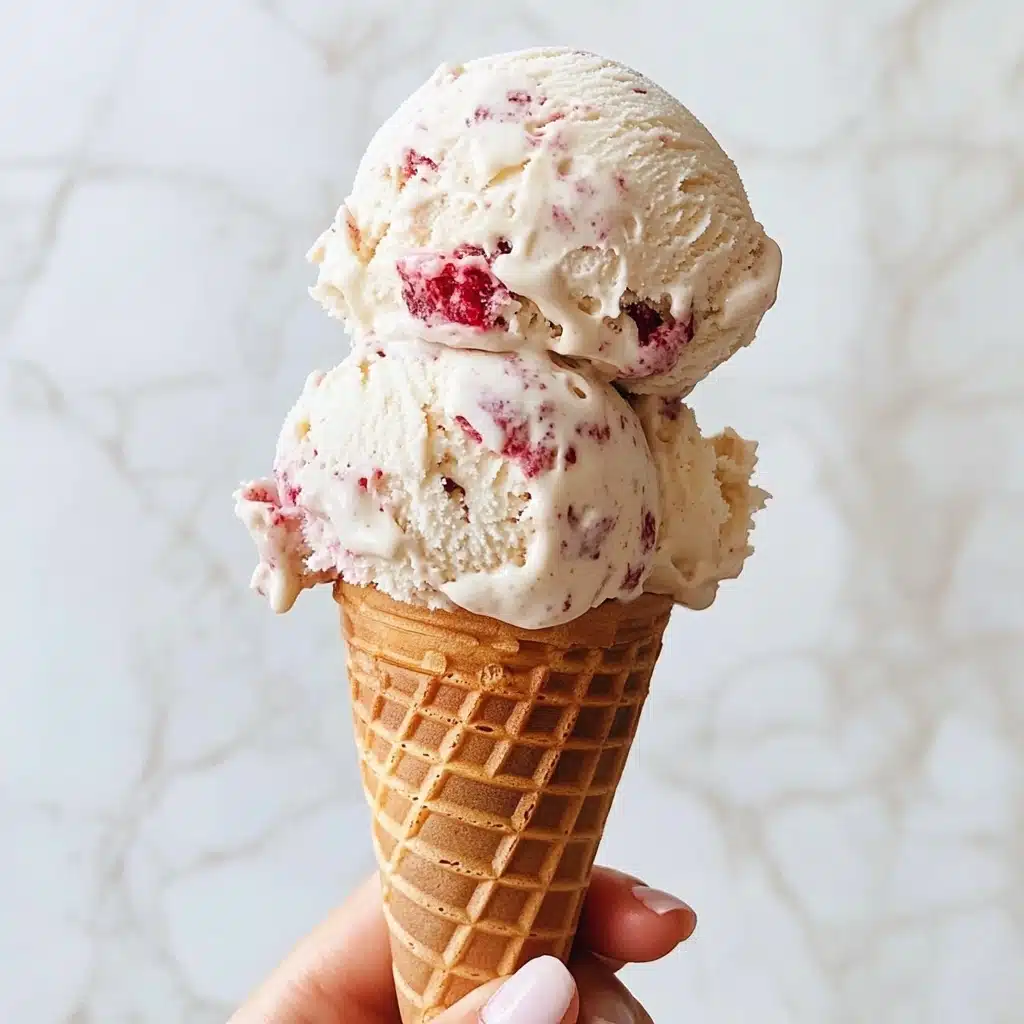
Why not get playful? Scoop your cold, creamy vanilla into waffle cones, pile tiny balls into mini mason jars, or layer it in parfait glasses with cake and berries for an instant trifle. You can even pre-scoop the ice cream on baking sheets and freeze for quick, party-perfect servings.
Make Ahead and Storage
Storing Leftovers
To keep your Homemade Vanilla Ice Cream at its best, store it in an airtight container tucked deep in the freezer. Press a piece of parchment directly on the surface before sealing to help fend off pesky freezer burn and maintain that silky-smooth texture.
Freezing
Homemade Vanilla Ice Cream freezes beautifully for up to a month. Just be sure to use a well-sealed, freezer-safe container and avoid storing it near strong-smelling foods (ice cream is a flavor sponge!).
Reheating
No microwave needed—just let your ice cream sit at room temperature for 5–10 minutes before scooping. If you love super-soft ice cream, give it a gentle stir once it starts to melt for the perfect, spoonable treat!
FAQs
-
Can I make this Homemade Vanilla Ice Cream without an ice cream maker?
Absolutely! If you don’t have an ice cream maker, pour the chilled base into a shallow pan, freeze until the edges start to set, then vigorously whisk or use a hand mixer every 30–45 minutes until totally frozen—this helps break up ice crystals and keeps it creamy.
-
Does this recipe work with alternative milks?
Yes! Full-fat coconut milk works especially well for a non-dairy version, but absolutely feel free to experiment with oat, almond, or cashew milks. Just know that the texture and richness will vary—homemade magic, your style.
-
How do I avoid icy or grainy ice cream?
For creamy perfection, always chill the base thoroughly before churning and don’t rush the freezing step. Avoid reducing the sugar too much—sugar not only sweetens, but also helps keep the ice cream soft and smooth.
-
Can I add mix-ins like cookies or fruit to Homemade Vanilla Ice Cream?
Definitely! Add chocolate chips, cookie crumbs, chopped fruit, or swirls of jam during the last minute or two of churning, or gently fold them in by hand after churning for perfect distribution without sinking.
Final Thoughts
I hope you’re as excited as I am to whip up a batch (or three!) of this Homemade Vanilla Ice Cream. There’s just nothing quite like that first, impossibly creamy scoop—so gather your ingredients, invite some friends, and make sweet memories, one spoonful at a time.
Print
Homemade Vanilla Ice Cream Recipe
- Prep Time: 30 minutes
- Total Time: 2 hours 30 minutes
- Yield: 1 quart
- Category: No-Cook
- Method: No-Cook
Description
Indulge in the creamy goodness of Homemade Ice Cream made with simple ingredients and a touch of vanilla. This classic dessert is perfect for hot summer days or anytime you crave a frozen treat.
Ingredients
Ice Cream Base:
- 1 1/2 cups heavy cream
- 1 1/2 cups whole milk
- 2/3 cup cane sugar
- 2 teaspoons vanilla extract
- 1/8 teaspoon sea salt
Instructions
- Mix the Base: In a medium saucepan, combine the cream, milk, sugar, vanilla, and salt. Warm over medium-low heat, whisking often, for 5 minutes, or until the sugar dissolves and the mixture is warmed through.
- Chill: Pour into a heatproof bowl, cover, and chill for 2 hours or overnight.
- Whisk and Churn: Remove the chilled ice cream base from the fridge and whisk well. Churn in an ice cream maker according to the manufacturer’s instructions, typically 20 to 30 minutes.
- Freeze: Transfer the churned ice cream to an airtight container and freeze for 2 to 4 hours before serving.
- Store: Store in the freezer for up to a month. Let the ice cream sit at room temperature for a few minutes to soften if too firm.
Notes
- Makes 1 quart
Nutrition
- Serving Size: 1 serving
- Calories: 320
- Sugar: 22g
- Sodium: 85mg
- Fat: 24g
- Saturated Fat: 15g
- Unsaturated Fat: 8g
- Trans Fat: 0g
- Carbohydrates: 25g
- Fiber: 0g
- Protein: 3g
- Cholesterol: 90mg


