
If you’re looking for a show-stopping Halloween treat that’s as fun to make as it is to eat, then you’ve got to try this Melted Witch Cupcakes Recipe. I’m serious when I say these cupcakes make any spooky party instantly better—they’re irresistibly rich, chocolaty, and have this delightfully creamy whipped topping that’s just begging for those cute witchy decorations. Stick with me through this post because I’m sharing all my favorite tips to make you look like a baking wizard in your kitchen!
Why You’ll Love This Recipe
- Super Easy to Make: The cake mix and pudding combo makes the batter extra moist and quick to prepare, so you can focus on the fun parts—decorating!
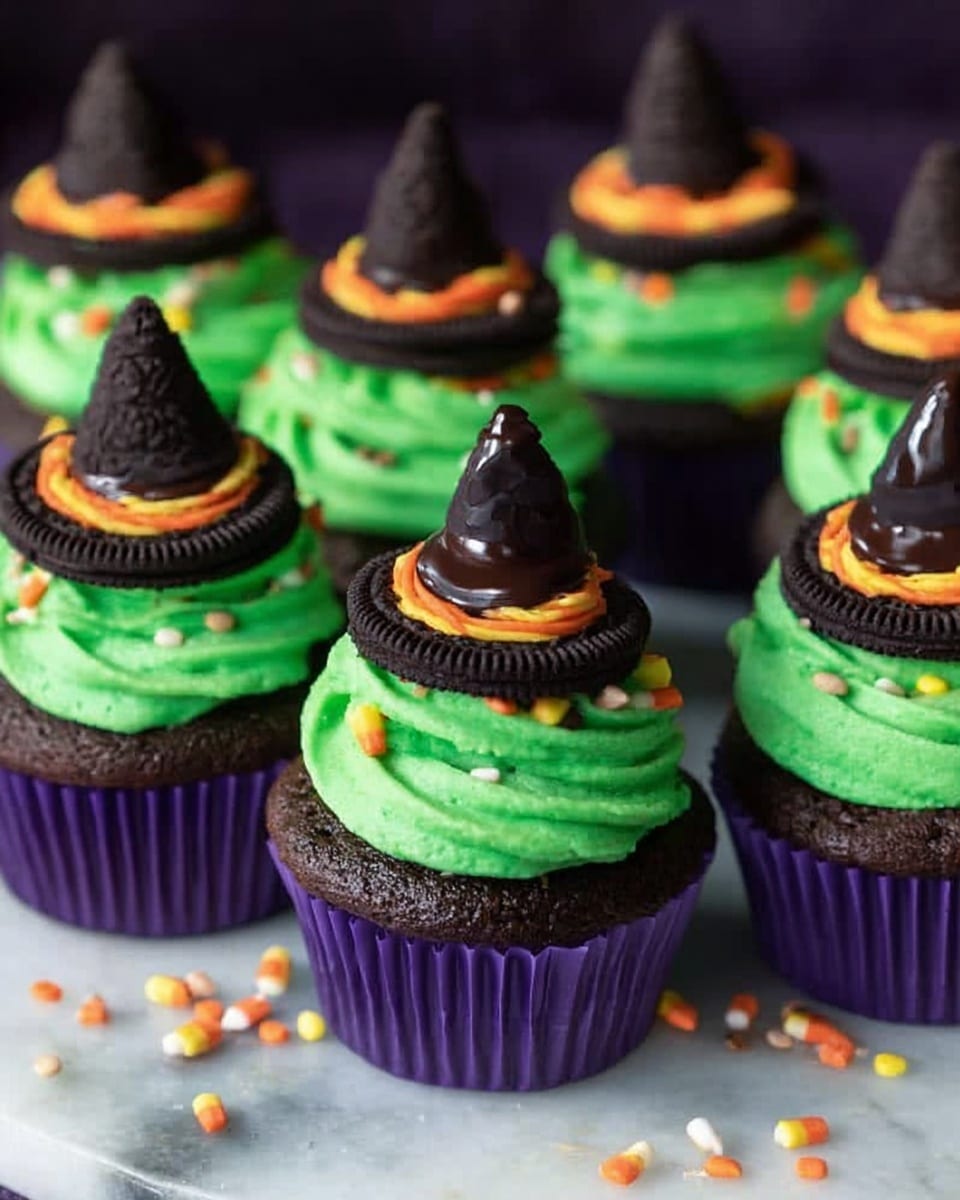
- Fun and Festive Design: The ‘melted witch’ look captures everyone’s attention and is perfect for Halloween parties or gatherings with kids.
- Rich, Chocolate-Packed Flavor: My family goes crazy for how deeply chocolatey and creamy these cupcakes taste.
- Customizable Toppings: You can easily switch up the decorations to suit your style or the occasion, making these cupcakes a year-round hit.

Ingredients You’ll Need
These ingredients come together to create a rich, fudgy cake base with a luscious whipped topping that feels as decadent as it sounds. Keep an eye out for quality chocolate chips and fresh cream—they really elevate the final product.
- Duncan Hines Dark Chocolate Fudge Cake Mix: Using a boxed mix speeds things up without skimping on flavor.
- Jell-O Instant Chocolate Fudge Pudding: Adds extra moisture and fudginess to the cupcakes.
- Eggs: They bind everything together and help with that perfect cake texture.
- Sour Cream: Gives tangy richness that keeps the cake tender and moist.
- Vegetable Oil: Keeps the cupcakes super moist and soft.
- Milk: Adds a bit of fluid to loosen the batter just enough.
- Vanilla Extract: Such a secret weapon for flavor depth.
- Sea Salt: Enhances the chocolate flavors without overpowering.
- Mini Chocolate Chips: For bursts of chocolate goodness in every bite.
- Heavy Cream: Essential for whipping into the luscious, fluffy topping.
- Confectioners’ Sugar: Sweetens the whipped cream just right, without graininess.
- Instant Vanilla Pudding Powder: Stabilizes the whipped cream and adds vanilla flavor.
- Green Gel Food Coloring: For that perfect witchy green tint on your frosting.
- Oreo Thins: These become the “melted” hat brims — so fun and crunchy!
- Hershey Kisses: Transform these into witch hats with a little black icing magic.
- Black Icing or Frosting: Perfect for the detailing on your miniature witches.
- Grape Gummies: To mimic creepy little witches’ fingers poking out—trust me, people love them!
- Black and White Paper Straws: Cut into thirds for the broomsticks—you’ll love the whimsical touch they add.
Variations
I love playing around with the decorations and sometimes even swapping out ingredients to suit different tastes or dietary needs. You can totally make these cupcakes your own—get creative!
- Variation: I once tried using peppermint extract instead of vanilla for a festive holiday twist. It was a hit at the office party!
- Variation: For a dairy-free version, you can swap the heavy cream for coconut cream and use dairy-free chocolate chips.
- Variation: Switch out the Oreo Thins for gluten-free cookies if you’re baking for friends with sensitivities.
- Variation: Try adding a little cinnamon or chili powder into the batter for a spicy kick that surprises.
How to Make Melted Witch Cupcakes Recipe
Step 1: Whip Up the Fudgy Cake Batter
Start by preheating your oven to 350°F (175°C) and lining your cupcake pan with liners. In a large bowl, combine the dark chocolate fudge cake mix and instant chocolate pudding mix—this is the base of our super-moist cake. Add in the eggs, sour cream, vegetable oil, milk, vanilla extract, and sea salt. Mix until just combined; the batter will be thick and luscious. Fold in the mini chocolate chips very gently. Overmixing can toughen the cake, so stop as soon as it’s incorporated.
Step 2: Time to Bake
Scoop the batter evenly into your cupcake liners—about ¾ full works best to allow room for rising. Bake for around 22 minutes or until a toothpick inserted in the center comes out mostly clean (a few moist crumbs are perfect). When you pull them out, let the cupcakes cool completely before frosting—trust me, this step is key to keeping your whipped topping fluffy and not melting off.
Step 3: Make the Witchy Whipped Cream Topping
In a chilled bowl, whisk the heavy cream with confectioners’ sugar and instant vanilla pudding powder until stiff peaks form. Adding pudding powder here is a game changer—it helps stabilize the whipped cream so your witches won’t droop. Add green gel food coloring little by little until you get that perfect spooky green shade. I use gel over liquid every time to keep the whipped cream thick and not watery.
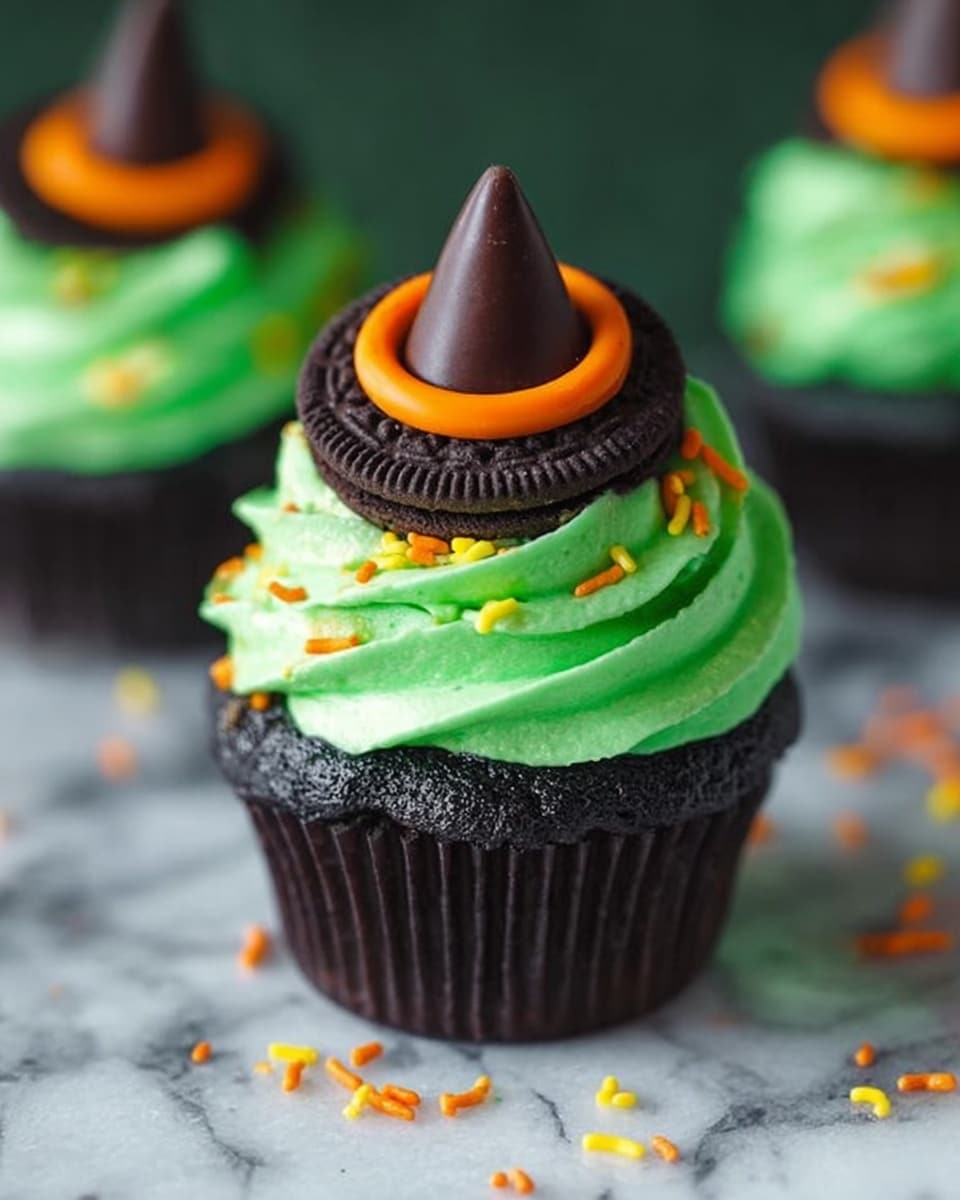
Step 4: Assemble the Melted Witch Look
Pipe generous swirls of the tinted whipped cream onto each cooled cupcake. Place an Oreo Thin slightly pressed into the cream for the “hat brim.” Next, top each Oreo with a Hershey Kiss, and use black icing to create the classic witch hat details. For a little spooky fun, add grape gummies poking out for “witch fingers” and use pieces of black and white paper straws as broomsticks stuck into the side. This is the part where you get to channel your inner artist—and everyone will ooh and ahh.
Pro Tips for Making Melted Witch Cupcakes Recipe
- Don’t Skip the Pudding Mix: It makes the cake so moist and fudgy, and without it, the cupcakes won’t have that melt-in-your-mouth feel.
- Chill Your Bowls and Tools: Cold equipment helps the whipped cream get to stiff peaks faster and keeps it stable longer.
- Use Gel Food Coloring: It won’t water down your whipped cream, so you get bold color without losing texture.
- Let Cupcakes Cool Completely: Frosting on warm cupcakes melts and gets watery—patience is your friend here!
How to Serve Melted Witch Cupcakes Recipe
Garnishes
I personally stick with the grape gummies and paper straw broomsticks because they add a playful texture and extra Halloween flair. You can always swap the gummies out for candy eyeballs or edible glitter for a more dramatic effect. Black icing always does the trick for detailing—the contrast looks sharp and spooky.
Side Dishes
When I serve these at parties, I like pairing them with warm apple cider or a pumpkin spice latte to complement the rich chocolate flavors. They’re also fantastic alongside simple vanilla or cinnamon cookies if you want to offer variety without competing flavors.
Creative Ways to Present
For Halloween parties, I’ve arranged these cupcakes on a black tray lined with fake spider webs and plastic spiders—it elevates the spooky vibe big time. Another fun idea is placing them on tiered cake stands with orange and purple napkins underneath for a pop of color. If you’re gifting them, wrap each cupcake in a cute treat bag with a Halloween tag—it’s a hit with kids and adults alike!
Make Ahead and Storage
Storing Leftovers
I keep leftover Melted Witch Cupcakes in an airtight container in the fridge where they last beautifully for about 3 days. The whipped cream topping holds up pretty well, especially with the pudding powder stabilizer, but I always recommend enjoying sooner rather than later for best texture.
Freezing
You can freeze the unfrosted cupcakes easily by wrapping them tightly in plastic wrap and then placing them in a freezer bag. When you’re ready to serve, thaw them overnight in the fridge and then frost and decorate fresh. Freezing topped cupcakes doesn’t quite work well because the whipped cream can separate and lose its texture.
Reheating
If you want slightly warm cupcakes (I sometimes like to warm mine), take them out of the fridge and let them come to room temperature before eating. Avoid microwaving once frosted, as it will melt the whipped cream and decorations. Room temperature is perfect for flavor and texture to shine through.
FAQs
-
Can I make Melted Witch Cupcakes Recipe from scratch without a cake mix?
Absolutely! While this recipe uses a boxed mix for convenience and consistent results, you can substitute your favorite chocolate cake recipe. Just make sure it’s moist and rich to complement the pudding mix’s texture and the whimsical decorations.
-
How do I keep the whipped cream frosting from melting?
Chill your mixing tools, whip the cream with instant pudding powder, and keep the cupcakes refrigerated until just before serving. Avoid letting them sit out for long, especially in warm environments.
-
Can I use different candies for decorating?
Definitely! While grape gummies and Hershey Kisses create the classic witch look, feel free to get creative with candies like candy corn, licorice strings, or edible glitter to match your Halloween theme.
-
Is this recipe kid-friendly for baking together?
For sure! The assembly and decorating steps are especially fun for kids. Just supervise oven use and help with piping the whipped cream if needed. Baking together makes this recipe even more memorable.
Final Thoughts
Honestly, the Melted Witch Cupcakes Recipe is one I keep coming back to every Halloween because it’s a delightful mix of show-stopping aesthetics and irresistible flavor. Whether you’re baking for a crowd or just delighting your family, these cupcakes bring a bit of magic and a lot of chocolate joy to the table. I can’t recommend them enough—you’re going to love making (and eating) every melted, witchy bite!
Print
Melted Witch Cupcakes Recipe
- Prep Time: 30 min
- Cook Time: 22 min
- Total Time: 52 min
- Yield: 24 cupcakes
- Category: Dessert
- Method: Baking
- Cuisine: American
Description
Melted Witch Cupcakes are a spooky and delicious Halloween treat combining rich dark chocolate fudge cake with creamy chocolate pudding and a green witchy whipped topping. These cupcakes are topped with Oreos, Hershey Kisses, grape gummies, and black icing to create a fun, melted witch design perfect for Halloween parties.
Ingredients
For the Cupcakes
- 1 Box Duncan Hines Dark Chocolate Fudge Cake Mix
- 3.9 oz package Jell-O Instant Chocolate Fudge Pudding
- 4 eggs
- 1 cup sour cream
- ¾ cup vegetable oil
- ½ cup milk
- 1 tbsp vanilla extract
- ¼ tsp sea salt
- 1½ cup mini chocolate chips
For the Topping
- 2 cups heavy cream
- ½ cup confectioners’ sugar
- ¼ cup instant vanilla pudding powder
- 1 tsp green gel food coloring
For Decoration
- 24 Oreo Thins
- 24 Hershey Kisses
- 48 grape gummies
- 8 black and white paper straws (cut into thirds)
- Black icing or frosting
Instructions
- Prepare the Cupcake Batter: In a large mixing bowl, combine the Duncan Hines Dark Chocolate Fudge Cake Mix and Jell-O Instant Chocolate Fudge Pudding. Add eggs, sour cream, vegetable oil, milk, vanilla extract, and sea salt. Mix until the batter is smooth and well combined.
- Fold in Chocolate Chips: Gently fold in the mini chocolate chips into the cupcake batter for added chocolate texture.
- Bake the Cupcakes: Preheat your oven to 350°F (177°C). Line a cupcake pan with liners and fill each about 2/3 full with batter. Bake for approximately 22 minutes or until a toothpick inserted comes out clean. Let them cool completely on a wire rack.
- Prepare the Witchy Green Whipped Topping: In a mixing bowl, whip the heavy cream until soft peaks form. Add confectioners’ sugar and instant vanilla pudding powder, then continue whipping until stiff peaks form. Gently fold in green gel food coloring to achieve the desired witchy green color.
- Assemble the Cupcakes: Place an Oreo Thin on top of each cooled cupcake as the witch’s hat brim. Pipe or spread the green whipped topping over the cupcake to resemble melting witch’s hair or melted wax.
- Add Decoration: Place a Hershey Kiss on top of each Oreo Thin to form the witch’s hat point. Use black icing or frosting to add melted wax drips down the cupcake and decorate with grape gummies as embellishments. Insert pieces of the cut paper straws to stand as broomsticks or hat details.
- Final Touches: Chill the cupcakes for at least 30 minutes to set the whipped topping and decorations before serving. Enjoy your fun and festive Melted Witch Cupcakes!
Notes
- These Melted Witch Cupcakes are fun, cute, and delicious! They’re easy to build and the perfect way to bring the Halloween spirit to life at your party!
- Make sure the cupcakes are completely cooled before adding the whipped topping to avoid melting.
- Use gel food coloring sparingly to achieve a vibrant green without altering the consistency.
- Chilling the cupcakes before serving helps the whipped cream topping stay firm.
- If preferred, substitute dairy ingredients with non-dairy alternatives to make it dairy-free.
Nutrition
- Serving Size: 1 cupcake
- Calories: 344 kcal
- Sugar: 22 g
- Sodium: 278 mg
- Fat: 24 g
- Saturated Fat: 14 g
- Unsaturated Fat: 8 g
- Trans Fat: 0 g
- Carbohydrates: 31 g
- Fiber: 1 g
- Protein: 3 g
- Cholesterol: 63 mg


