
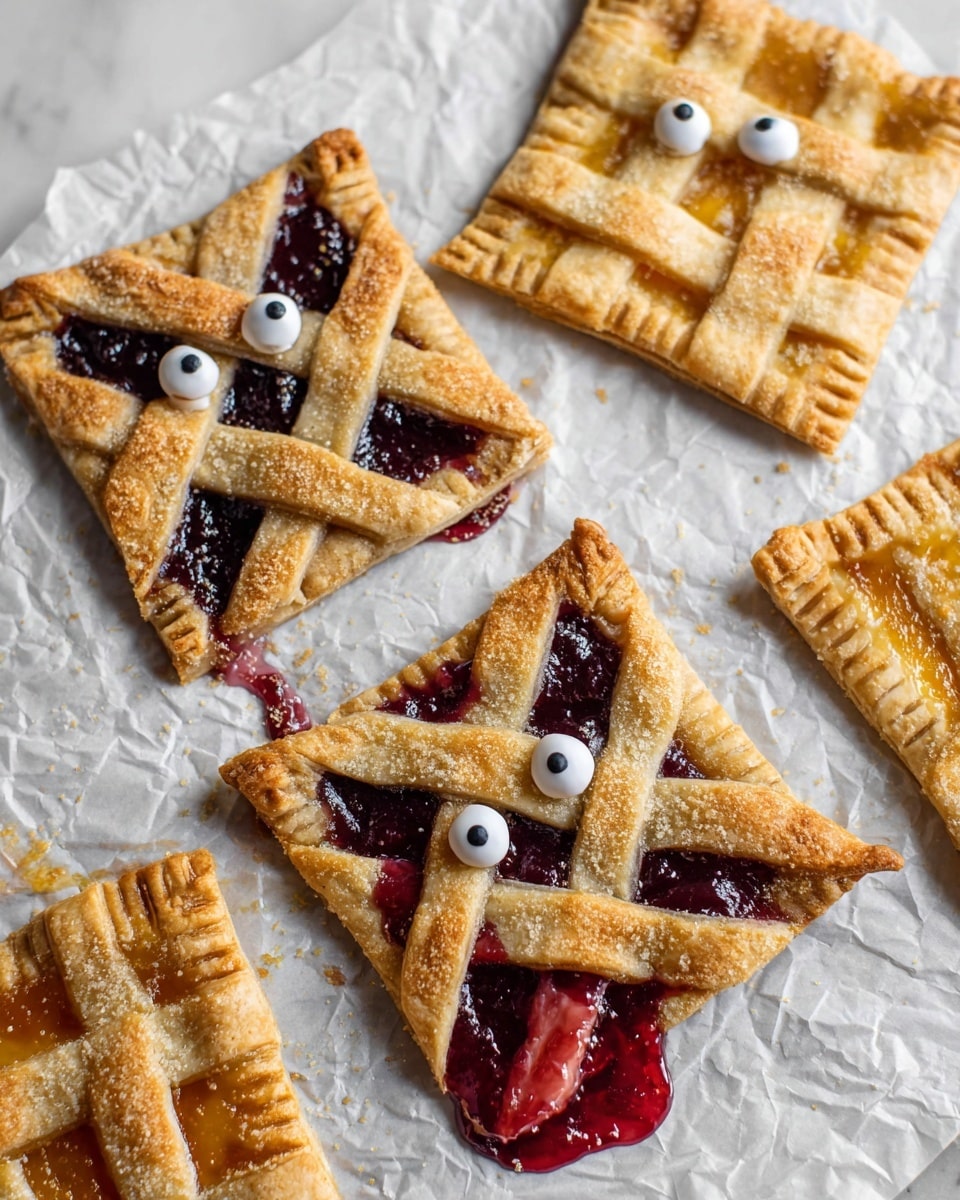
If you’re on the hunt for a festive, fun-to-make treat that’ll wow your friends and family, I have just the thing for you: Mummy Hand Pies Recipe. These charming little pies are as adorable as they are delicious, perfect for Halloween or any spooky occasion. I absolutely love how they come together with crispy, flaky crusts wrapped like mummy bandages and jammy fruit filling inside. Trust me, once you try these, you’ll be making them every fall!
Why You’ll Love This Recipe
- Super Cute and Themed: These pies look like little mummies with candy eyes, making them a hit with kids and adults alike.
- Easy to Make: No fancy techniques—just simple steps and basic ingredients you probably already have around.
- Customizable Filling: Use your favorite jam or preserves, so you can tailor the sweetness and flavor to your liking.
- Great for Snack Time or Parties: These handheld pies are perfect for on-the-go snacking or as a fun dessert at gatherings.

Ingredients You’ll Need
Every ingredient in this Mummy Hand Pies Recipe plays a part in creating that perfect balance of flaky crust and fruity sweetness. I like to use a good-quality pre-made pie dough because it saves time and gives a reliable, buttery texture—plus, the jam you pick makes all the difference, so choose something flavorful.
- Pie dough: A double crust package works best; it’s buttery and easy to roll out. Let it come to room temp for handling.
- Jam or fruit preserves: Pick your favorite—strawberry, raspberry, or apricot all work well and bring a nice contrast to the crust.
- Egg: You’ll use it for the egg wash, which helps the crust brown beautifully and acts as glue for the strips.
- Water: Just a splash to loosen the egg for the wash.
- Sugar: Combined with cinnamon for a sweet, crunchy topping that adds a lovely spice kick.
- Ground cinnamon: Pairs perfectly with the sugar to give those pies that warm, comforting flavor.
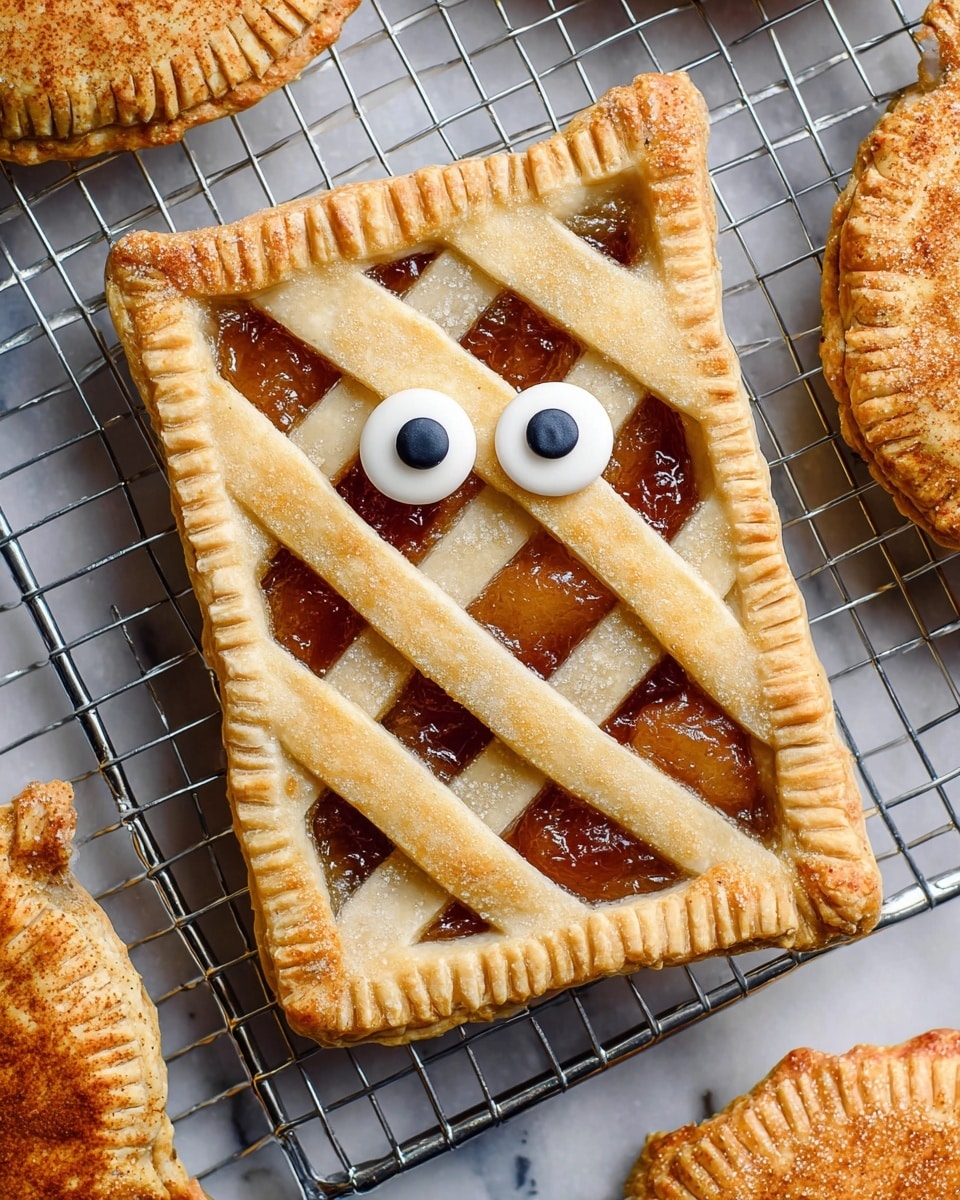
- Candy eyes: The finishing touch that turns your pies into cute mummies. These are easy to find during Halloween season.
Variations
I love how flexible this Mummy Hand Pies Recipe is—you can easily mix up the fillings or tweak the toppings to keep things exciting. Don’t hesitate to make it your own!
- Savory Version: Swap the jam for cheesy fillings or spiced pumpkin puree; I tried this once and it was a delightful surprise for those who prefer savory snacks.
- Gluten-Free Dough: Use your favorite gluten-free pie crust to accommodate dietary needs without losing that flaky texture.
- Spiced Fillings: Add a pinch of nutmeg or cloves to your jam for a cozy twist that’s perfect for cooler months.
- Decorating Fun: Besides the candy eyes, try drizzling chocolate or adding tiny edible pearls to jazz up your mummies even more!
How to Make Mummy Hand Pies Recipe
Step 1: Prep Your Dough and Oven
Start by removing the pie dough from the freezer and letting it come to room temperature—this usually takes about 20-30 minutes depending on your kitchen. Meanwhile, preheat your oven to 400°F. While you wait, whisk together one egg with a splash of water to make your egg wash; this helps get that gorgeous golden crust we all love. Set that aside, and mix your cinnamon and sugar in a small bowl to sprinkle over later. Trust me, these small prep steps make the whole process smooth and fun.
Step 2: Roll and Cut Your Dough Into Rectangles
Once your dough feels pliable, roll it out on a lightly floured surface until it’s about a quarter-inch thick. Next, trim the edges off the circle of dough by about 2-3 inches to make a neat rectangle—don’t toss those trimmed edges! You’ll cut those into strips in the next step. Then slice that rectangle into 6 equal rectangles. This part is where I like to put on some music and get into a crafty vibe, because we’re about to assemble some cute mummies!
Step 3: Fill, Seal, and Bandage Your Pies
Place a heaping tablespoon of your chosen jam in the center of each small rectangle, leaving about a half-inch border around the edges. Use a pastry brush to carefully paint the egg wash along the border—that’s going to help seal everything together. Now, take the reserved dough and cut it into thin strips to make those classic mummy bandages. Lay them across the jam-filled rectangle in a crisscross or random overlapping pattern to mimic the look of wrappings. I’ve found using a sharp knife or pizza cutter helps cut neat strips. Finally, use a fork to press the edges firmly closed so the jam won’t ooze out during baking. I like to trim any ragged bits with the knife for a nice clean look.
Step 4: Egg Wash, Cinnamon Sugar, and Bake
Brush more egg wash lightly over the dough strips, trying to keep it on the crust so it doesn’t get too soggy. Then sprinkle your cinnamon sugar mix evenly over the top for a little sparkle and extra flavor. Place your prepared pies on a baking sheet lined with parchment paper and pop them in your preheated oven. Bake for about 15-18 minutes, until the crust turns golden and inviting. Keep an eye on them—every oven’s different, but you want that perfect golden brown without burning.
Step 5: Add Candy Eyes and Serve
Let the pies cool for a few minutes once out of the oven. Then add the candy eyes right on top while the crust is still a bit warm so they stick nicely. This is such a fun step—I always catch myself smiling at my little edible mummies. Serve them warm or at room temperature, and prepare for lots of “oohs” and “ahhs.”
Pro Tips for Making Mummy Hand Pies Recipe
- Don’t Overfill: I learned the hard way that overloaded filling can burst through the crust, so stick to about a tablespoon per pie.
- Keep Dough Cool: Handling dough too warm makes it sticky and tricky; give it time to rest if it feels too soft.
- Use Parchment Paper: It makes cleanup so much easier, and prevents the pies from sticking or burning on the bottom.
- Egg Wash Evenly: Paint gently with a pastry brush to avoid sogginess, focusing on edges and strips for that golden finish.
How to Serve Mummy Hand Pies Recipe
Garnishes
I like to keep garnishes simple so the focus stays on those fun mummy faces. Sometimes I dust a little extra cinnamon sugar on top before serving for a sparkle effect. If it’s a party, a light drizzle of chocolate or caramel adds a lovely touch without overshadowing the jam inside.
Side Dishes
For a cozy snack time, I often serve these with a warm cup of cider or hot chocolate. They also pair wonderfully with vanilla ice cream or a small bowl of yogurt if you want a little creamy contrast to the sweet pies.
Creative Ways to Present
One year, I arranged these mummy hand pies on a platter lined with autumn leaves for an instant Halloween centerpiece. Another fun idea is placing each pie in a mini cupcake liner to keep them neat and easy to grab at parties. If you want to get extra festive, scatter some edible glitter or candy spiders around the plate—your guests will love the spooky vibe.
Make Ahead and Storage
Storing Leftovers
If you happen to have leftovers (which is rare in my house!), store them in an airtight container at room temperature for up to two days. They’re best eaten within this window to enjoy the crust’s crispiness. I usually reheat in the oven to bring back that fresh-baked texture.
Freezing
I’ve frozen these pies before baking by assembling them and then transferring them raw to a baking sheet lined with parchment, freezing until solid, and then storing them in freezer bags. When ready, just bake from frozen, adding a few extra minutes to the baking time. It’s a great way to prep ahead for a party or busy day.
Reheating
To reheat, pop the pies in a 350°F oven for about 5-7 minutes. Skip the microwave if you can—the oven keeps the crust crisp and flaky. If you add the candy eyes before reheating, set a low temp and watch carefully so they don’t melt!
FAQs
-
Can I use homemade pie dough for this Mummy Hand Pies Recipe?
Absolutely! Homemade pie dough works wonderfully here if you like making dough from scratch. Just be sure your dough is well-chilled and not too sticky so it’s easier to cut and handle when shaping the pies.
-
What types of jam work best for Mummy Hand Pies?
I’ve found that thicker jams or preserves like raspberry, strawberry, or apricot hold up well during baking without making the crust soggy. Avoid very runny fillings like fresh fruit compotes unless they’re reduced.
-
How do I prevent the jam from leaking out during baking?
Make sure to leave a border around the jam when filling and brush the edges with egg wash before sealing. Pressing the edges firmly with a fork helps create a tight seal that keeps the filling inside.
-
Can I make these ahead on the day of a party?
Yes! You can assemble them ahead of time, store them covered in the fridge for a few hours, then bake fresh before serving. Or freeze already assembled pies and bake from frozen to save time.
-
What can I use instead of candy eyes?
If candy eyes aren’t available, you can use small chocolate chips, white chocolate drops with a chocolate dot piped on, or even tiny marshmallows decorated with edible markers.
Final Thoughts
I hope you enjoy making these Mummy Hand Pies Recipe as much as I do. They bring a little extra magic to Halloween festivities and are just plain fun to make with kids or friends. Whenever I bake them, I feel like a kid again, excited to reveal those cute mummies peeking out of the oven. Give this recipe a try—you’ll impress your guests and earn some serious kitchen bragging rights. Happy baking!
Print
Mummy Hand Pies Recipe
- Prep Time: 30 minutes
- Cook Time: 20 minutes
- Total Time: 50 minutes
- Yield: 12 pies
- Category: Dessert, Snack
- Method: Baking
- Cuisine: American
Description
These spooky and adorable Mummy Hand Pies are a delightful Halloween treat made with flaky pie dough filled with sweet jam and decorated with cinnamon sugar and candy eyes. Perfectly golden and easy to make, they are great for parties or festive snacks for kids and adults alike.
Ingredients
Pie Dough
- 15 oz pie dough (enough for a double crust pie)
Filling
- 3/4 cup jam or fruit preserves
For Decoration
- 1 egg
- 1 tbsp water
- 1/4 cup sugar
- 2 tsp ground cinnamon
- 12 pairs candy eyes
Instructions
- Prepare the pie dough: Take the pie dough out of the freezer and allow it to rest at room temperature according to package instructions until it becomes pliable for rolling.
- Make egg wash and cinnamon sugar: Whisk together 1 egg with 1 tbsp water to make an egg wash and set aside. In a small bowl, mix 1/4 cup sugar with 2 tsp ground cinnamon and set aside.
- Preheat oven: Preheat your oven to 400 degrees Fahrenheit (200 degrees Celsius) and line a baking sheet with parchment paper.
- Roll and cut dough: Roll out the first pie crust. Cut off the edges about 2-3 inches deep to create a rectangle. Then cut this rectangle into 6 equal smaller rectangles.
- Fill and seal pies: Place a heaping tablespoon of jam in the center of one small rectangle, spreading evenly but leaving about a half-inch border. Brush egg wash along the border to help seal.
- Create mummy bandages: Using a sharp knife or pizza cutter, cut strips from the reserved dough edges. Arrange these strips diagonally across the jam-covered rectangle to resemble mummy bandages.
- Seal edges: Use a fork to crimp down the edges of the rectangle to seal the filling inside. Trim jagged or uneven edges with a knife or pizza cutter.
- Apply finishing touches: Brush more egg wash over the top of each pie, focusing on the crust areas, then sprinkle generously with the cinnamon sugar mixture.
- Bake pies: Place the assembled pies on the parchment-lined baking sheet. Bake in the preheated oven at 400°F for 15-18 minutes or until golden brown.
- Add candy eyes: After removing the pies from the oven, allow them to cool slightly and then press a pair of candy eyes onto each pie to complete the mummy look.
- Serve: Serve the mummy hand pies warm or at room temperature and enjoy your fun Halloween treat!
Notes
- These fun and spooky Mummy Hand Pies are surprisingly easy to make and ideal for Halloween celebrations.
- If you use a double crust pie dough, you should be able to make approximately 12 pies.
- You can use any flavor of jam or fruit preserves that you like for different tastes.
- For best results, use fresh pie dough and handle gently to ensure a flaky crust.
Nutrition
- Serving Size: 1 pie
- Calories: 220 kcal
- Sugar: 12 g
- Sodium: 150 mg
- Fat: 9 g
- Saturated Fat: 3 g
- Unsaturated Fat: 5 g
- Trans Fat: 0 g
- Carbohydrates: 30 g
- Fiber: 1 g
- Protein: 3 g
- Cholesterol: 35 mg


