
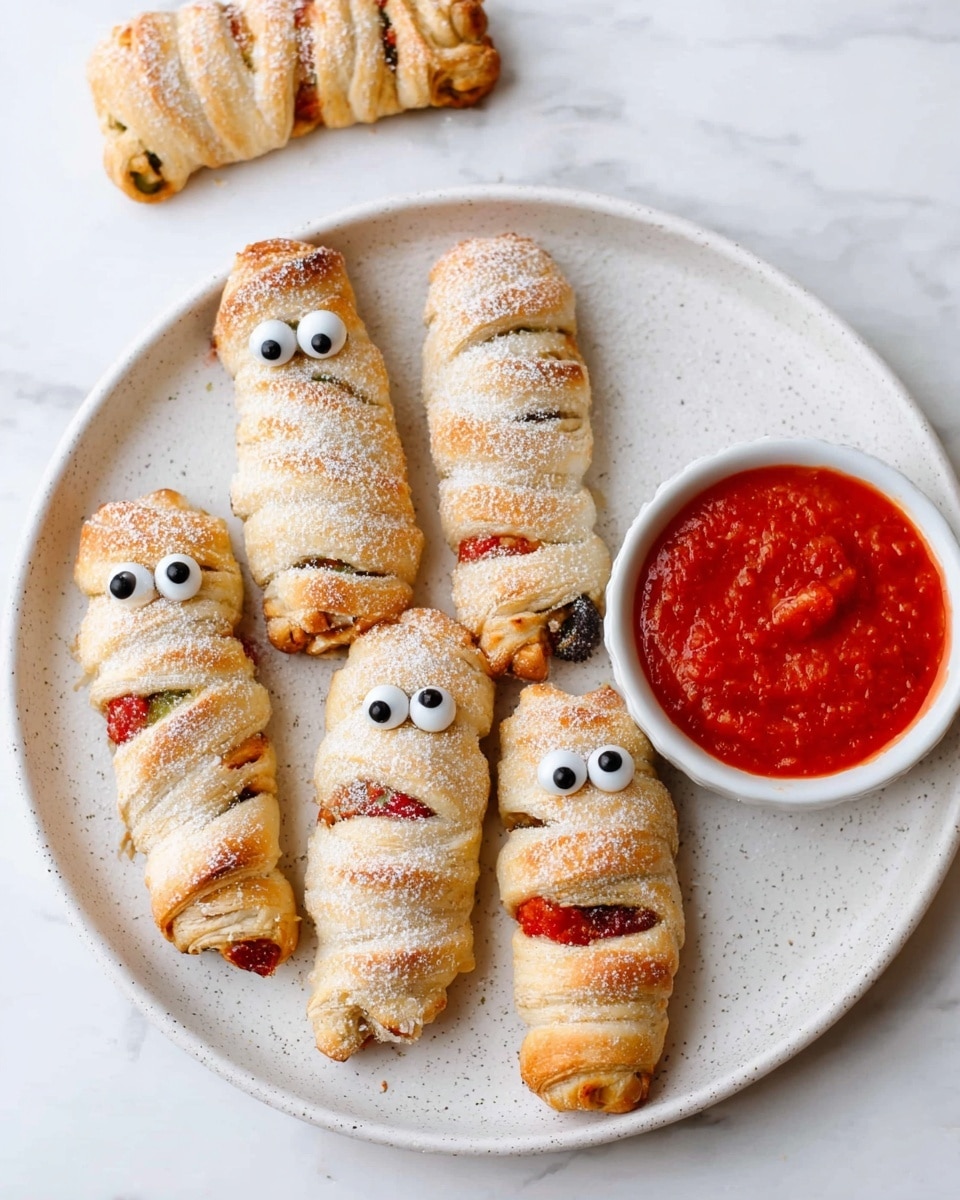
If you’re looking for a fun, spooky, and absolutely delicious twist on a classic snack, you have to try this Pizza Mummies Recipe. I first made these for a Halloween party, and let me tell you, they were a total hit! Not only do they look delightfully creepy (in the best way), but they’re also super easy to whip up, which means you’ll get all the fun without spending hours in the kitchen. Whether you’re making them for a family movie night, a kids’ party, or just because you want to bring some festive cheer to your snack table, these pizza mummies are a guaranteed crowd-pleaser.
Why You’ll Love This Recipe
- Kid-Friendly and Fun: Kids adore the creepy-cute look, and it’s a great way to get them involved in the kitchen.
- Quick and Easy Prep: You can have these spooky treats ready in about 40 minutes, perfect for last-minute party planning.
- Flexible Ingredients: Feel free to customize the toppings based on your favorites or what you have on hand.
- Perfect for Halloween: These look amazing on a festive spread and make a tasty addition to any Halloween menu.

Ingredients You’ll Need
This Pizza Mummies Recipe uses simple, accessible ingredients that work perfectly together – the dough’s softness and the savory toppings create an irresistible combo. Plus, a few spooky touches like olive spiders and edible eyes really bring the mummies to life. When shopping, try to get fresh pizza dough and quality mozzarella for the best results.
- Pizza dough: Store-bought is super convenient, and rolling it into rectangles is straightforward; just make sure it’s thawed if frozen.
- Pizza sauce: Choose your favorite brand or homemade sauce for that rich tomato base.
- Mozzarella cheese: Shredded works best for even melting and ooey-gooey texture.
- Salami: Adds a smoky, meaty flavor that pairs so well with cheese.
- Baby spinach: Gives a little freshness and color contrast.
- Red capsicum (bell pepper): Adds crunch and a pop of vibrant color.
- Olive oil spray: Helps the dough crisp up nicely while baking.
- Spooky eyes: Edible eyes to really bring the mummy effect home — fun and easy to find at party stores or online.
- Green olives: These become creepy spiders when sliced — so clever and delicious!
- Heat treated flour: For dusting – it gives the mummies that dusty, bandage-like look.
Variations
I love making this Pizza Mummies Recipe my own by swapping out toppings depending on what’s in the fridge or the occasion. Don’t be shy to personalize it — it’s all about having fun and stirring up creativity in the kitchen!
- Vegetarian variation: Skip the salami and add mushrooms, olives, or roasted veggies to keep it meat-free but still packed with flavor.
- Spice it up: I sometimes toss on a sprinkle of chili flakes or add pepperoni instead of salami for an extra kick that my family loves.
- Gluten-free: Use a gluten-free pizza base or flatbread and adjust baking times as needed — works just fine and equally delicious.
- Mini versions: Make smaller pizza mummies for bite-sized snacks, perfect for kids’ parties or finger food at gatherings.
How to Make Pizza Mummies Recipe
Step 1: Prepare Your Mummy Canvas
Start by heating your oven to 180°C (350°F) and lining a large baking tray with baking paper. Next, roll out your pizza dough on a lightly floured surface and cut it into 8 rectangles — they don’t have to be perfect, just roughly equal in size. Slice small horizontal strips along the edges of each rectangle, leaving the center intact. These strips will become the “bandages” wrapped around your mummies, so make them thin but sturdy enough to fold.
Step 2: Sauce and Fill
Spread about a teaspoon of pizza sauce in the middle of each dough rectangle, careful to avoid the strips on the edges. Now comes the fun part — pile on the shredded mozzarella, chopped salami, baby spinach, and red capsicum. These toppings add layers of flavor and keep the “mummy” balanced in taste and texture.
Step 3: Wrap Like a Mummy
Gently pull the dough strips over the filling one side at a time, crossing them over to create an “X” pattern that looks just like mummy bandages. Don’t worry about being perfect — a little messiness actually adds personality! Once wrapped, lightly spray the tops with olive oil to help them bake up golden and crisp.
Step 4: Bake and Add the Creepy Eyes
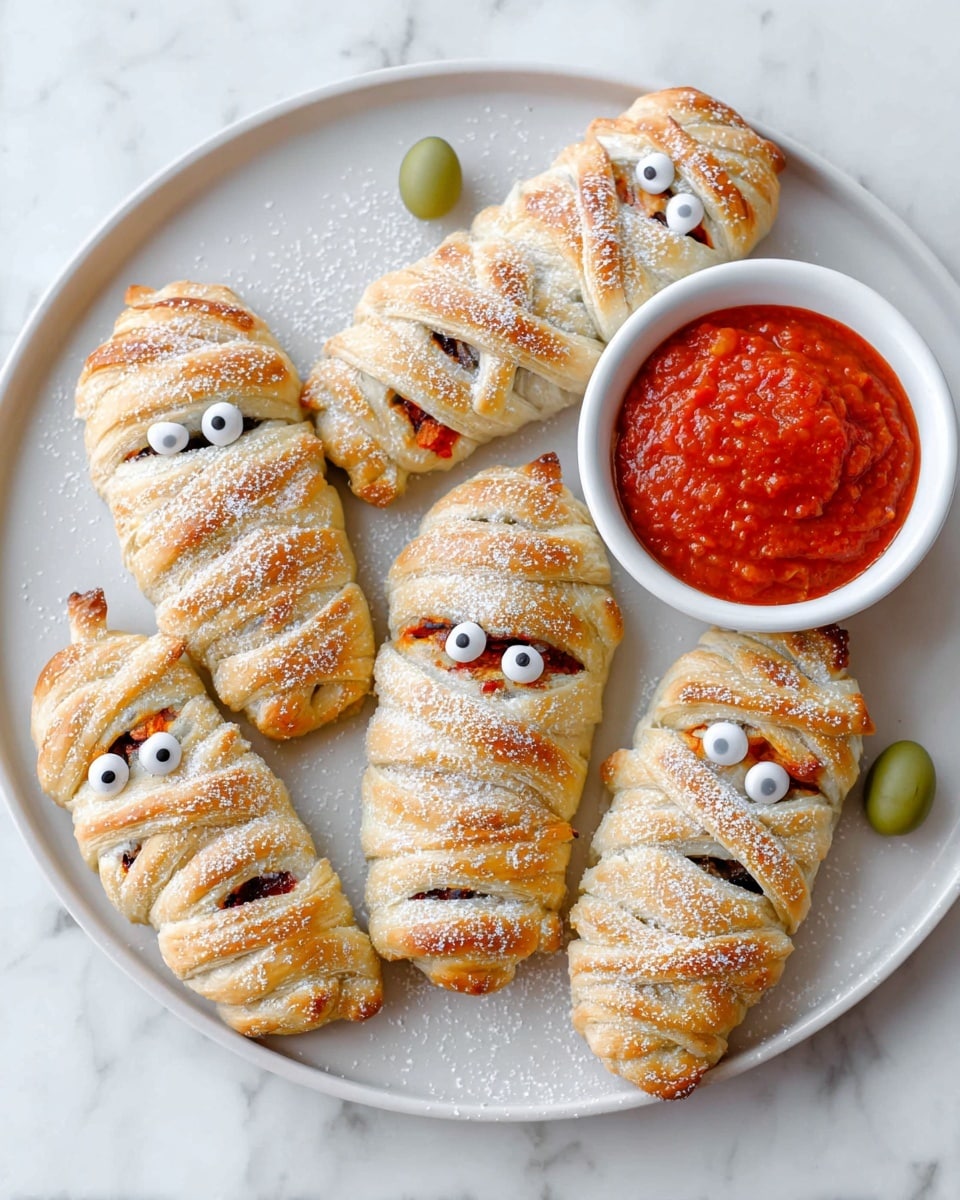
Bake your pizza mummies for about 15-20 minutes or until the dough is lightly golden and the cheese bubbly. While they’re baking, you can craft your olive spiders by halving the green olives for the body and slicing thin pieces for the legs — so simple! When the mummies come out, dust them with heat-treated flour for that dusty cloth effect and place the edible eyes right on top for the finishing spooky touch.
Step 5: Arrange and Serve
Place the pizza mummies and olive spiders on a platter, and don’t forget a bowl of extra pizza sauce on the side for dipping. Watching everyone’s faces light up when they see these spooky snacks is honestly the best part of this whole recipe for me!
Pro Tips for Making Pizza Mummies Recipe
- Don’t Overfill the Center: If you add too much filling, it can spill out during baking. A thin layer keeps your mummy neat and tasty.
- Gentle Dough Handling: I learned that gentle stretching and folding keep the dough strips intact and less likely to tear.
- Use Fresh, Quality Ingredients: Fresh mozzarella melts beautifully, and good pizza sauce makes a huge flavor difference.
- Flour Dusting Magic: The heat-treated flour dusting adds an authentic mummy texture and just the right spooky vibe.
How to Serve Pizza Mummies Recipe
Garnishes
I always stick with those googly edible eyes — they’re easy to find and make a huge visual impact. If you want to jazz things up, sprinkle some fresh herbs like chopped parsley or basil right before serving to add a pop of green and freshness that balances the rich flavors.
Side Dishes
Pair these with a crisp green salad or some roasted veggies to round out the meal without overshadowing the pizza mummies. For kids, carrot sticks and ranch dip alongside the pizza sauce are a fun and colorful combo.
Creative Ways to Present
For Halloween parties, I like to serve these on a dark tray dusted with extra flour for a dusty tomb effect, scattered with a few plastic spiders for added drama. You can also place them on a bed of torn lettuce or kale to resemble cobwebs — it’s so fun watching guests’ reactions!
Make Ahead and Storage
Storing Leftovers
I usually store leftover pizza mummies in an airtight container in the fridge for up to 2 days. They hold their shape well and keep the flavors intact. Just make sure to cool them completely before storing to avoid sogginess.
Freezing
If you want to prep your Pizza Mummies Recipe ahead of time, you can freeze them unbaked on a tray first, then transfer to a freezer bag once firm. Bake them straight from frozen — add a few extra minutes to the baking time and you’re good to go!
Reheating
Reheat leftovers in a 180°C (350°F) oven for about 8-10 minutes to bring back that crispy crust and melty cheese. I avoid microwaving because it makes the dough tough and the mummies lose their charm.
FAQs
-
Can I make pizza mummies ahead of time?
Yes! You can assemble the pizza mummies in advance and either refrigerate them for a few hours before baking or freeze them unbaked. Just make sure to cover them tightly to prevent them from drying out.
-
What if I don’t have edible eyes?
No worries! You can use small dots of cream cheese with a tiny drop of olive or a raisin for eyes. Get creative and have fun with whatever you have at home.
-
Can I substitute the salami with other meats?
Absolutely. Pepperoni, cooked sausage, or even deli ham work wonderfully. Feel free to use whichever cured meats you prefer.
-
How do I make the olive spiders?
Cut one green olive in half for the body, then slice another olive thinly to create long, thin pieces that act as legs. Arrange them around your pizza mummies for a fun Halloween vibe.
Final Thoughts
This Pizza Mummies Recipe has become my go-to festive treat not just because it looks incredible but because it actually tastes fantastic and is so simple to make. Whenever I serve these at my Halloween gatherings, they disappear fast — everybody loves the spooky presentation and rich flavor. If you want a recipe that’s playful, quick, and guaranteed to please both kids and adults, give this one a try. I promise you’ll be making it again year after year!
Print
Pizza Mummies Recipe
- Prep Time: 20 minutes
- Cook Time: 20 minutes
- Total Time: 40 minutes
- Yield: 8 servings
- Category: Snack
- Method: Baking
- Cuisine: Italian-American
Description
These Halloween-themed Pizza Mummies are fun, spooky snacks perfect for parties or a festive treat. Using store-bought pizza dough, they’re filled with classic pizza toppings and cleverly arranged to resemble mummies with olive spiders, making them an irresistible option for kids and adults alike.
Ingredients
Pizza Mummies
- 500g store-bought pizza dough
- 8 heaped teaspoons pizza sauce
- 1/2 cup shredded mozzarella cheese
- 1/2 cup salami, chopped
- 1/4 cup baby spinach, chopped
- 1/2 cup diced red capsicum (bell pepper)
- Olive oil spray
- Heat treated flour, to dust*
Spooky Eyes & Spiders
- 16 spooky edible eyes
- 8-10 green olives
Instructions
- Preheat Oven: Preheat the oven to 180°C (350°F) and line a large baking sheet with baking paper to prevent sticking and for easy cleanup.
- Prepare Dough Rectangles: Cut and roll the pizza dough into 8 rectangular pieces. Slice horizontal strips on both sides of each rectangle to create the ‘bandage’ effect.
- Assemble Fillings: Spread a heaped teaspoon of pizza sauce in the center of each rectangle. Top with shredded mozzarella, chopped salami, baby spinach, and diced red capsicum, keeping the sliced strips plain for wrapping.
- Form Mummy Shape: Gently pull the dough strips over the filling from each side, pressing lightly to create an overlapping X pattern resembling mummy bandages.
- Add Olive Oil and Bake: Spray the top of each mummy with olive oil for a golden finish. Bake for 15-20 minutes or until the dough is lightly golden and cooked through.
- Create Olive Spiders: While mummies bake, cut green olives in half to form spider bodies. Slice remaining olives thinly across to make legs and assemble around the mummies for a spooky touch.
- Final Touches and Serve: Once baked, place pizza mummies on a serving plate, dust lightly with heat treated flour to enhance the mummy look, and top with edible spooky eyes. Serve with extra pizza sauce for dipping.
Notes
- Add these pizza mummies to your spooky Halloween menu—they’re quick to make and perfect as a fun snack for kids.
- Use heat treated flour to dust the mummies for an authentic dusty bandage appearance.
- Customize toppings to suit your preferences or dietary needs.
- Serve with extra pizza sauce to enhance flavor and dipping fun.
- Store leftovers in an airtight container and reheat in the oven for best texture.
Nutrition
- Serving Size: 1 mummy
- Calories: 280 kcal
- Sugar: 3 g
- Sodium: 550 mg
- Fat: 12 g
- Saturated Fat: 5 g
- Unsaturated Fat: 6 g
- Trans Fat: 0 g
- Carbohydrates: 32 g
- Fiber: 2 g
- Protein: 12 g
- Cholesterol: 25 mg


